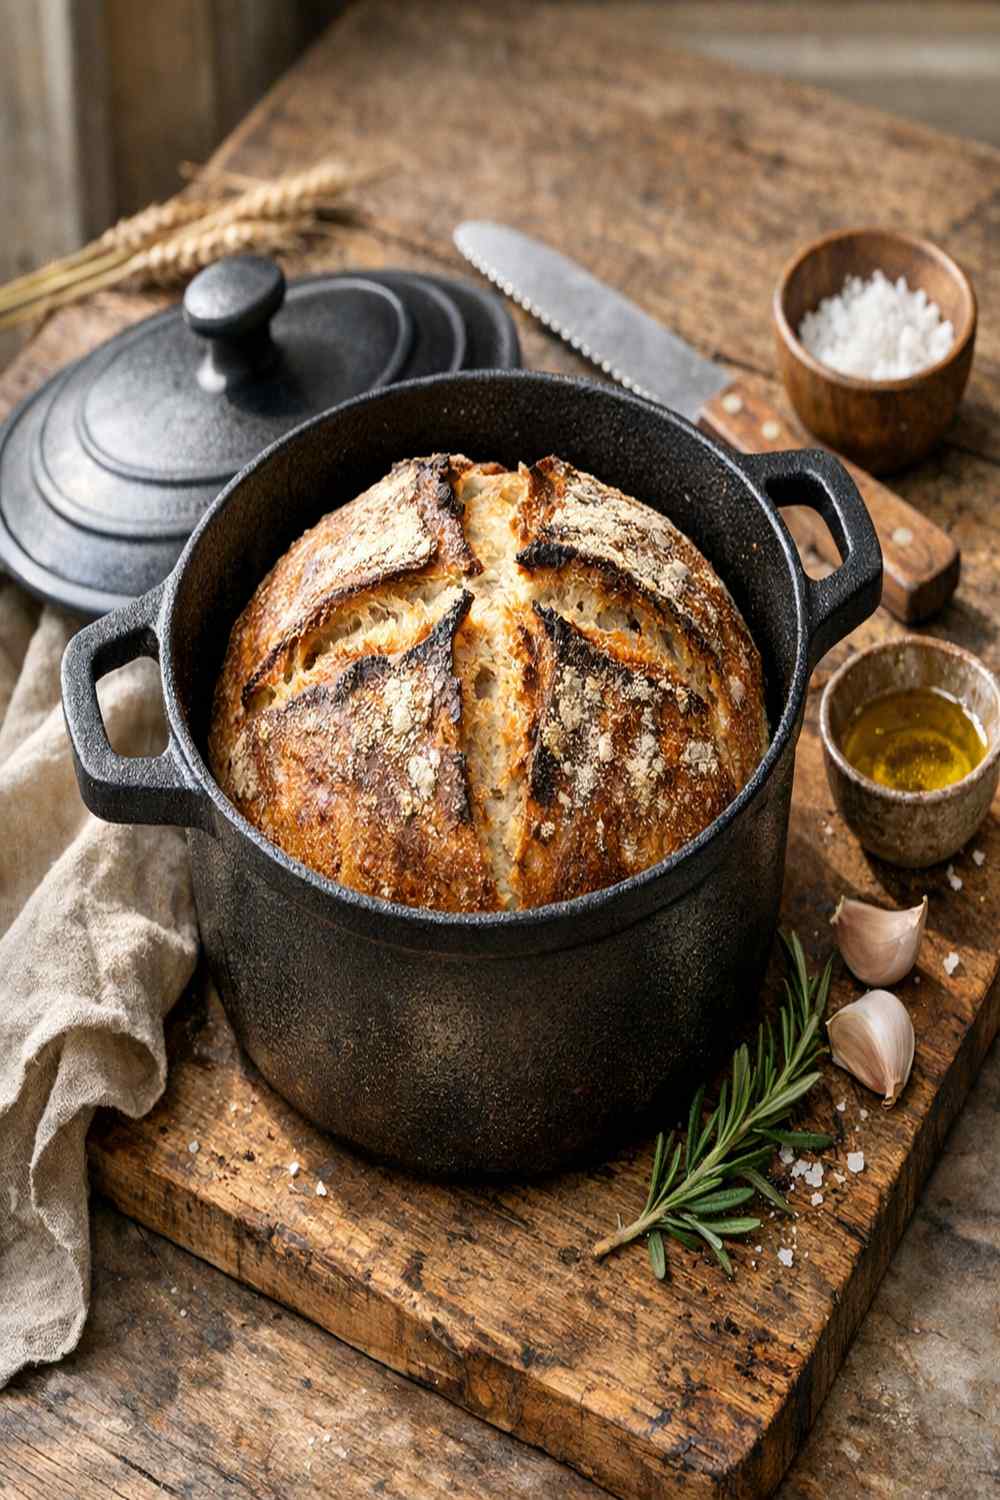
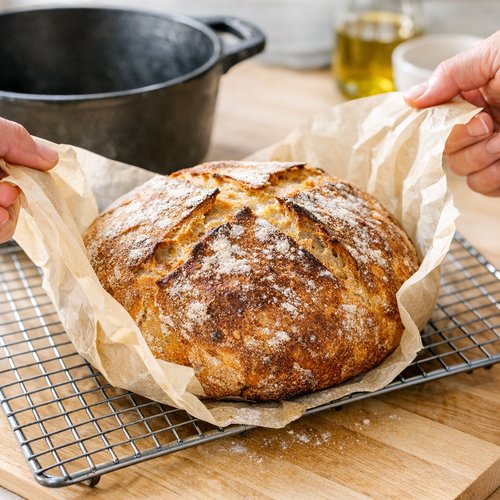
There’s something magical about pulling a golden, crusty loaf from a hot Dutch oven. This bread pairs beautifully with soups, stews, and hearty meals—think alongside a warm bean and quinoa recipe for a complete, satisfying dinner. Or slice it thick and use it for open-faced sandwiches with your favorite toppings. I’ve made this recipe dozens of times, and I’m excited to share it with you today.
How a Dutch Oven Changed My Bread-Baking Life
I still remember standing in my kitchen three years ago, staring at a bread-baking book I’d borrowed from a friend. I’d tried making artisan bread before using regular baking sheets, and every single attempt turned out dense, pale, and disappointing. I was convinced I wasn’t a bread person.
Then my sister gifted me a cast iron Dutch oven for my birthday, and everything shifted. The first time I used it, I couldn’t believe the transformation. The trapped steam created a crust so crispy it practically shattered when I cut into it, while the inside stayed beautifully chewy and open. I was hooked.
What I love most about this method is how forgiving it is. The Dutch oven does the heavy lifting. You’re not fighting with steam pans or worrying about your oven’s humidity levels. It just works, consistently, every single time.
What is Dutch Oven Artisan Bread?
Dutch oven bread is a simple, rustic loaf that relies on a few basic ingredients and one key piece of equipment: a covered cast iron pot. The magic happens because of steam. When you bake bread in a preheated Dutch oven with the lid on, moisture gets trapped inside, creating an incredibly crispy, restaurant-quality crust.
This particular style comes from the no-knead bread movement, which gained popularity over the past fifteen years. The beauty of this technique is that you’re working with time instead of against it. Long fermentation develops flavor and structure naturally, without all the kneading that intimidates so many home bakers.
The result? A bread that tastes like it came from an artisan bakery, but required maybe ten minutes of active hands-on time from you.
Why You’ll Love This Dutch Oven Bread Recipe
- Minimal hands-on time – Just mix, wait, and bake. No kneading required, which means less cleanup and less chance of overworking the dough.
- Five basic ingredients – Water, yeast, salt, flour, and nothing else. This simplicity means better flavor and fewer unknowns.
- Foolproof technique – The Dutch oven handles the steam work for you. Even if your timing isn’t perfect, you’ll still get excellent results.
- Make-ahead friendly – You can refrigerate the dough for days, which means you can bake fresh bread whenever you want without planning ahead.
- Incredibly versatile – Serve it with soups, use it for sandwiches, dip it in olive oil, or just eat it plain with butter. This bread is a blank canvas.
- Teaches real baking skills – Once you master this, you understand fermentation, hydration, and how heat works in baking. These skills transfer to other breads too.
The Ingredients
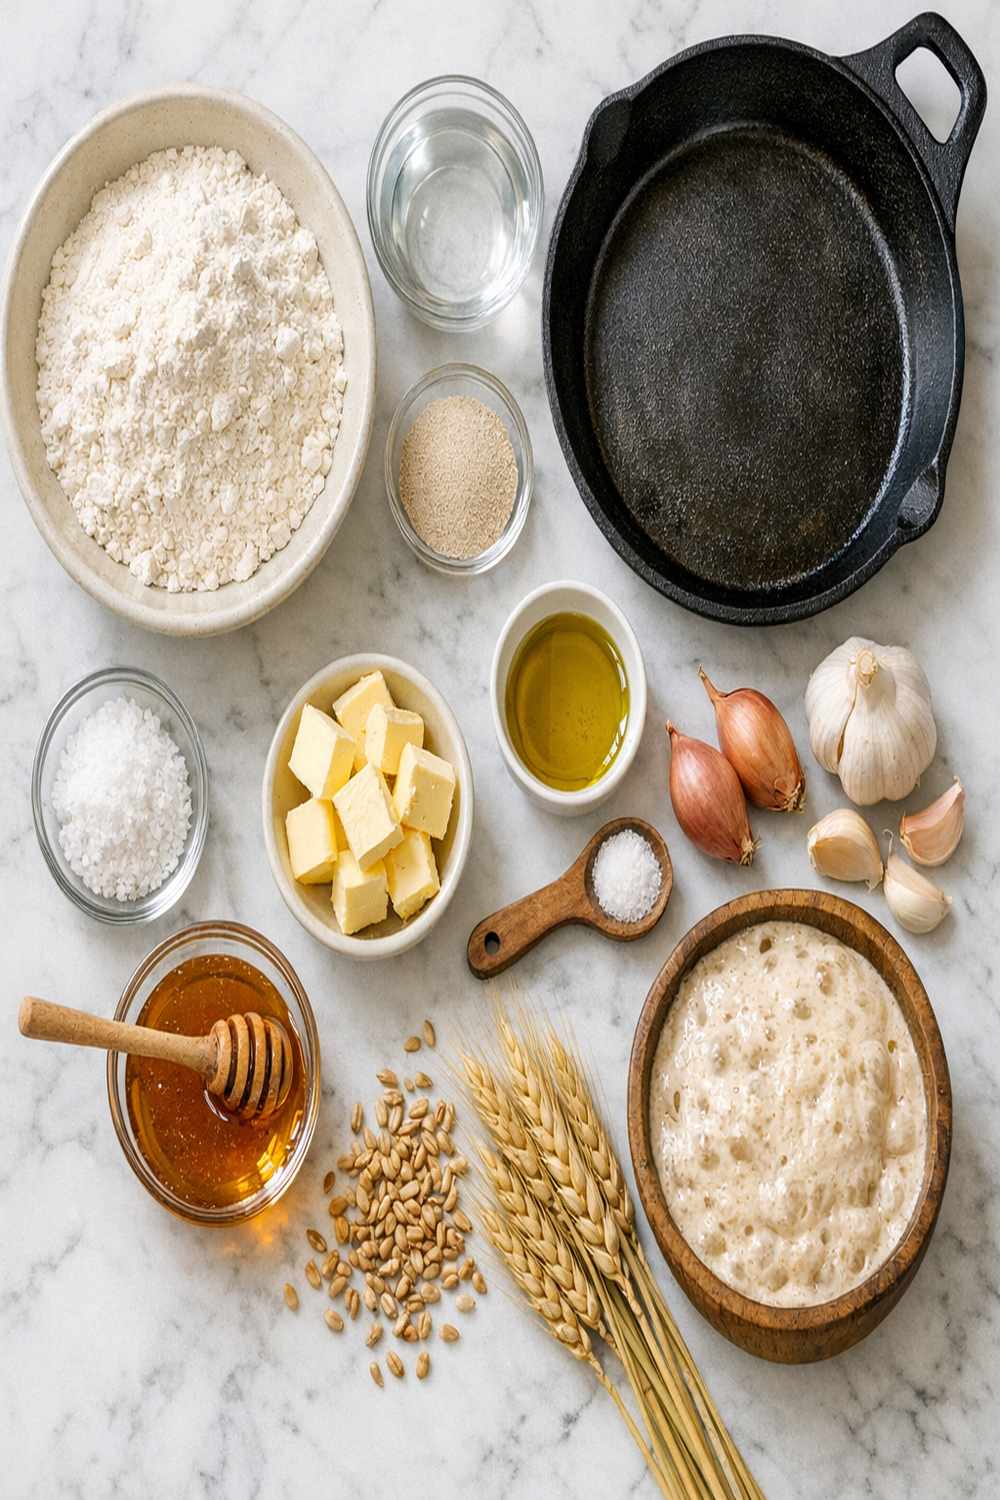
Here’s what you’ll need to make this beautiful loaf. These ingredients work together to create a dough with excellent structure and flavor. The long fermentation time means we’re using a small amount of yeast—it does its job slowly, which actually develops more complex flavors as the dough sits.
- Extra flour for dusting (you’ll need this for shaping and on the parchment paper)
- 1 packet active dry yeast, instant yeast, or quick rise yeast (or 2.25 teaspoons if measuring loose)
- 1½ cups lukewarm water (approximately 100 degrees Fahrenheit, which feels comfortably warm to your inner wrist)
- 1½ teaspoons fine grain salt (not kosher salt, which measures differently)
- Cornmeal or additional flour for the Dutch oven (optional but helpful for preventing sticking)
- 3¼ cups all-purpose flour (spooned and leveled into measuring cups, never packed)
Makes one large round or oval loaf, approximately 12 servings
How to Make Dutch Oven Artisan Bread?
I’m going to walk you through this step by step. Don’t skip reading ahead—knowing what’s coming helps you understand why each step matters. The whole process takes about 2-3 hours of rising time, plus baking, but your active work time is genuinely just minutes.
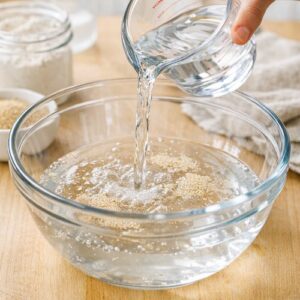
Step 1: Combine Your Wet Ingredients and Yeast
Pour your 1½ cups of warm water into a large mixing bowl or container. Make sure the water is warm to the touch but not hot—if it’s too hot, it kills the yeast. If it’s too cool, the yeast won’t activate properly.
Add your 1 packet (or 2.25 teaspoons) of yeast to the water. Then add your 1½ teaspoons of fine grain salt. Using a whisk, stir everything together for about 30 seconds until the yeast and salt are mostly dissolved or at least broken up.
You might see tiny yeast granules, and that’s fine. The important thing is that you’ve mixed everything together well. This only takes about one minute of your time.

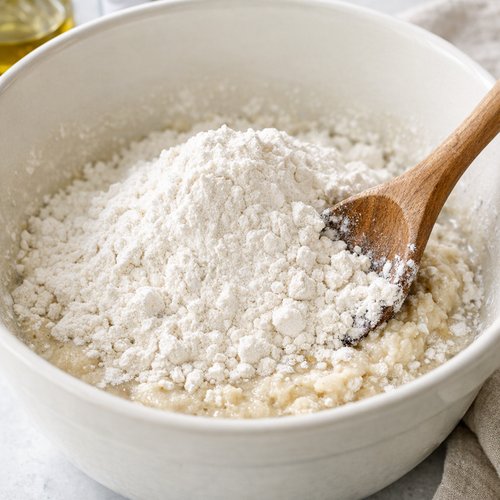
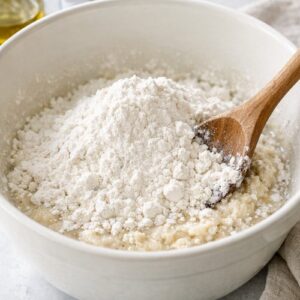
Step 2: Add Your Flour
Add all 3¼ cups of flour directly to your bowl at once. Don’t be shy here—just dump it in. Now use a wooden spoon or sturdy spatula to stir everything together until a shaggy, sticky dough forms.
This won’t look like traditional dough. It will be messy, lumpy, and honestly kind of wet. That’s exactly what you want. Your goal is just to make sure all the dry flour is moistened and incorporated—don’t overmix. A silicone spatula is perfect for scraping down the sides and folding everything together.
If your mixture seems impossibly wet (like batter rather than dough), add 1-2 tablespoons more flour and stir again. If it seems too dry and crumbly, add 1-2 tablespoons of water. You’re aiming for a consistency that’s somewhere between a thick batter and a shaggy dough.
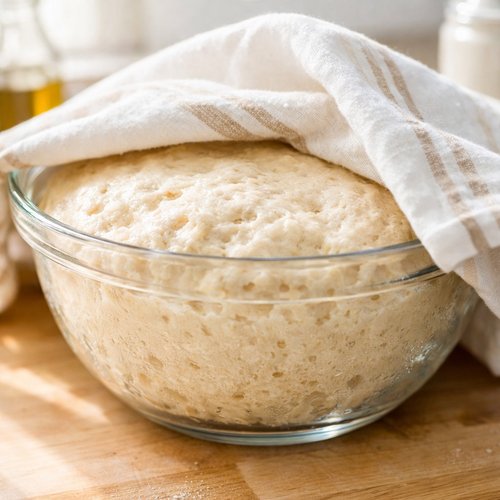
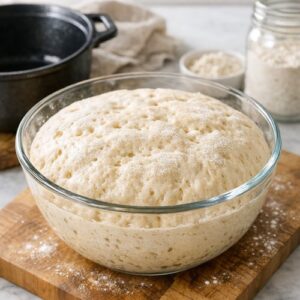
Step 3: Let Your Dough Rise in a Warm Space
Cover your bowl with a kitchen towel or place the lid slightly ajar if you’re using a container with one. Now you wait. This is where the magic happens. Place your bowl in a warm location for 2 to 3 hours until the dough has roughly doubled in volume.
If your kitchen is naturally warm (above 72 degrees), just leave it on the counter. If it’s chilly outside, I have a trick I use constantly: preheat your oven for just a few minutes at 200 degrees, then turn it completely off. Place your covered bowl inside, and the residual heat creates the perfect warm environment for rising.
You can also place the bowl near a sunny window or on top of your refrigerator if it’s warm there. The goal is a space around 75-80 degrees, but honestly, the bread isn’t that picky. It’ll rise even in cooler temperatures—it just takes a bit longer.
Step 4: Decide Your Baking Timeline
Once your dough has doubled—and you’ll be able to see it clearly—you have a decision to make. You can bake it immediately, or you can refrigerate it for later. This is where the recipe becomes truly convenient.
If you’re baking today, move straight to Step 5. If you want to bake tomorrow or later this week, transfer your bowl to the refrigerator. The cold slows fermentation dramatically, and your dough can live in the fridge for up to 5 days. Cold dough actually develops more flavor, so this isn’t a shortcut—it’s actually preferable for taste.
When you’re ready to bake, remove the dough from the fridge about 30 minutes before you want to start the preheating process.

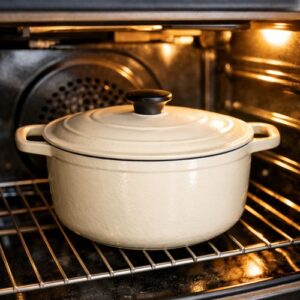
Step 5: Preheat Your Dutch Oven Thoroughly
This step is crucial and worth doing right. Set your oven to 450 degrees Fahrenheit. Place your Dutch oven inside with the lid on. Let it preheat for 30 minutes to 1 hour.
Once your oven reaches 450 degrees, keep it going for another 20 minutes with the Dutch oven still inside. You want that cast iron absolutely screaming hot. This is non-negotiable—a cold Dutch oven won’t create the steam and crust you’re after.
I know this seems like overkill, but when you open that oven door and hear the sizzle of your dough hitting hot metal, you’ll understand why.

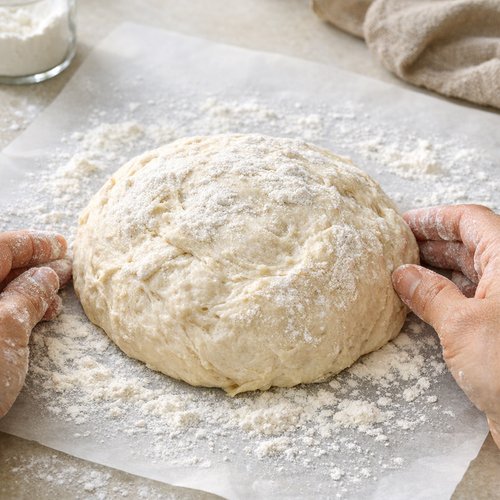
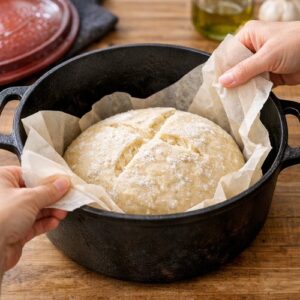
Step 6: Shape Your Dough on Parchment Paper
While your Dutch oven preheats, prepare your dough for baking. Dust a piece of parchment paper generously with flour. Scrape your dough out of the bowl onto the floured parchment. Don’t worry about it being perfectly shaped or smooth.
Using a silicone spatula or even your hands, gently fold the edges up on top of itself to create a rustic round or oval shape. The shape doesn’t have to be perfect—honestly, the more rustic it looks, the more it looks like artisan bakery bread.
Now here’s a helpful trick: grab the edges of the parchment paper and flip the entire dough over so the floured side is now on top and the smoother underside faces down. This gives you a nicer presentation when baked.
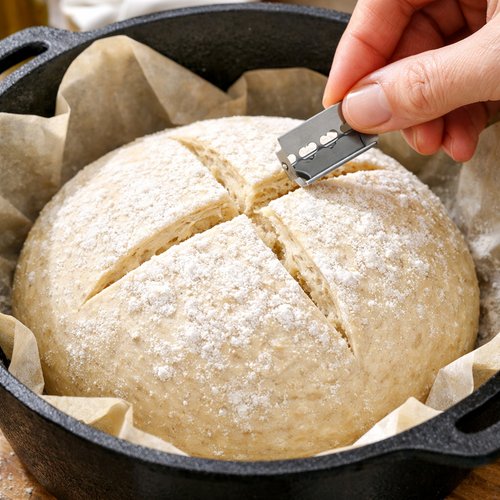
Step 7: Score Your Loaf (Optional But Recommended)
Using a very sharp knife or a clean razor blade, make a few shallow cuts across the top of your loaf about ½ inch deep. Some people make a cross pattern, others make slashes down the center, and some do a grid. The pattern is purely decorative—what matters is that these cuts allow steam to escape in a controlled way, which helps the bread rise evenly.
This step is optional. If you skip it, your bread will still be delicious. But those pretty scores look so professional, and they actually help your bread bake more evenly.
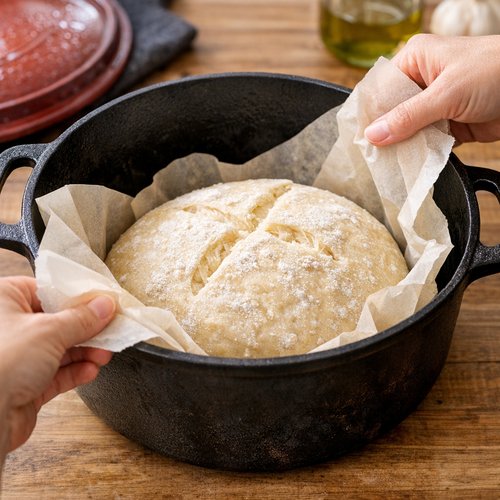
Step 8: Transfer to Your Preheated Dutch Oven
Carefully remove your Dutch oven from the oven and take off the lid—careful, it’s hot. Grab the parchment paper by its edges and gently place your dough directly into the Dutch oven. The parchment paper comes with it, which is fine. It won’t burn at 450 degrees.
Work quickly but calmly. You want to minimize heat loss, but you also don’t want to splash yourself with steam. Place the lid back on the Dutch oven and return it to the oven immediately.
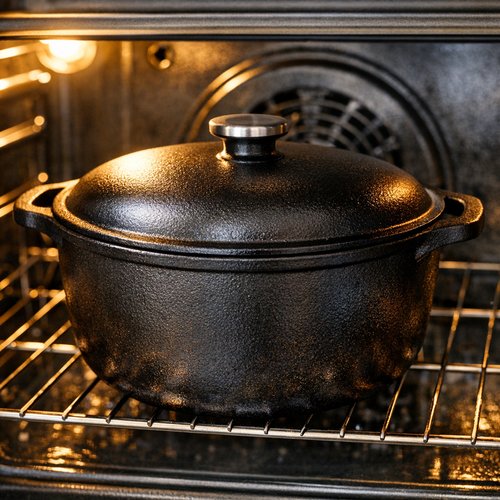
Step 9: Bake with the Lid On
Place your covered Dutch oven on the center rack of your preheated oven. Bake for 35 minutes at 450 degrees Fahrenheit (or 40 minutes if your dough came straight from the refrigerator).
Don’t open the oven door during this time. This is when the steam is doing its important work, creating that stunning crust. Just trust the process and wait.
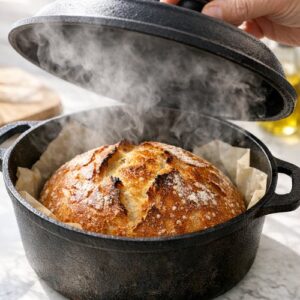
Step 10: Finish Baking Uncovered Until Golden
After the lid-on time is finished, carefully remove the Dutch oven and take off the lid. Be aware that steam will escape—it’s hot and forceful. Step back slightly to avoid a steam burn.
Return the uncovered Dutch oven to the oven and bake for another 5 to 10 minutes, watching for a deep golden brown color to develop on top. If your bread isn’t brown enough after 10 minutes, give it another 5. Baking times vary based on your oven, so trust your eyes.
You’re looking for a crust that’s deeply browned, almost caramel-colored. The darker it is (without burning), the crispier it will be.

Step 11: Cool Before Slicing
Using the parchment paper handles, lift the bread out of the Dutch oven and place it on a wire cooling rack or cutting board. Now comes the hardest part: waiting.
Let your bread cool for at least 10 minutes before slicing, though ideally 30 minutes to 1 hour. I know it smells incredible and you want to dig in, but this cooling time is important. The crumb (the inside) is still setting, and if you slice too early, the structure will be gummy.
When you do slice into it, use a serrated bread knife with a gentle sawing motion. You should hear that satisfying crunch of the crust and see an open, airy crumb structure inside.
Expert’s Nutritional Tip: The Magic of Fermentation
Here’s something I always tell my nutrition clients: the long fermentation time in this bread isn’t just for flavor. It’s genuinely beneficial for digestibility. As the dough ferments over 2-3 hours, the yeast and natural bacteria break down phytic acid, which is an antinutrient that can inhibit mineral absorption.
This means your body can actually absorb more magnesium, zinc, and iron from this bread compared to quick-rise breads. Additionally, the fermentation creates B vitamins that weren’t present in the original flour. It’s one of those instances where taking your time actually creates a more nutritious final product.
Tips and Tricks
- Invest in a good Dutch oven – You don’t need an expensive brand. A $40-60 enameled cast iron Dutch oven works beautifully. The key is that it has a lid that fits snugly and can handle high heat. Lodge and Tramontina are great affordable options.
- Water temperature matters – Use a thermometer if you have one. Aim for 95-105 degrees Fahrenheit. Too hot kills yeast, too cold and it won’t activate. Your inner wrist should feel it as comfortably warm, not hot.
- Use fine grain salt, not kosher – The granule size affects how much salt you’re actually using. Fine grain salt measures denser, so if you use kosher salt with the same measurement, you’ll get less salt. This matters for flavor and dough development.
- Don’t skip the parchment paper – It makes transferring the dough to the hot Dutch oven infinitely easier and safer. Yes, you can use it in the oven at 450 degrees—it won’t burn.
- Score your loaf, but don’t overthink it – A few quick slashes with a sharp knife are all you need. This helps the bread expand evenly and looks beautiful. If you don’t have a bread lame (scoring tool), a clean razor blade or the sharpest knife you own works perfectly.
- Listen for the sizzle – When you transfer your cold dough to the hot Dutch oven, you should hear an immediate sizzle. That sound means you’ve got the right temperature. If there’s no sizzle, your Dutch oven wasn’t hot enough.
- Trust your eyes for doneness – The crust should be deep golden brown, almost caramel-colored. If it’s pale, give it more time. If it’s dark, it’s still probably fine—just don’t let it go completely black.
Common Mistakes to Avoid
- Not preheating the Dutch oven long enough – This is the biggest mistake I see. People preheat for 10-15 minutes and wonder why their crust isn’t crispy. You need that full 30-60 minutes plus the extra 20 minutes after the oven reaches temperature. The cast iron needs to be genuinely hot throughout.
- Opening the oven door during the lid-on baking time – I get it, you’re curious. But opening that door releases all the steam, which is the whole point of using the Dutch oven. Resist the urge. Set a timer and trust the process.
- Slicing the bread while it’s still hot – This is hard because it smells amazing, but hot bread is still setting inside. Cutting into it creates gummy, dense crumb. Wait at least 10 minutes, preferably longer.
- Using water that’s too hot – If your water is hotter than 110 degrees, you risk killing the yeast before it can do its job. This is especially true for instant yeast and quick-rise yeast, which are more sensitive to temperature than active dry yeast.
Make-Ahead Guide: Plan Your Baking Week
This is where the recipe shines for meal planning. Here’s how I work it into my busy week:
Option 1: Bake Same Day – Mix your dough in the morning, let it rise 2-3 hours, bake in the afternoon. You’ll have fresh bread for dinner.
Option 2: Refrigerate for Later – Mix your dough anytime during the day. Let it rise for 2-3 hours until doubled, then refrigerate. Your dough will keep for up to 5 days in the fridge. When you want fresh bread, remove it 30 minutes before baking to let it come closer to room temperature, then proceed with the preheating and baking steps. Cold dough will take about 40 minutes instead of 35 minutes in the covered Dutch oven.
Option 3: Batch Baking – Make a double or triple batch of dough. This uses the same active time but yields multiple loaves. Divide it into portions before refrigerating, then bake them throughout the week as needed. I often make my dough on Sunday evening and bake fresh bread Wednesday and Friday.
Storage tip: Once baked and cooled, wrap your bread in a clean kitchen towel or place it in a paper bag. Keep it at room temperature for up to 3 days. After that, it gets stale. You can freeze cooled bread wrapped tightly in plastic wrap for up to 3 months. Thaw at room temperature or refresh in a 350-degree oven for 10-15 minutes.
Seasonal Variations
While this basic recipe is perfect year-round, here’s how I adapt it by season:
Summer: Rising happens faster when it’s warm. In hot months, your dough might double in just 1.5-2 hours instead of 2-3. Watch it closely. I often refrigerate summer dough to slow fermentation and prevent overproofing. The cooler dough also makes it easier to handle.
Fall and Spring: This is the sweet spot. Room temperature is usually perfect for rising. Your dough will probably take the full 2-3 hours, and everything works exactly as intended.
Winter: Cold kitchens mean slower rising. This is where that trick of preheating your oven and turning it off comes in handy. Alternatively, place your dough in a cooler space (like a basement) and let it rise overnight. Long, slow fermentation in cold temperatures actually develops incredible flavor.
Can I Store Dutch Oven Artisan Bread?
Yes, and I’ll break it down by storage method:
Room temperature storage: Keep your cooled bread in a paper bag or wrapped loosely in a kitchen towel at room temperature for up to 3 days. Paper allows the crust to stay crispy. Plastic wrap will soften the crust, which is fine if you prefer a softer texture.
Freezing: Wrap your completely cooled bread tightly in plastic wrap, then place it in a freezer bag, removing as much air as possible. Freeze for up to 3 months. Thaw at room temperature for several hours or overnight. If you want to crisp the crust back up, pop the thawed bread into a 350-degree oven for 10-15 minutes.
Refrigerating the dough: Keep mixed dough in a covered bowl in the refrigerator for up to 5 days. Cold fermentation actually improves flavor, so this isn’t a last resort—it’s actually preferable. Just remember to add about 5 extra minutes to your covered baking time since the dough is cold.
Day-old bread refresh: If your bread has been sitting for a couple of days and tastes slightly stale, wrap it in aluminum foil and place it in a 350-degree oven for 10-15 minutes. Steam from the foil will revive it, making it taste nearly fresh-baked.
Nutrition Information
Based on USDA data for this recipe (one loaf, approximately 12 slices):
Per slice: approximately 140 calories, 28g carbohydrates, 5g protein, 0.5g fat, 1g fiber. This bread is naturally low in fat and provides sustained energy from complex carbohydrates. The fermentation process makes the carbohydrates more digestible and allows better mineral absorption. It’s also an excellent source of B vitamins, particularly thiamine and niacin.
One important note: this bread is not low in sodium due to the salt content needed for flavor and structure development. Each slice contains approximately 290mg of sodium, which is moderate for bread but something to be aware of if you’re tracking sodium intake.
What Can I Serve With Dutch Oven Artisan Bread?
This bread is genuinely one of the most versatile things you can make. Here are my favorite ways to use it:
- With soups and stews – Serve thick slices alongside a warm bowl of soup. The bread is perfect for soaking up broth.
- With olive oil and herbs – Simply tear off pieces and dip them in good quality olive oil mixed with fresh herbs. This is how they serve it in Italian restaurants.
- For open-faced sandwiches – Toast thicker slices and top with your favorite ingredients. The crispy crust and chewy crumb handle any topping beautifully.
- With cheese and charcuterie – Slice it and serve with cheese fondue recipe ingredients or a simple charcuterie board for entertaining.
- As a side to seafood – Pair it with roasted fish like bass recipe preparations. The bread’s neutral flavor complements delicate fish beautifully.
- Alongside hearty mains – Serve it with BBQ chicken baked in oven recipe or other grilled meats. The crust provides nice textural contrast.
- For breakfast toasted – Toast slices and top with butter, jam, or avocado. It’s equally at home at breakfast as dinner.
- With bean dishes – This bread is perfect alongside bean rice cheese burrito recipe preparations. The bread can replace the tortilla or serve alongside.
Substitutes
- Bread flour instead of all-purpose flour – Bread flour has higher protein content, which creates a chewier crumb and more open structure. Use the exact same amount. Your bread will have slightly better oven spring and a more pronounced chewy texture.
- Whole wheat flour (partial substitute) – Replace up to 25% of the all-purpose flour with whole wheat flour for nuttier flavor and added fiber. Going beyond 25% makes the dough heavier and requires adjusting hydration slightly. You might need an extra tablespoon or two of water.
- Instant yeast or quick-rise yeast – These are already included in the recipe as alternatives to active dry yeast. They work identically in this recipe. Quick-rise yeast might reduce rising time by 15-30 minutes, but watching your dough double is more reliable than watching time anyway.
- A regular covered baking vessel instead of a Dutch oven – A ceramic baker or pyrex baking dish with a lid works, but it won’t retain heat quite as well. Results will be close but not identical. Make sure whatever you use can handle 450-degree heat safely.
- Half whole wheat, half all-purpose – For a heartier loaf, use 1.625 cups whole wheat flour and 1.625 cups all-purpose flour. This creates a denser, more substantial bread with deeper flavor. It’s delicious but definitely different in texture.
Bread Recipe Cast Iron
Ingredients
Method
- Pour your 1½ cups of warm water into a large mixing bowl or container. Make sure the water is warm to the touch but not hot—if it's too hot, it kills the yeast. If it's too cool, the yeast won't activate properly. Add your 1 packet (or 2.25 teaspoons) of yeast to the water. Then add your 1½ teaspoons of fine grain salt. Using a whisk, stir everything together for about 30 seconds until the yeast and salt are mostly dissolved or at least broken up. You might see tiny yeast granules, and that's fine. The important thing is that you've mixed everything together well. This only takes about one minute of your time.
- Add all 3¼ cups of flour directly to your bowl at once. Don't be shy here—just dump it in. Now use a wooden spoon or sturdy spatula to stir everything together until a shaggy, sticky dough forms. This won't look like traditional dough. It will be messy, lumpy, and honestly kind of wet. That's exactly what you want. Your goal is just to make sure all the dry flour is moistened and incorporated—don't overmix. A silicone spatula is perfect for scraping down the sides and folding everything together. If your mixture seems impossibly wet (like batter rather than dough), add 1-2 tablespoons more flour and stir again. If it seems too dry and crumbly, add 1-2 tablespoons of water. You're aiming for a consistency that's somewhere between a thick batter and a shaggy dough.
- Cover your bowl with a kitchen towel or place the lid slightly ajar if you're using a container with one. Now you wait. This is where the magic happens. Place your bowl in a warm location for 2 to 3 hours until the dough has roughly doubled in volume. If your kitchen is naturally warm (above 72 degrees), just leave it on the counter. If it's chilly outside, I have a trick I use constantly: preheat your oven for just a few minutes at 200 degrees, then turn it completely off. Place your covered bowl inside, and the residual heat creates the perfect warm environment for rising. You can also place the bowl near a sunny window or on top of your refrigerator if it's warm there. The goal is a space around 75-80 degrees, but honestly, the bread isn't that picky. It'll rise even in cooler temperatures—it just takes a bit longer.

- Once your dough has doubled—and you'll be able to see it clearly—you have a decision to make. You can bake it immediately, or you can refrigerate it for later. This is where the recipe becomes truly convenient. If you're baking today, move straight to Step 5. If you want to bake tomorrow or later this week, transfer your bowl to the refrigerator. The cold slows fermentation dramatically, and your dough can live in the fridge for up to 5 days. Cold dough actually develops more flavor, so this isn't a shortcut—it's actually preferable for taste. When you're ready to bake, remove the dough from the fridge about 30 minutes before you want to start the preheating process.
- This step is crucial and worth doing right. Set your oven to 450 degrees Fahrenheit. Place your Dutch oven inside with the lid on. Let it preheat for 30 minutes to 1 hour. Once your oven reaches 450 degrees, keep it going for another 20 minutes with the Dutch oven still inside. You want that cast iron absolutely screaming hot. This is non-negotiable—a cold Dutch oven won't create the steam and crust you're after. I know this seems like overkill, but when you open that oven door and hear the sizzle of your dough hitting hot metal, you'll understand why.
- While your Dutch oven preheats, prepare your dough for baking. Dust a piece of parchment paper generously with flour. Scrape your dough out of the bowl onto the floured parchment. Don't worry about it being perfectly shaped or smooth. Using a silicone spatula or even your hands, gently fold the edges up on top of itself to create a rustic round or oval shape. The shape doesn't have to be perfect—honestly, the more rustic it looks, the more it looks like artisan bakery bread. Now here's a helpful trick: grab the edges of the parchment paper and flip the entire dough over so the floured side is now on top and the smoother underside faces down. This gives you a nicer presentation when baked.

- Using a very sharp knife or a clean razor blade, make a few shallow cuts across the top of your loaf about ½ inch deep. Some people make a cross pattern, others make slashes down the center, and some do a grid. The pattern is purely decorative—what matters is that these cuts allow steam to escape in a controlled way, which helps the bread rise evenly. This step is optional. If you skip it, your bread will still be delicious. But those pretty scores look so professional, and they actually help your bread bake more evenly.

- Carefully remove your Dutch oven from the oven and take off the lid—careful, it's hot. Grab the parchment paper by its edges and gently place your dough directly into the Dutch oven. The parchment paper comes with it, which is fine. It won't burn at 450 degrees. Work quickly but calmly. You want to minimize heat loss, but you also don't want to splash yourself with steam. Place the lid back on the Dutch oven and return it to the oven immediately.
- Place your covered Dutch oven on the center rack of your preheated oven. Bake for 35 minutes at 450 degrees Fahrenheit (or 40 minutes if your dough came straight from the refrigerator). Don't open the oven door during this time. This is when the steam is doing its important work, creating that stunning crust. Just trust the process and wait.

- After the lid-on time is finished, carefully remove the Dutch oven and take off the lid. Be aware that steam will escape—it's hot and forceful. Step back slightly to avoid a steam burn. Return the uncovered Dutch oven to the oven and bake for another 5 to 10 minutes, watching for a deep golden brown color to develop on top. If your bread isn't brown enough after 10 minutes, give it another 5. Baking times vary based on your oven, so trust your eyes. You're looking for a crust that's deeply browned, almost caramel-colored. The darker it is (without burning), the crispier it will be.
- Using the parchment paper handles, lift the bread out of the Dutch oven and place it on a wire cooling rack or cutting board. Now comes the hardest part: waiting. Let your bread cool for at least 10 minutes before slicing, though ideally 30 minutes to 1 hour. I know it smells incredible and you want to dig in, but this cooling time is important. The crumb (the inside) is still setting, and if you slice too early, the structure will be gummy. When you do slice into it, use a serrated bread knife with a gentle sawing motion. You should hear that satisfying crunch of the crust and see an open, airy crumb structure inside.

Nutrition
Notes
Tried this recipe?
Let us know how it was!FAQs
Can I make this bread without a Dutch oven?
Technically yes, but you’ll get different results. Without the trapped steam, your crust won’t be as crispy and glossy. You can use a regular baking sheet with a bowl inverted over the dough for the first 20 minutes to trap some steam, but it’s not the same. The Dutch oven creates an enclosed environment that’s hard to replicate. If you don’t have one and are interested in bread baking, I’d genuinely recommend investing in one. They’re affordable and incredibly useful for so many recipes beyond bread.
Why is my bread dense and gummy inside?
This usually happens for one of three reasons: your dough wasn’t fully proofed (didn’t rise enough), you sliced it while it was still hot, or your oven temperature wasn’t accurate. Make sure you wait for the dough to visibly double, let bread cool completely before slicing, and use an oven thermometer to verify your oven actually reaches 450 degrees. Many home ovens run hot or cold without you realizing it.
My bread didn’t rise. What went wrong?
First, check your yeast expiration date. Dead yeast is the most common culprit. Second, verify your water temperature was warm but not hot. Third, make sure your rising location was actually warm enough (aim for 75-80 degrees). If your kitchen is cold, your dough will rise very slowly or not at all. Finally, check that you used the correct amount of salt—too much salt kills yeast and prevents rising.
Can I use instant yeast or rapid rise yeast instead of active dry yeast?
Absolutely. Instant yeast and rapid-rise yeast work identically to active dry yeast in this recipe. You can use the same measurement (one packet or 2.25 teaspoons). The only difference might be that your rising time is slightly shorter, perhaps 1.5 to 2 hours instead of 2-3. Watch your dough for doubling rather than relying on time.
Can I add seeds, nuts, or herbs to this bread?
Yes, and I encourage you to experiment. Add up to ¾ cup of add-ins at the end of Step 2, after you’ve incorporated the flour. Try sesame seeds, sunflower seeds, chopped rosemary, dried oregano, walnuts, or olives. Just fold them in gently. The bread will still rise beautifully, and you’ll have custom artisan bread with flavor tailored to your preferences.
More Recipes You’ll Love
- this simple cake – A tender, moist cake that pairs beautifully with sliced artisan bread for a complete breakfast or brunch.
- Bean And Quinoa Recipe – A hearty, protein-packed side dish that begs for thick slices of crusty bread on the side.
- this simple cake – Because not every meal centers on bread. A classic cake for celebrations.
I genuinely hope you make this bread soon. There’s something so satisfying about pulling a gorgeous, golden loaf from your oven and hearing that satisfying crunch when you slice into it. Once you master this recipe, you’ll be making it regularly. It becomes your go-to for weeknight dinners, weekend entertaining, and those moments when you want your kitchen to smell absolutely incredible.
The beauty of this bread is that it teaches you something real about baking. You’re not fighting with your ingredients or worrying about a dozen variables. You’re working with time and heat to create something delicious. Start with this recipe as written, master it, then have fun experimenting with variations.
Happy cooking!