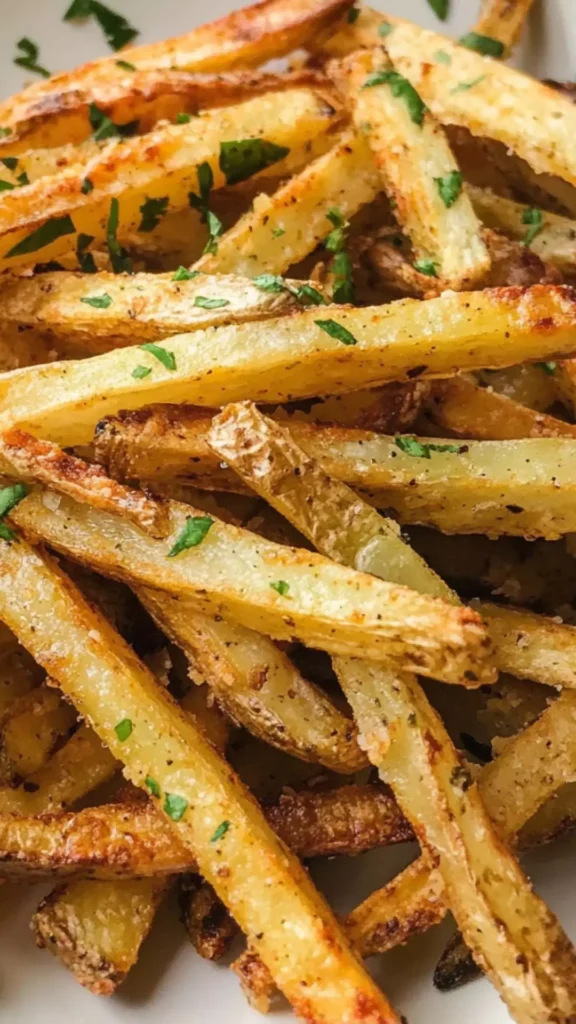
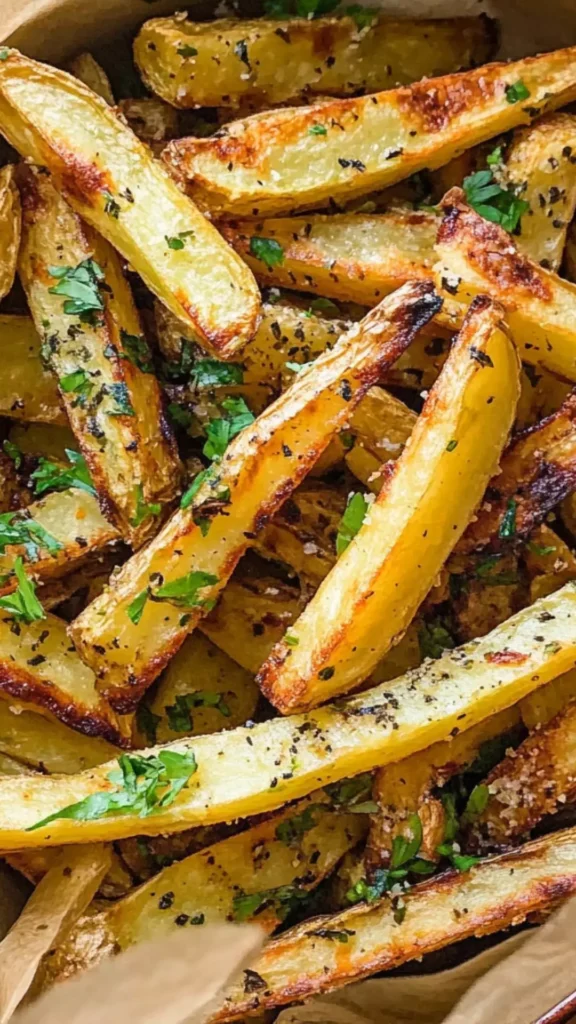
One sunny Saturday afternoon, I thought about what would pair perfectly with a juicy burger on the grill. The answer was simple: homemade baked fries. These crispy, golden delights are not only easy to make but also a healthier alternative to their deep-fried counterparts.
As a food enthusiast, I always seek out ways to turn classic dishes into something special without loaded calories.
Before diving into the delightful process of making homemade baked fries, let me clarify what they are. Homemade baked fries are fresh potatoes sliced into wedges or sticks, tossed in olive oil and spices, then baked until they’re perfectly crispy.
They provide a satisfying crunch and a wonderful flavor that complements any main dish.

What Are Homemade Baked Fries?
Homemade baked fries are not just a side; they’re an experience. Imagine the smell of freshly cut potatoes mixed with garlic and rosemary wafting through your kitchen. The best part? You get to control the ingredients, ensuring they are as wholesome as they are tasty.
Unlike frozen fries packed with preservatives, homemade baked fries are made from real ingredients you choose. The process is straightforward. With just a few simple steps, you can create a side dish that will have your family begging for more.
The Ingredients
Creating perfect baked fries requires just a handful of ingredients. Here’s what you need to gather before you start your fry-making adventure:
- 2-3 tablespoons extra-virgin olive oil
- 4 large russet potatoes
- 1 tablespoon smoky paprika salt or zesty citrus pepper
- 1 teaspoon garlic powder
- ½ teaspoon dried rosemary
With these ingredients at hand, you’re almost ready to begin.

How to Make Homemade Baked Fries
Let’s keep this short but sweet. Making homemade baked fries involves cutting, seasoning, and baking. It really is that simple! Below, I’ll dive deeper into each step.
Step-by-Step Directions
Step 1: Preheat Your Oven
Start by preheating your oven to 425°F (220°C). A hot oven is essential for getting those fries crispy, so don’t skip this!
Step 2: Prepare the Potatoes
Wash the russet potatoes thoroughly under cold water. There’s nothing quite like the taste of fresh potatoes! After washing, dry them with a kitchen towel.
Now, cut each potato in half lengthwise, then slice each half into wedges or sticks, depending on your preferred fry shape. Aim for uniformity in thickness to ensure even cooking.
Step 3: Toss with Olive Oil
In a large mixing bowl, add the cut potatoes. Drizzle the extra-virgin olive oil over the fries. Now for the fun part—use your hands to toss them around until every piece is lightly coated in oil. This step is crucial for achieving that crispy exterior.
Step 4: Season to Perfection
Now it’s time for the spice magic. Sprinkle the smoky paprika, garlic powder, and rosemary over the fries. Add salt or zesty citrus pepper based on your preference. Again, toss everything together until the fries are well seasoned. You want every fry to have a bit of that flavor!
Step 5: Bake the Fries
Spread the seasoned fries in a single layer on a baking sheet lined with parchment paper. Make sure they are not overcrowded; give them space to breathe for optimal crispiness. Bake for about 30-35 minutes. Flip them halfway through to ensure even browning.
Step 6: Enjoy!
Once they’re golden and crispy, remove them from the oven and let them cool for a minute. Serve them right away for the best experience. Dipping sauces like ketchup or homemade garlic aioli enhance the flavor as well.
Notes
Here are some tips to guarantee your fries turn out perfectly every time:
- Choose the Right Potato: Russets are best for fries due to their starch content.
- Soak Before Baking: Soaking the cut potatoes in water for 30 minutes can help reduce starch and enhance crispiness if you have time!
- Use a Good Quality Olive Oil: It adds depth of flavor. Don’t skimp on this.
- Experiment with Spices: Feel free to add more spices that suit your taste—cumin and chili powder can work wonders, too.
- Keep an Eye on Them: Ovens can vary, so watch the fries as they bake. Remove them as soon as they’re golden.
Storage Tips
If you happen to have some leftover fries—though honestly, that’s a rare occurrence in my kitchen—here’s how to store them:
- Cool down: Let them cool to room temperature before storing.
- Airtight container: Place the fries in a sealable container lined with paper towels to absorb excess moisture.
- Fridge life: They can last for 3-4 days in the refrigerator.
- Reheat properly: For best results, reheat in an oven or air fryer. This restores their crispiness.

Serving Suggestions
When it comes to serving baked fries, they make a fantastic companion to a variety of dishes. Here are some suggestions:
- Juicy Burgers: Nothing beats the combo of a cheeseburger and crispy fries. The flavors and textures balance beautifully.
- Tacos: Tacos and fries might seem odd at first, but the crunch of fries inside a soft taco shell? Perfection.
- Salads: Top a fresh salad with baked fries for a hearty twist. It adds crunch alongside the fresh greens.
- Steak: Baked fries complement a well-cooked steak wonderfully, creating a luxury dinner experience at home.
- Wraps or Sandwiches: Wraps filled with grilled chicken or veggies paired with fries makes for a fulfilling meal, satisfying both hunger and cravings.
What Other Substitutes Can I Use in Homemade Baked Fries?
Feel free to experiment with your fries! Here are some alternatives you can use:
- Sweet Potatoes: Swap out regular potatoes for sweet potatoes for a slightly sweet, vibrant twist.
- Zucchini: Cut zucchini into strips, season, and bake for a lighter option. They bake quickly, so watch closely!
- Carrots: Try carrot fries! They’re sweet and have a different crunchy texture.
- Turnips: If you want twists, turnips offer a unique flavor profile. They’re low in carbs too!
- Parsnips: For something entirely different, parsnips provide a slightly nutty taste and are a fantastic alternative.

Homemade Baked Fries Recipe
Ingredients
Equipment
Method
- Start by preheating your oven to 425°F (220°C). A hot oven is essential for getting those fries crispy, so don’t skip this!
- Wash the russet potatoes thoroughly under cold water. There’s nothing quite like the taste of fresh potatoes! After washing, dry them with a kitchen towel.
- Now, cut each potato in half lengthwise, then slice each half into wedges or sticks, depending on your preferred fry shape. Aim for uniformity in thickness to ensure even cooking.
- In a large mixing bowl, add the cut potatoes. Drizzle the extra-virgin olive oil over the fries. Now for the fun part—use your hands to toss them around until every piece is lightly coated in oil. This step is crucial for achieving that crispy exterior.
- Now it’s time for the spice magic. Sprinkle the smoky paprika, garlic powder, and rosemary over the fries. Add salt or zesty citrus pepper based on your preference. Again, toss everything together until the fries are well seasoned. You want every fry to have a bit of that flavor!
- Spread the seasoned fries in a single layer on a baking sheet lined with parchment paper. Make sure they are not overcrowded; give them space to breathe for optimal crispiness. Bake for about 30-35 minutes. Flip them halfway through to ensure even browning.
- Once they’re golden and crispy, remove them from the oven and let them cool for a minute. Serve them right away for the best experience. Dipping sauces like ketchup or homemade garlic aioli enhance the flavor as well.
Nutrition
Notes
- Choose the Right Potato: Russets are best for fries due to their starch content.
- Soak Before Baking: Soaking the cut potatoes in water for 30 minutes can help reduce starch and enhance crispiness if you have time!
- Use a Good Quality Olive Oil: It adds depth of flavor. Don’t skimp on this.
- Experiment with Spices: Feel free to add more spices that suit your taste—cumin and chili powder can work wonders, too.
- Keep an Eye on Them: Ovens can vary, so watch the fries as they bake. Remove them as soon as they’re golden.
Tried this recipe?
Let us know how it was!Frequently Asked Questions
Conclusion
Homemade baked fries transform the humble potato into a delicious side that can elevate any meal. By using fresh ingredients and simple techniques, these fries not only taste better than store-bought but also provide a wholesome alternative.
Whether you’re pairing them with a burger, a salad, or enjoying them solo, these fries are bound to impress. So fire up your oven, grab those russets, and get started on this tasty adventure. Your taste buds will thank you!
