I’m sharing one of my favorite weeknight side dishes today, and I promise it’s about to become yours too. These roasted brown mushrooms are the kind of recipe that proves you don’t need complicated techniques to create something genuinely delicious. They pair beautifully with everything from baked BBQ chicken thighs to simple grain bowls, making them one of my go-to vegetables when I need something that’s both nutritious and impressive.
The Day I Learned Mushrooms Could Be a Main Character
About five years ago, I was meal prepping for a particularly hectic week. I had chicken thighs marinating, rice cooking, and absolutely no exciting side vegetables in my fridge except a container of brown mushrooms I’d bought with good intentions. I decided to roast them with nothing but butter, garlic, and lemon juice—basically because I was running out of time and creativity.
My husband came home to the smell of caramelized mushrooms filling our kitchen, and the first thing he said was, “What smells amazing?” That’s when it clicked for me. These humble mushrooms, treated with a little respect and high heat, transformed into something genuinely spectacular. They weren’t just a side dish anymore. They were the reason people wanted to come back for seconds.
As a registered dietitian, I’ve spent years helping people build balanced plates, and what I’ve learned is that the sides often matter more than people think. When you make vegetables taste this good, people actually eat them. And that’s the real win.
What Is Brown Mushroom Recipe?
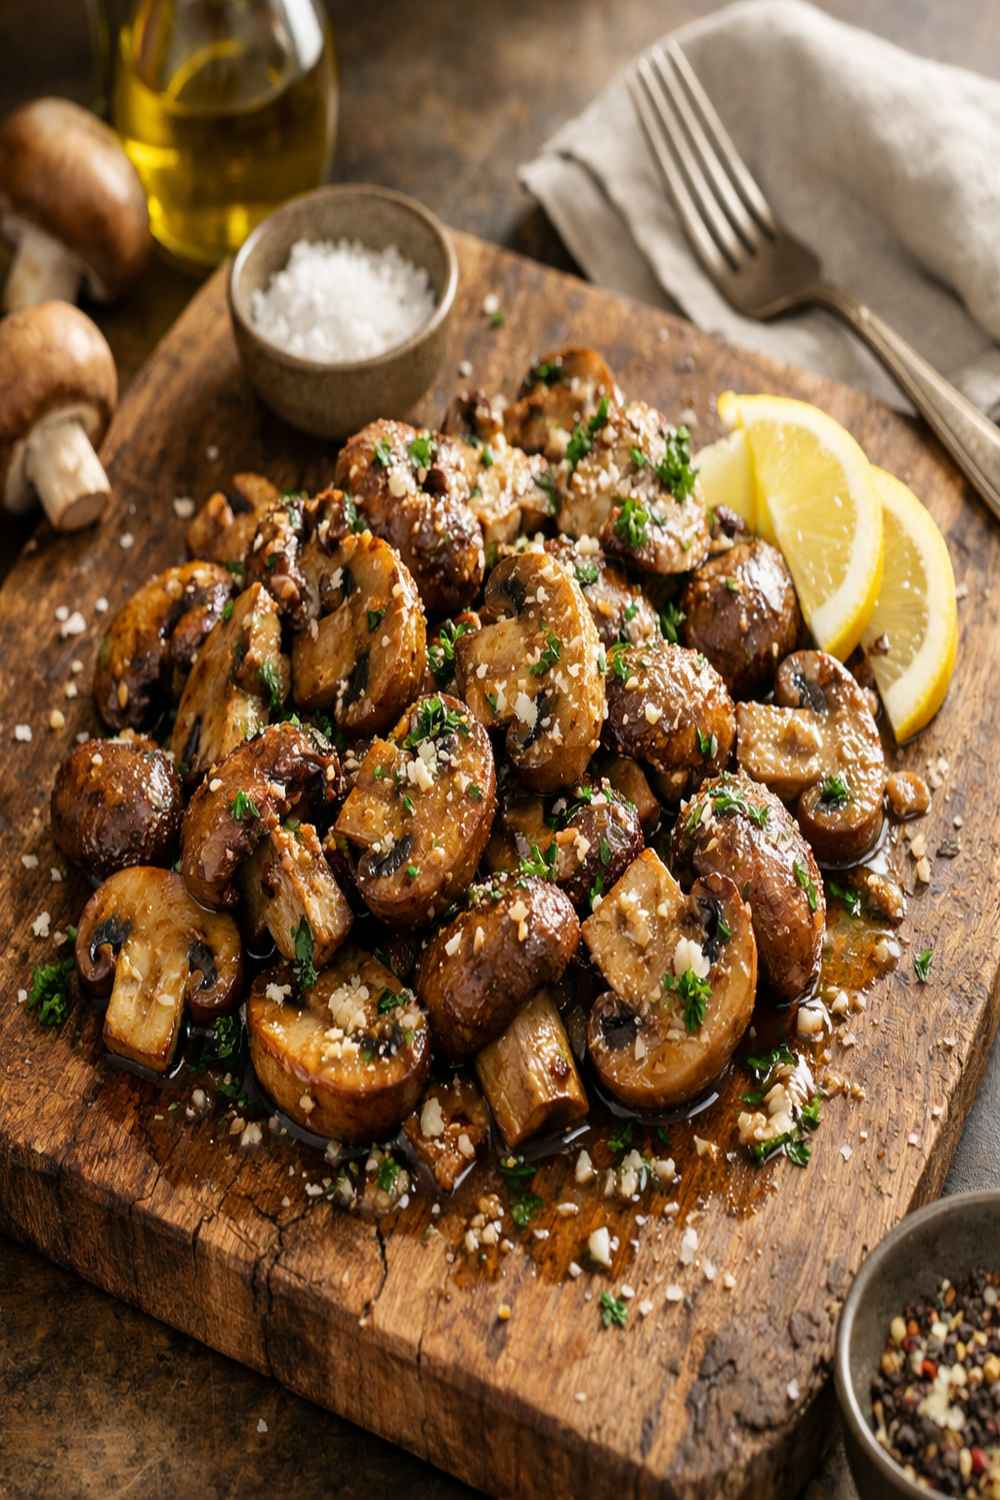
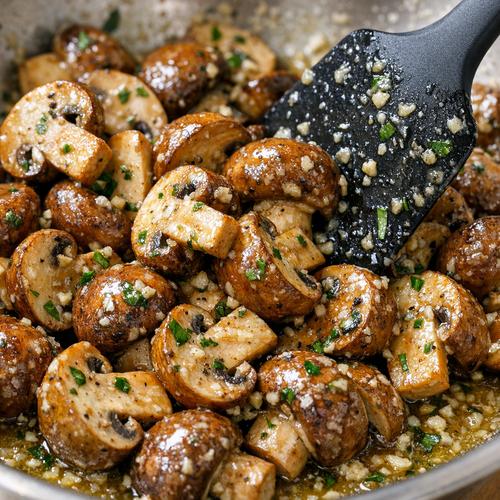
This is a straightforward roasted mushroom dish that celebrates the earthy, umami-rich flavor of brown mushrooms. Whether you’re using cremini mushrooms (which are just young portabellos), Swiss browns, or large portobellos, this recipe works beautifully. The magic happens when you roast them at high heat with butter and garlic until they’re golden, tender, and slightly caramelized around the edges.
Unlike sautéed mushrooms, which can get watery and steamed, roasting concentrates their natural flavors. The moisture evaporates, and what’s left is pure, concentrated mushroom goodness. Finish everything with fresh lemon juice and thyme, and you’ve got a side dish that tastes like you spent way more time on it than you actually did.
Why You’ll Love This Brown Mushroom Recipe
- It’s genuinely quick – Twenty-five minutes from oven to table, which means you can add this to any weeknight dinner without stress
- Minimal prep work – Just toss everything together in a bowl and spread on a baking tray. No slicing, no complicated techniques
- Packed with nutrients – Brown mushrooms are loaded with B vitamins, selenium, and potassium, plus they’re incredibly low in calories
- Umami powerhouse – The combination of mushrooms, garlic, butter, and lemon creates deep, savory flavors that make your palate happy
- Works with everything – Serve alongside chicken, fish, beef, or add to grain bowls and pasta dishes
- Flexible ingredient swaps – Don’t have thyme? Parsley works great. No fresh lemon? Balsamic vinegar is beautiful here too
- Makes excellent leftovers – These mushrooms are delicious cold from the fridge as a snack or added to salads
The Ingredients
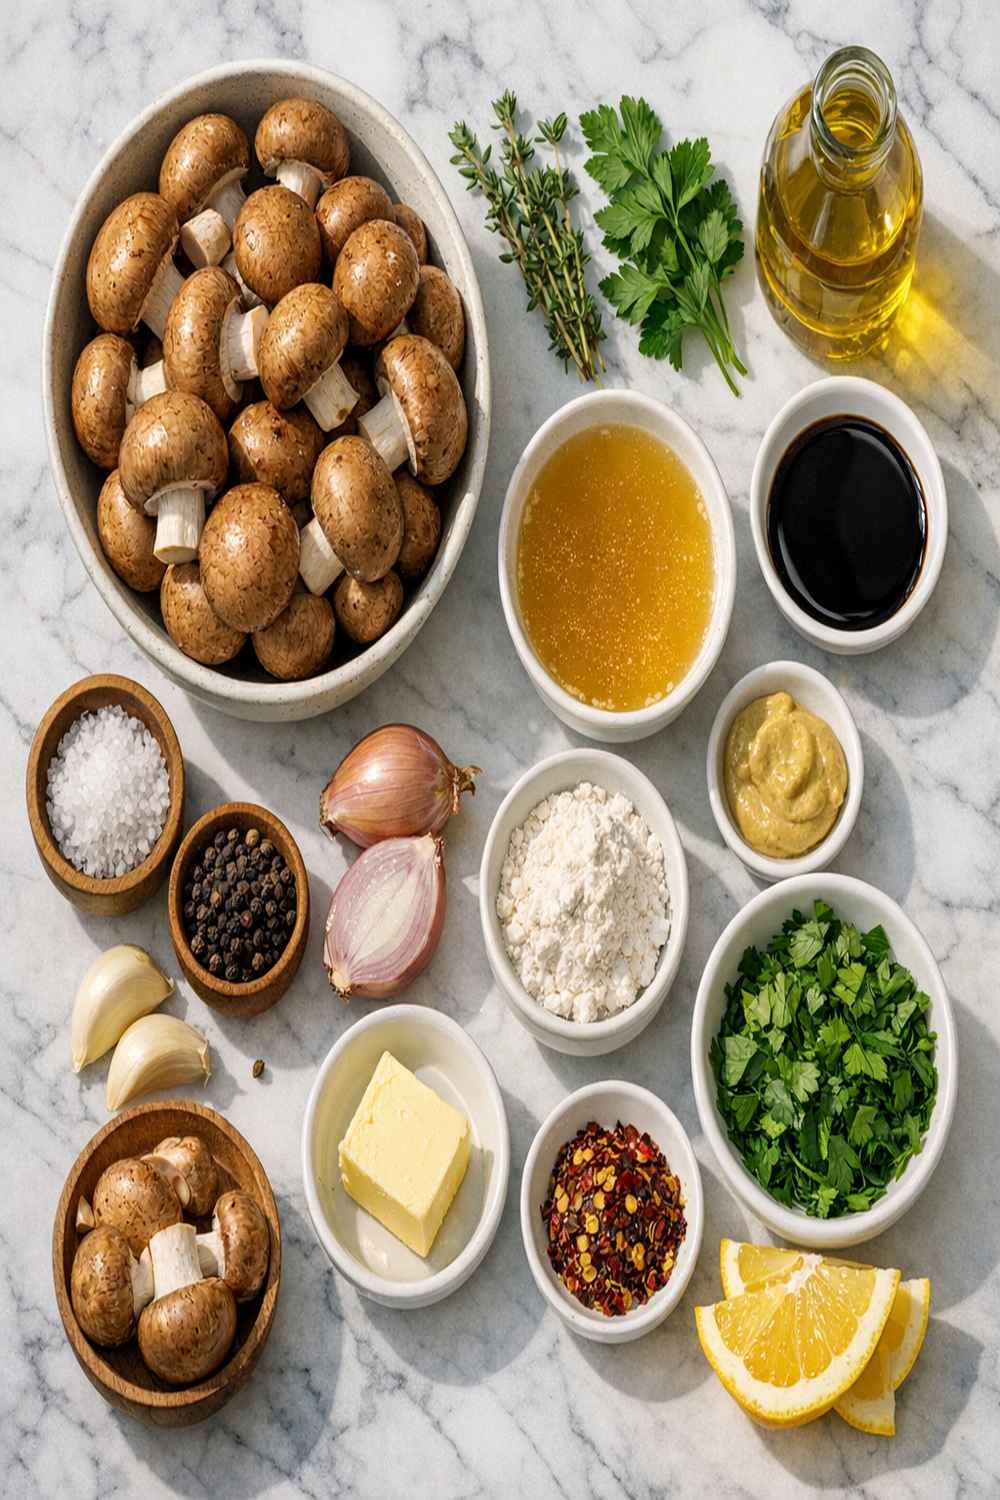
I love how simple this ingredient list is. You probably have most of these items in your kitchen right now. The key is using quality ingredients, especially the butter. Those few items really shine when there’s nothing hiding them.
- 2 garlic cloves (finely minced for even distribution)
- ½ teaspoon salt (adjust based on your preference)
- 1 tablespoon olive oil (helps prevent butter from browning too quickly)
- 500g brown mushrooms (cremini, Swiss brown, or portobello – about 1 pound total)
- 1 teaspoon fresh thyme leaves (or fresh parsley if you prefer the color and brightness)
- 1½ tablespoons fresh lemon juice (squeezed just before serving)
- 50g unsalted butter (melted, which is about 3 tablespoons)
- ½ teaspoon freshly ground black pepper (makes a real difference here)
How to Make Brown Mushroom Recipe?
This recipe is straightforward, but I’m going to walk you through each step so you understand what’s happening and why. Small details matter when you’re working with minimal ingredients.
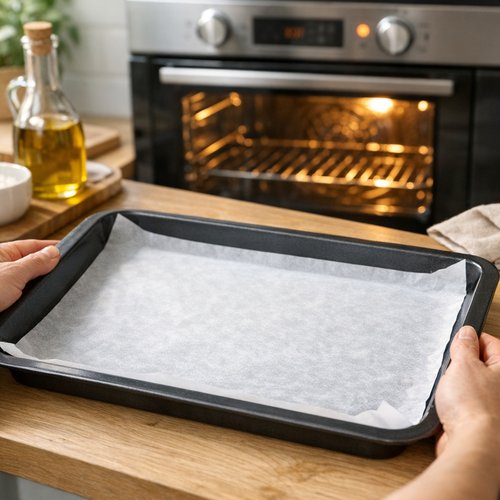
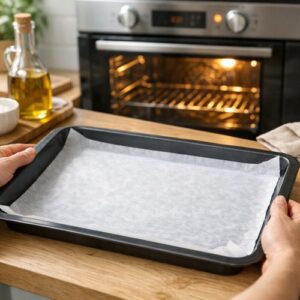
Step 1: Preheat Your Oven and Prepare the Pan
Start by preheating your oven to 220°C (450°F), or 200°C if you have a fan/convection oven. While that’s heating, grab a large baking tray and have it ready. You want your oven nice and hot so those mushrooms will develop golden, caramelized edges. This temperature is crucial—it’s hot enough to drive off moisture but not so hot that the outside burns before the inside cooks.
Step 2: Prepare Your Mushrooms
Clean your mushrooms by wiping them gently with a damp paper towel. I know there’s debate about rinsing mushrooms, but honestly, they can handle a quick rinse under cool water. Just pat them dry immediately. Leave smaller mushrooms whole, but if you’re using large portobellos, cut them in half or quarters so they cook evenly. You want pieces roughly similar in size so everything finishes at the same time.

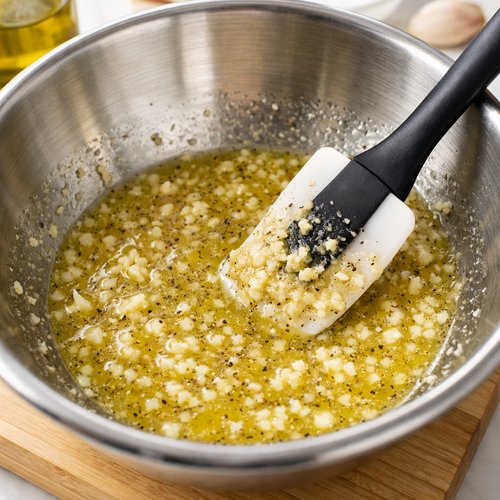
Step 3: Combine Your Tossing Ingredients
In a large mixing bowl, combine your melted butter, olive oil, minced garlic, salt, and pepper. Use a rubber spatula to mix these together until the garlic is evenly distributed throughout the fat. This might seem like an extra step, but coating your mushrooms evenly matters. You want every piece to get some garlic and seasonings.
Step 4: Toss the Mushrooms
Add your prepared mushrooms to the butter mixture and toss gently but thoroughly using that rubber spatula. Make sure every mushroom surface is coated with the buttery mixture. This is where the flavor comes from—the butter and garlic will help create those beautiful caramelized edges while keeping everything moist inside.
Step 5: Spread on the Baking Tray
Pour the mushrooms and all their buttery coating onto your baking tray, spreading them in a single layer. This is important—don’t pile them on top of each other. They need space for the hot air to circulate. If they’re crowded, they’ll steam instead of roast, and steamed mushrooms are watery mushrooms. Nobody wants that.

Step 6: Roast Without Stirring
Pop the tray into your preheated oven and roast for exactly 25 minutes. This is key—don’t toss or turn them during cooking. I know it’s tempting to peek and stir, but resist that urge. The undisturbed heat allows the flat sides to make contact with the hot tray, which creates those gorgeous caramelized spots. After 25 minutes, they should be golden brown and tender, with slightly shrunken edges.

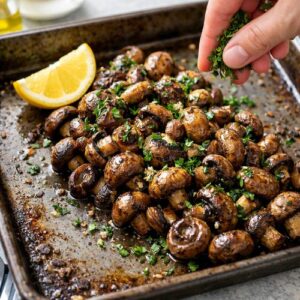
Step 7: Finish with Lemon and Fresh Herbs
Remove the tray from the oven and immediately push the mushrooms together onto one side of the tray. This helps keep them warm and makes them easier to handle. Drizzle everything with the fresh lemon juice and sprinkle the thyme leaves over top. Toss gently to distribute, taste, and adjust seasoning if needed. The bright acidity from lemon cuts through the richness beautifully and wakes up all those savory flavors.

Serve immediately while they’re still warm and the edges are at their crispest.
Tips and Tricks
- Don’t wash mushrooms excessively – They’re mostly water already. A quick wipe with a damp paper towel is all they need. Soaking them in water makes them waterlogged
- Make sure your oven is truly preheated – This is one of those small things that actually makes a huge difference. Give it at least 15-20 minutes to reach temperature
- Use a baking tray with sides – All that lovely buttery liquid needs somewhere to stay. A rimmed baking sheet is your friend here
- Fresh herbs matter more than you think – Dried thyme works in a pinch, but fresh thyme adds brightness that dried simply can’t match
- Squeeze your lemon right before serving – Bottled lemon juice loses its brightness. Real lemons make a real difference with such a simple recipe
- Temperature check for doneness – The mushrooms are ready when they’re golden brown and have released most of their moisture. The liquid should be mostly evaporated
- Save those pan drippings – All that concentrated mushroom and garlic liquid in the bottom of the pan is liquid gold. Pour it over the mushrooms when you serve them
Expert’s Nutritional Tip
Here’s something I always share with my clients: brown mushrooms are one of the few plant-based sources of vitamin B12 in its active form. Now, they contain less than animal sources, but every little bit helps, especially for vegetarians and vegans. They’re also rich in ergothioneine, a powerful antioxidant that your body can’t synthesize on its own, so you need to get it from food sources. Roasting them doesn’t diminish these benefits—in fact, cooking actually increases the bioavailability of some compounds. Plus, at only about 25 calories per 100 grams, you can eat as much as you want without guilt.
Common Mistakes to Avoid
- Overcrowding the pan – This is the number one mistake I see. Mushrooms need space. If they’re touching each other, they steam instead of roast. Use two baking trays if you need to
- Stirring during cooking – I understand the urge, but those caramelized golden spots are what make this dish special. Leave them alone
- Using pre-minced garlic – Fresh garlic makes such a difference in a simple recipe like this. The jarred stuff gets bitter when roasted at high heat
- Skipping the lemon juice – Some people think it’s optional. It’s really not. That brightness is essential to balancing the richness. At minimum, use it even if you skip the thyme
Make-Ahead Guide
One of the questions I get asked most is whether you can prep this ahead, and the answer is yes—with caveats. You can prepare your mushrooms and your butter mixture up to 8 hours in advance. Store the cleaned mushrooms in a paper bag in the fridge (not plastic—plastic traps moisture), and keep your butter mixture in a small container. When you’re ready to cook, combine them and proceed with the recipe as written.
However, I don’t recommend roasting them ahead of time and reheating. They’re best served fresh from the oven. That said, leftover roasted mushrooms are absolutely delicious cold or at room temperature the next day. Use them in salads, grain bowls, or eat them straight from the fridge as a snack. They’ll keep in an airtight container in the refrigerator for up to 3 days.
Seasonal Variations
Spring – Add fresh mint or tarragon instead of thyme. Consider finishing with white wine vinegar for brightness.
Summer – Mix in fresh basil at the end. A squeeze of lime juice instead of lemon gives it a completely different personality.
Fall – Add a pinch of smoked paprika and fresh sage. A tiny drizzle of balsamic vinegar brings out earthy notes.
Winter – Use rosemary instead of thyme. Add a small pinch of garlic powder if you want more depth. A touch of truffle oil at the end feels luxurious.
Can I Store Brown Mushroom Recipe?
Storage depends on whether you’re talking about raw or cooked mushrooms. Raw prepared mushrooms (cleaned and cut) can stay in the fridge for up to 5 days in a paper bag. Never store them in plastic—the condensation will make them mushy.
Roasted mushrooms are best eaten the day you make them for optimal texture, but they’ll keep in an airtight container for up to 3 days in the refrigerator. They won’t be quite as crispy as fresh, but they’re still delicious. Reheat them gently in a 180°C oven for about 10 minutes if you want to restore some of that texture.
These mushrooms don’t freeze particularly well because of their high water content, so I’d recommend only making what you plan to eat within a few days.
Nutrition Information
Based on USDA data, one serving of this recipe (about 125g of mushrooms with all the seasonings) contains approximately 95 calories, 8g of fat, 4g of carbohydrates, and 2g of protein. The sodium is about 165mg, making it quite reasonable for those watching salt intake.
What excites me most nutritionally is the micronutrient profile. Those brown mushrooms deliver 18% of your daily selenium, which is essential for thyroid function and immune health. You’re also getting meaningful amounts of copper, potassium, and B vitamins. The lemon juice adds vitamin C for iron absorption, and the olive oil helps your body absorb the fat-soluble vitamins. This simple side dish is genuinely nutrient-dense.
What Can I Serve With Brown Mushroom Recipe?
These mushrooms are versatile enough to pair with almost anything, but here are some of my favorite combinations. They’re particularly beautiful alongside protein-forward meals like high-protein chicken burritos or ahi tuna with a simple marinade. The earthy umami of the mushrooms complements rich, savory proteins beautifully.
- Grilled or roasted chicken – Any preparation works, but I especially love them with simple roasted breasts or thighs
- Steak or beef tenderloin – The buttery, garlicky mushrooms feel fancy enough for special dinners
- Fish dishes – Lighter fish like halibut or sea bass benefit from these rich, savory mushrooms alongside
- Grain bowls – Add them to bowls with farro, quinoa, or wild rice, along with roasted vegetables and a good vinaigrette
- Pasta dishes – Toss them through warm pasta with a little pasta water and fresh herbs for a simple, satisfying meal
- Vegetable platters – Serve alongside grilled potatoes and other roasted vegetables for a beautiful vegetarian spread
- Toast – Top thick slices of whole grain toast with these mushrooms for breakfast or lunch
- Salads – Chop them and add to green salads, grain salads, or heartier salads with beans and cheese
Substitutes
- Button mushrooms – These are slightly less flavorful but absolutely work if that’s what you have. They’re smaller, so watch the cooking time—they might need just 20 minutes
- Oyster mushrooms – These are larger and have a different texture, but they roast beautifully. They might need 30 minutes due to their shape
- Butter substitute – Use ghee or coconut oil in equal amounts. The flavor will shift slightly, but it works
- Olive oil instead of butter – You can use all olive oil if needed, but you’ll lose some of that buttery richness. Use about 75ml total
- Parsley instead of thyme – This gives you different color and a slightly brighter flavor. Use the same amount
- Balsamic or white wine vinegar instead of lemon – Use about the same amount. This creates a slightly different flavor profile but is equally delicious
- Shallots instead of garlic – Thinly slice them and follow the same process. Shallots are gentler and slightly sweet when roasted
Brown Mushroom Recipe
Ingredients
Method
- Start by preheating your oven to 220°C (450°F), or 200°C if you have a fan/convection oven. While that's heating, grab a large baking tray and have it ready. You want your oven nice and hot so those mushrooms will develop golden, caramelized edges. This temperature is crucial—it's hot enough to drive off moisture but not so hot that the outside burns before the inside cooks.
- Clean your mushrooms by wiping them gently with a damp paper towel. I know there's debate about rinsing mushrooms, but honestly, they can handle a quick rinse under cool water. Just pat them dry immediately. Leave smaller mushrooms whole, but if you're using large portobellos, cut them in half or quarters so they cook evenly. You want pieces roughly similar in size so everything finishes at the same time.

- In a large mixing bowl, combine your melted butter, olive oil, minced garlic, salt, and pepper. Use a rubber spatula to mix these together until the garlic is evenly distributed throughout the fat. This might seem like an extra step, but coating your mushrooms evenly matters. You want every piece to get some garlic and seasonings.

- Add your prepared mushrooms to the butter mixture and toss gently but thoroughly using that rubber spatula. Make sure every mushroom surface is coated with the buttery mixture. This is where the flavor comes from—the butter and garlic will help create those beautiful caramelized edges while keeping everything moist inside.
- Pour the mushrooms and all their buttery coating onto your baking tray, spreading them in a single layer. This is important—don't pile them on top of each other. They need space for the hot air to circulate. If they're crowded, they'll steam instead of roast, and steamed mushrooms are watery mushrooms. Nobody wants that.

- Pop the tray into your preheated oven and roast for exactly 25 minutes. This is key—don't toss or turn them during cooking. I know it's tempting to peek and stir, but resist that urge. The undisturbed heat allows the flat sides to make contact with the hot tray, which creates those gorgeous caramelized spots. After 25 minutes, they should be golden brown and tender, with slightly shrunken edges.

- Remove the tray from the oven and immediately push the mushrooms together onto one side of the tray. This helps keep them warm and makes them easier to handle. Drizzle everything with the fresh lemon juice and sprinkle the thyme leaves over top. Toss gently to distribute, taste, and adjust seasoning if needed. The bright acidity from lemon cuts through the richness beautifully and wakes up all those savory flavors. Serve immediately while they're still warm and the edges are at their crispest.
Nutrition
Notes
Tried this recipe?
Let us know how it was!FAQs
Can I use baby bella mushrooms instead of brown mushrooms?
Absolutely! Baby bella mushrooms are actually the same species as cremini mushrooms—they’re just portabellos at a younger stage. They’ll work perfectly in this recipe. You might have to roast them for just 20-22 minutes instead of 25 since they’re smaller, so keep an eye on them. They’re done when they’re golden and have released their moisture.
What if I don’t have fresh thyme?
Fresh parsley is a beautiful substitute and gives you better color. You can also use fresh chives, tarragon, or oregano. If you only have dried herbs, use about ¼ teaspoon since dried herbs are more concentrated than fresh. Honestly, the lemon juice is more important than the herb—the dish is still delicious without any herb at all, just with the bright lemon finish.
Why are my mushrooms watery?
This usually happens for one of two reasons: either your oven wasn’t hot enough (it needs to be at least 220°C), or your pan was too crowded. Mushrooms release a lot of water naturally, and you need high enough heat and enough space for that water to evaporate rather than creating steam. Make sure you’re not stirring them during cooking either—that agitation releases even more moisture. If you have excess liquid in the pan when they finish cooking, just drain it off before serving.
Can I make this in a cast iron skillet instead?
Yes, and honestly, cast iron gives you even better browning. Preheat your cast iron skillet in the oven at the same temperature for about 5 minutes so it’s nice and hot. Toss your mushrooms in the butter mixture and carefully add them to the hot skillet—it’ll be very hot! Proceed exactly as written, roasting for 25 minutes. The results are slightly better because of the even heat distribution.
Is this recipe vegetarian and vegan-friendly?
It’s naturally vegetarian. For vegan, simply substitute the butter with vegan butter in equal amounts, or use all olive oil. The flavor will be slightly different without the butter, but it’s still absolutely delicious. Increase the olive oil to about 65ml if you’re going butter-free. The rest of the recipe is plant-based already.
More Recipes You’ll Love
- Slow Cooker Chicken Cacciatore – This rustic Italian dish pairs beautifully with roasted mushrooms on the side
- Bean Rice Cheese Burrito Recipe – Add these mushrooms to your burrito filling for extra umami and nutrition
- this simple cake – Balance your dinner with something sweet featuring the same bright lemon notes
There you have it—one of my absolute favorite ways to make vegetables genuinely exciting. The beauty of this recipe is that it proves you don’t need complicated techniques or fancy ingredients to create something restaurant-quality at home. Just good mushrooms, quality butter, fresh garlic, and a hot oven.
I keep coming back to that moment when my husband smelled these roasting, because it’s a reminder that sometimes the simplest preparations create the most memorable meals. These mushrooms have made their way to my table dozens of times since that first accidental discovery, and they show up on my family’s plates regularly throughout the year.
The next time you’re looking for a side dish that actually tastes like something special, give these a try. Your dinner guests will think you’ve been holding out on them. And the best part? You’ll spend less than 30 minutes total and create something genuinely delicious that everyone wants more of.
Happy cooking!