I absolutely love a good burrito for lunch or dinner, especially when it’s packed with lean protein and real nutrition. This high protein chicken burrito hits all the marks — it’s satisfying, filling, and keeps you energized for hours. If you’re a fan of hearty meals, you might also enjoy my Bean Rice Cheese Burrito Recipe for a vegetarian twist, or try Barbecue Chicken Recipe With Barbecue Sauce for a different flavor profile.
Why I’m Obsessed With This Burrito
I remember the first time I made this burrito for my family on a Tuesday night. My daughter had soccer practice, my son needed dinner early, and I was staring at chicken breasts in my fridge wondering how to make something exciting happen fast. I threw together some seasoned chicken, colorful peppers, black beans, and that tangy Greek yogurt ranch sauce — and honestly, everyone went quiet while eating. That’s when you know you’ve nailed it.
What I love most is that these burritos are genuinely good for you. They’re loaded with protein, fiber, and vegetables without any of that heavy, sluggish feeling you get from less nutritious options. And they come together in about 30 minutes, which means weeknight dinner doesn’t have to be complicated.
What Is High Protein Chicken Burrito?
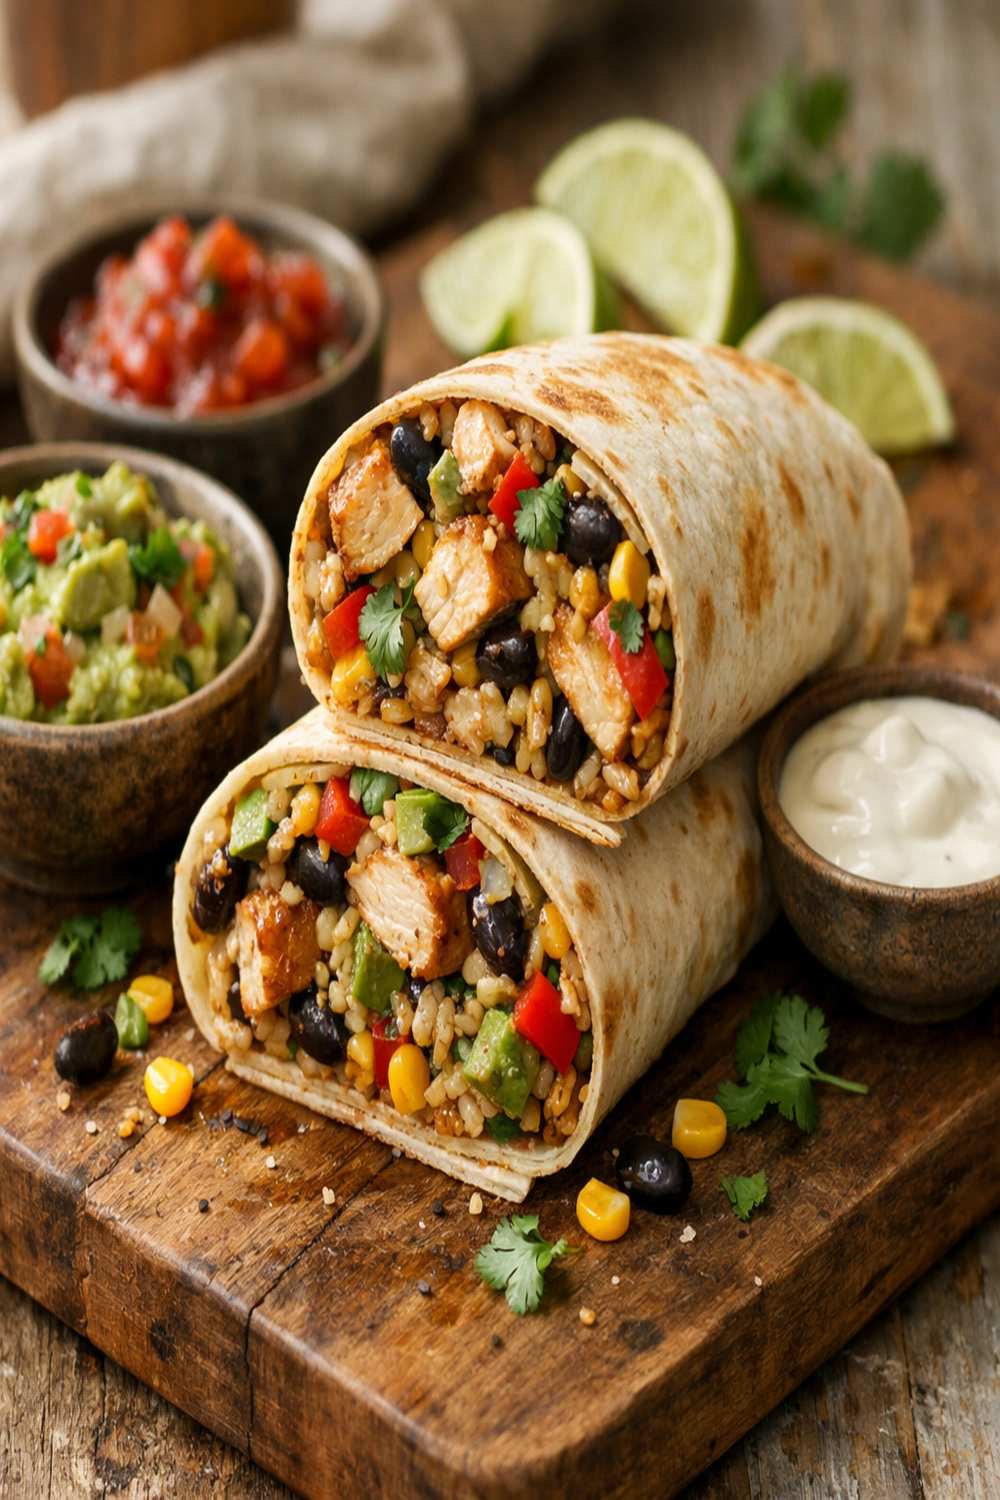
A high protein chicken burrito is a wrapped meal that puts the focus where it should be — on lean, flavorful chicken that’s seasoned beautifully and paired with nutrient-dense ingredients. This isn’t your typical restaurant burrito loaded with excess cheese and sour cream. Instead, we’re building something intentional and balanced.
The beauty of this recipe is that it combines diced, seasoned chicken breast with black beans, fresh bell peppers, diced tomatoes with chilies, and a lighter Greek yogurt-based ranch sauce. Everything gets wrapped up in a soft flour tortilla with just enough cheese to keep it interesting. The result is a meal that delivers real protein — we’re talking 25-35 grams per burrito depending on how you build it — plus fiber, vitamins, and minerals from the vegetables and beans.
I’ve found that the key to making these special is the spice blend and that creamy sauce. A combination of chili powder, cumin, smoked paprika, and just a touch of cayenne brings the chicken to life without being overwhelming. The sauce balances everything with cool, tangy Greek yogurt and a hint of ranch seasoning.
Why You’ll Love This High Protein Chicken Burrito Recipe
- Packed with protein – Each burrito delivers 25-35 grams of protein, making it perfect for muscle recovery, satiety, and keeping blood sugar stable throughout your afternoon.
- Quick to prepare – From start to finish, you’re looking at about 30 minutes, which makes this ideal for busy weeknights when you need something real, not takeout.
- Customizable heat level – The optional cayenne pepper means you control how spicy things get. My family loves turning up the heat, but if you prefer mild, you just skip that ingredient.
- Meal prep friendly – You can prepare these ahead, refrigerate them, and grab them for lunch. They hold up beautifully and actually taste better the next day as flavors meld.
- Balanced nutrition – You’re getting lean protein, healthy carbs from beans, fiber from vegetables, and healthy fats from cheese and Greek yogurt. This is a complete meal in one package.
- Budget conscious – Chicken breast is affordable, beans are inexpensive, and you’re using pantry staples. These burritos cost a fraction of what you’d spend at a restaurant.
- Family approved – Everyone loves a burrito. Kids will eat them, picky eaters can customize their own, and adults appreciate the nutritional balance.
The Ingredients
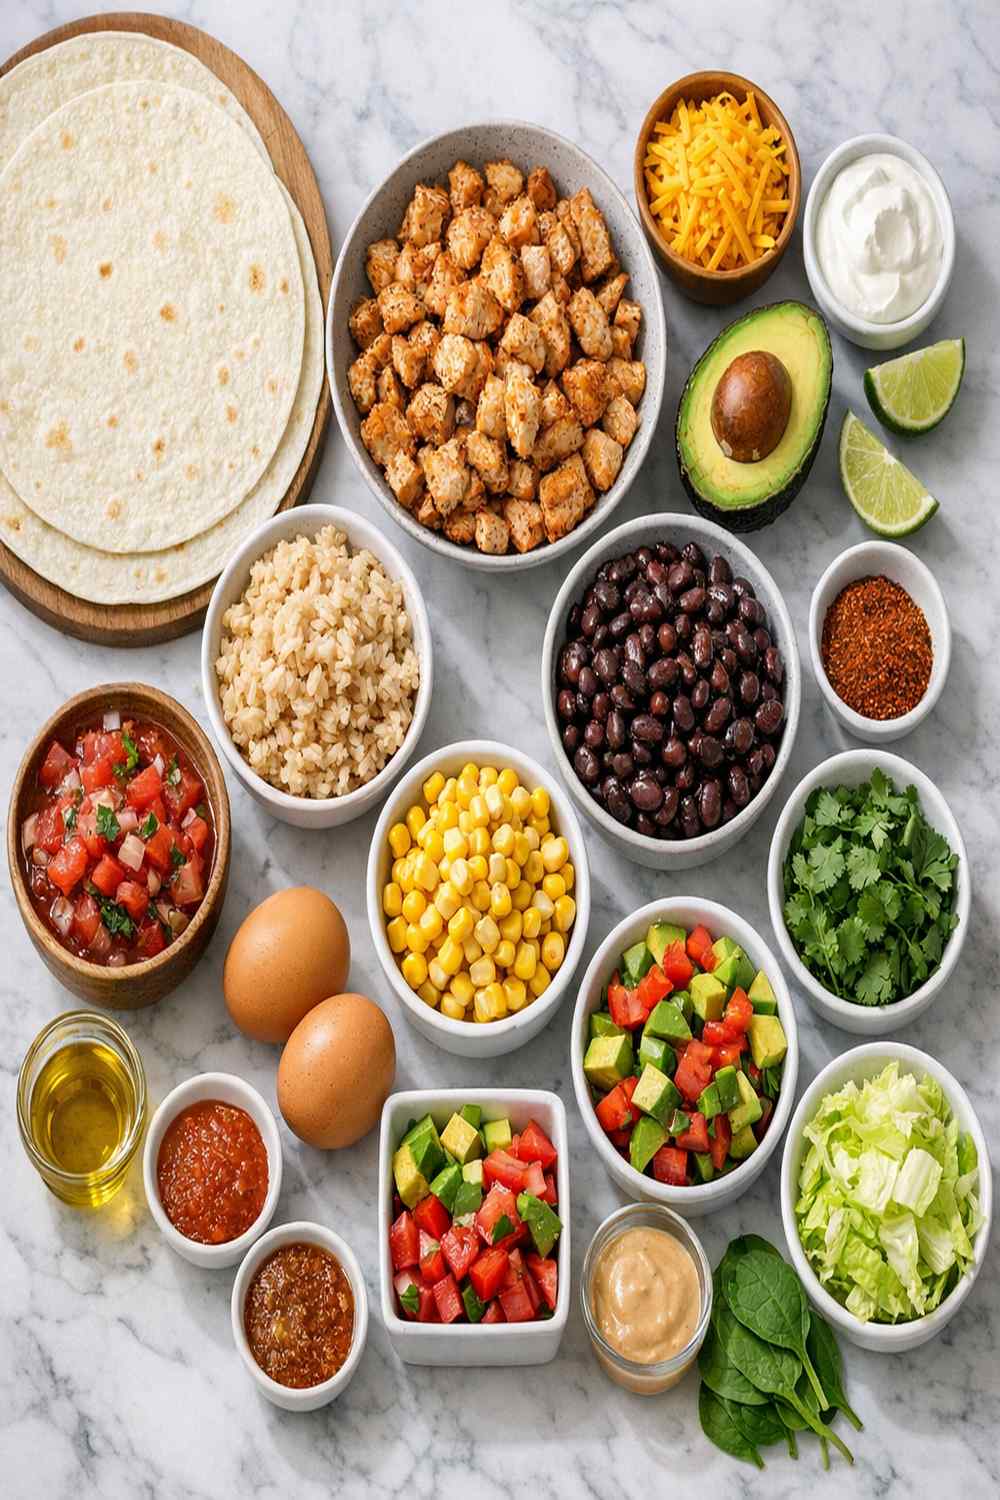
I’ve organized these ingredients into two sections to make it easier to see what goes into the filling versus what makes that incredible sauce. Most of these are things you probably have on hand, though I always keep diced tomatoes with chilies stocked because they add so much flavor.
For the Chicken Filling
- ½ teaspoon smoked paprika (brings subtle smokiness)
- ¼ cup yellow onion (diced small for quick cooking)
- ½ teaspoon garlic powder (concentrates garlic flavor nicely)
- ½ to 1 teaspoon cayenne pepper (optional, for heat as you like)
- ½ cup green bell pepper (sliced thin for brightness and crunch)
- ½ cup red bell pepper (sliced into thin strips for color and sweetness)
- Salt and black pepper to taste
- 1 teaspoon extra virgin olive oil (for cooking the chicken gently)
- 1 tablespoon chili powder (not spicy, just deep flavor)
- 1 teaspoon ground cumin (adds warmth and earthiness)
- 18 ounces boneless, skinless chicken breasts or thighs (diced into small ¼ to ½ inch pieces for even cooking)
- 15.5 ounces canned diced tomatoes with green chilies (drained thoroughly to avoid soggy tortillas)
- 8 ounces canned black beans (drained and rinsed well)
For the Tortillas and Assembly
- 6 flour tortillas (9-inch size, they wrap perfectly without cracking)
- 1 cup sharp cheddar cheese (shredded, approximately 3 ounces)
For the Creamy Ranch Sauce
- ½ to 1 teaspoon cayenne pepper (optional, for spicy sauce lovers)
- 2 tablespoons ranch salad dressing (adds that familiar flavor)
- ½ to 1 teaspoon ground cumin (adjust based on preference)
- 1 tablespoon honey or sugar (balances the savory elements)
- 1 cup plain Greek yogurt (full-fat works best for texture and taste)
- ½ teaspoon smoked paprika (ties it to the filling flavors)
- 1 tablespoon dry ranch seasoning mix (adjust this to your taste preference)
One thing I always recommend is draining your canned ingredients really well. Too much liquid makes soggy burritos, and nobody wants that. Also, if you’re sensitive to sodium, rinse your black beans under cold water — it reduces sodium by about 40 percent.
How to Make High Protein Chicken Burrito?
Let me walk you through this step by step. I’ve made these dozens of times, and I’m going to share exactly how I do it so you get the best results.
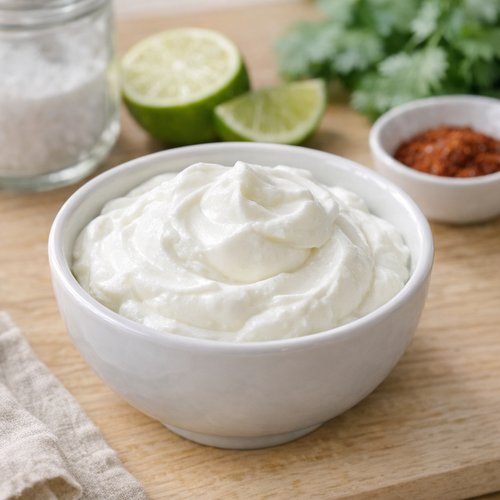
Step 1: Prepare Your Sauce Base
Start with your sauce because it’s the simplest part and can sit while you cook everything else. In a small bowl, combine 1 cup of plain Greek yogurt with 2 tablespoons of ranch dressing and 1 tablespoon of dry ranch seasoning. Add 1 tablespoon of honey or sugar — this is key because it balances the salty, savory elements. Stir in ½ teaspoon of smoked paprika and ½ to 1 teaspoon of cumin. Taste it and adjust the seasonings to your preference. If you want heat, add ½ to 1 teaspoon of cayenne pepper. The sauce should taste creamy, slightly tangy, and flavorful. Set this aside in the refrigerator.
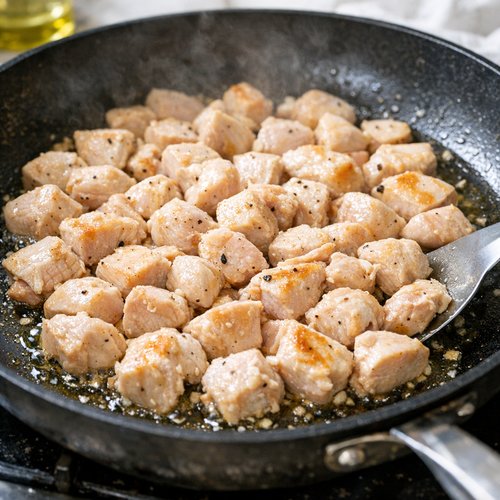
Step 2: Cook Your Chicken Perfectly
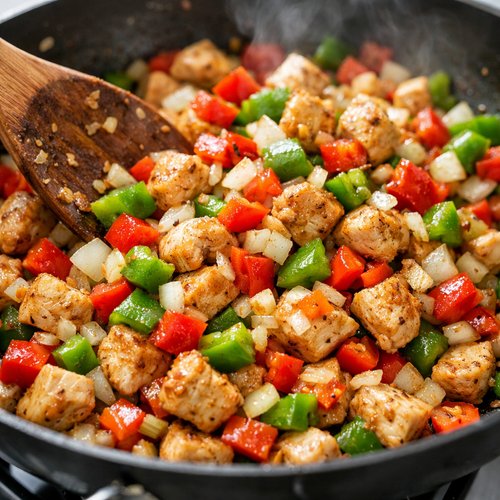
Heat 1 teaspoon of olive oil in a large skillet over medium-high heat. Once it’s shimmering, add your diced chicken (about 18 ounces total). You want the chicken in a single layer so it browns nicely rather than steaming. Let it cook undisturbed for about 3-4 minutes until the bottom is golden. Stir and cook for another 4-5 minutes until the chicken is cooked through and no longer pink in the center. This should take about 7-9 minutes total.
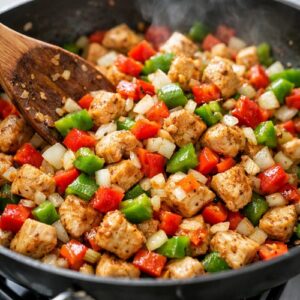
Step 3: Add Your Vegetables and Seasonings
Now add your diced onion and both the red and green bell peppers to the chicken. Stir well and let everything cook together for about 3-4 minutes, just until the vegetables soften slightly but still have some texture. You’re looking for them to be warm and fragrant but not mushy. This is where your dish really comes alive. Sprinkle in the chili powder, cumin, garlic powder, smoked paprika, and cayenne pepper if you’re using it. Add salt and pepper to taste. Stir everything together so the spices coat everything evenly. Cook for about 1 minute until you can really smell those spices blooming.
Step 4: Incorporate the Beans and Tomatoes
Add your drained black beans and drained diced tomatoes with chilies to the skillet. Stir everything together gently and let it warm through for about 2-3 minutes. Don’t over-stir at this point because you want to keep the beans and tomato pieces somewhat intact. The mixture should look colorful, aromatic, and delicious. Taste it one more time and adjust your seasonings if needed — sometimes I add a touch more cumin or a squeeze of lime juice here. Let this cool for a few minutes before assembling.

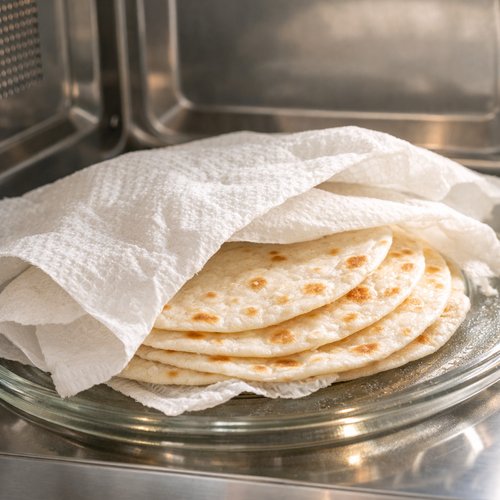
Step 5: Warm Your Tortillas
While your filling cools slightly, prepare your tortillas. You can do this a few ways — I usually wrap them in a slightly damp paper towel and microwave them for about 30 seconds, which keeps them soft and pliable. Alternatively, you can warm them directly over a gas flame for just a few seconds per side, or wrap them in foil and warm them in a 350°F oven for about 5 minutes. Warm tortillas are essential because they won’t tear when you roll them.
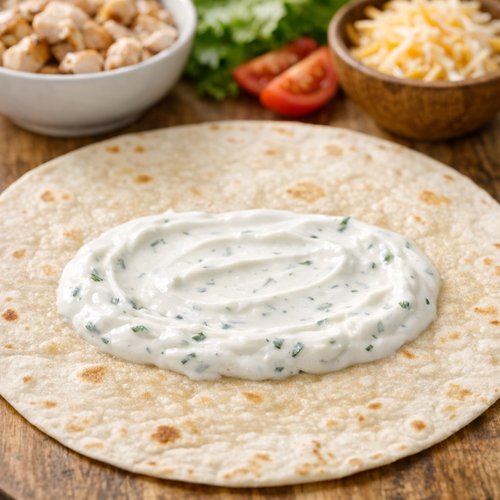
Step 6: Build Your Burritos
Lay out one warm tortilla on a flat surface. Spread about 2-3 tablespoons of your Greek yogurt sauce in the center of the tortilla, leaving about 2 inches on all sides. Add about ¾ cup of your chicken and vegetable filling on top of the sauce. Sprinkle with about 2-3 tablespoons of shredded cheddar cheese. Now here’s the rolling technique I use: fold the bottom of the tortilla up and over the filling, then fold in the left and right sides, and finally roll the top down tightly. Roll firmly but not so tight that the tortilla tears. Place seam-side down on a serving plate. Repeat with remaining tortillas.
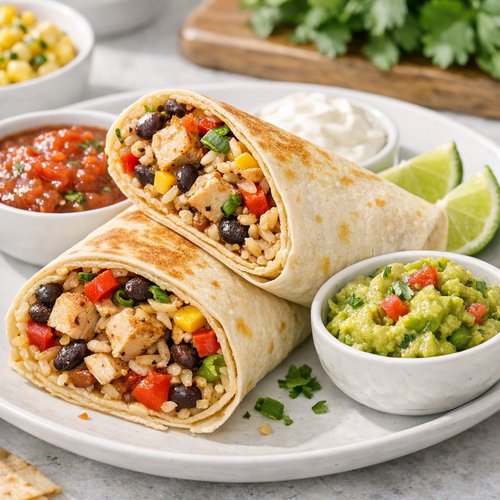
Step 7: Serve and Enjoy
These are best served warm, right after you’ve made them. You can serve them whole, or if you prefer, cut them in half diagonally for a nice presentation. I like to place the seam-side down on the plate so it looks finished and professional. Some people like to add extra toppings like fresh cilantro, additional cheese, or a dollop of Greek yogurt on the side. That’s totally your call.
Dietitian’s Nutritional Tip
Here’s something important I want you to know from my background as a registered dietitian: the combination of chicken protein with black bean fiber and Greek yogurt probiotics creates a trifecta for digestive health and stable blood sugar. The protein takes about 3-4 hours to digest, the fiber from beans slows glucose absorption, and the probiotics in Greek yogurt support your gut microbiome. This means you’re not just eating a delicious meal — you’re supporting your body’s actual function. That’s why these burritos keep you satisfied for hours instead of leaving you hungry an hour later.
Tips and Tricks
- Don’t skip the draining step – Thoroughly drain your canned beans and tomatoes. Excess liquid makes soggy burritos, and soggy burritos fall apart. Trust me on this one.
- Cut chicken into consistent sizes – The more uniform your chicken pieces, the faster and more evenly they cook. Aim for ¼ to ½ inch cubes.
- Warm tortillas before rolling – Cold tortillas tear. Warm ones bend beautifully. It’s a small step that makes a huge difference.
- Make your sauce ahead – The Greek yogurt sauce actually tastes better if you make it 30 minutes to a few hours before you need it, allowing flavors to meld.
- Season aggressively – Don’t be shy with your spices. Taste as you go and adjust. Bland burritos are sad burritos.
- Use a skillet large enough – Crowding your skillet means the chicken steams instead of sears. A 12-inch skillet is ideal.
- Let the filling cool slightly – If your filling is too hot when you add the sauce and cheese, it’ll make everything watery. Give it 3-5 minutes.
Make-Ahead Guide
One of my favorite things about these burritos is how well they work for meal prep. Here’s exactly how I do it in my own kitchen:
Prepare the filling 1-2 days ahead: Make the entire chicken, vegetable, and bean mixture exactly as directed. Let it cool completely, then transfer it to an airtight container. Store it in the refrigerator for up to 2 days. When you’re ready to eat, gently reheat it in a skillet over medium heat for about 5 minutes, stirring occasionally, until it’s warm throughout.
Make the sauce up to 3 days ahead: The Greek yogurt sauce keeps beautifully in the refrigerator in a sealed container. In fact, it tastes better after the flavors have had time to develop.
Assemble and refrigerate: If you want to wrap the burritos ahead of time, go right ahead. Wrap each burrito tightly in plastic wrap or foil and refrigerate for up to 24 hours. When you’re ready to eat, you can either eat them cold (they’re actually good that way in summer), reheat them in the microwave for 1-2 minutes, or warm them in a skillet for about 2 minutes per side for crispy edges.
Freeze for later: These burritos freeze beautifully for up to 3 months. Wrap each one individually in plastic wrap, then place them in a freezer bag. To reheat from frozen, wrap in a damp paper towel and microwave for 4-5 minutes, or warm slowly in a 350°F oven for about 15-20 minutes.
Common Mistakes to Avoid
Mistake 1: Overstuffing the burrito – I see this all the time. People pile in too much filling, and then the burrito either won’t roll properly or it bursts open when you try to eat it. Stick to about ¾ cup of filling per burrito, plus a little sauce and cheese. That’s the sweet spot.
Mistake 2: Not draining canned ingredients thoroughly – This creates soggy burritos that fall apart. Put your drained beans and tomatoes in a fine mesh strainer and let them sit for a minute. Even better, pat them dry with a paper towel.
Mistake 3: Using cold or room-temperature tortillas – Cold tortillas crack and tear. Warm tortillas bend and roll beautifully. This is non-negotiable.
Mistake 4: Rolling too loosely – If you roll too loosely, everything falls out when you bite into it. If you roll too tightly, the tortilla might tear. Aim for firm but gentle — like you’re cradling something precious but wrapping it securely.
Seasonal Variations
Spring/Summer Version: Add fresh corn (about ½ cup) along with the peppers, and stir in fresh cilantro at the end. Use lime juice instead of honey in the sauce for brightness. The fresh corn adds sweetness that’s perfect for warm months.
Fall/Winter Version: Roast diced butternut squash and add it to your filling along with the peppers. Add a pinch of cinnamon to your spice blend and use the full amount of cayenne pepper for warming heat. It shifts the flavor profile to feel more seasonal.
Spicy Lover’s Version: Use the maximum cayenne in both the filling and sauce, add fresh jalapeños (about 2 tablespoons diced) to the filling, and consider adding a tablespoon of hot sauce to the sauce base.
Can I Store High Protein Chicken Burrito?
Absolutely, and that’s one of the best things about this recipe. Here’s exactly how I store them:
Refrigerator storage: Wrapped burritos last about 24 hours in the refrigerator when stored in an airtight container or wrapped tightly in plastic wrap. After that, the tortilla can get a bit soft and the filling can develop off-flavors. The filling on its own keeps for up to 2 days in an airtight container.
Freezer storage: These burritos are fantastic for freezing. Wrap each burrito individually in plastic wrap and then place them in a freezer bag, removing as much air as possible. They’ll stay fresh for up to 3 months. To reheat, wrap in a damp paper towel and microwave for 4-5 minutes, or unwrap and warm in a skillet over medium heat for 2-3 minutes per side for crispy edges.
Pro tip: I like to freeze them in individual portions so I can grab just one when I need it. It’s like having homemade burrito convenience without the preservatives.
Nutrition Information
Based on USDA nutrition data, here’s what each burrito provides when made as written (serves 6):
Each burrito contains approximately 340-380 calories, 30-35 grams of protein, 25-30 grams of carbohydrates, 12-15 grams of fat, and 6-7 grams of fiber. The sodium content is approximately 650-750 mg (if you rinse the canned beans and tomatoes well).
From a nutrition standpoint, what excites me most is the protein-to-calorie ratio. You’re getting substantial protein without excessive calories, making these ideal for anyone focused on body composition or simply wanting to stay satisfied longer. The fiber from the beans and vegetables supports digestive health, while the Greek yogurt provides probiotics and calcium.
If you need to reduce sodium further, use no-salt-added canned tomatoes and beans, and reduce or eliminate the ranch seasoning in the sauce.
What Can I Serve With High Protein Chicken Burrito?
These burritos are hearty enough to be a complete meal on their own, but if you want sides, here are some excellent options that complement rather than overshadow them:
- Simple green salad – A light salad with lime vinaigrette is refreshing alongside the burrito without adding heaviness.
- Pico de gallo – Fresh tomato, onion, cilantro, and lime juice add brightness and crunch.
- Steamed or roasted vegetables – Roasted zucchini or steamed broccoli adds nutrition without competing flavors.
- Mexican street corn salad – If you want something more substantial, a corn salad with lime and cotija cheese is delicious.
- Black bean soup – If you want a warm side, a simple black bean soup is perfect for sipping alongside.
- Fresh fruit – Mango or pineapple salsa brings tropical brightness, or serve fresh watermelon for something cooling.
- Tortilla chips with salsa or guacamole – Keep it light with just a small portion, as these are calorie-dense additions.
If you’re looking for other main dishes in a similar style, try my my oven-baked chicken for a different take on chicken, or explore Bean And Quinoa Recipe for a vegetarian alternative.
Substitutes
- Ground turkey or ground chicken – If you prefer ground meat, use 1 pound and brown it thoroughly. The texture will be different but equally delicious, and you might save a few minutes on prep.
- Pinto beans instead of black beans – Pinto beans have a creamier texture and slightly different flavor. They work beautifully in this recipe and are often cheaper.
- Corn tortillas instead of flour – If you need gluten-free, corn tortillas work, though they’re more fragile. Warm them extra carefully and you might need to double-wrap to prevent tearing.
- Sour cream instead of Greek yogurt – Regular sour cream works, though it’s higher in fat and lower in protein. Use about ¾ cup instead of 1 cup since it’s denser.
- Cotija or feta cheese instead of cheddar – These give you a different flavor profile. Cotija is more traditional; feta is tangier. Use the same amount.
- Rotisserie chicken – Short on time? Shred a rotisserie chicken (about 2 cups) and warm it with your spices instead of cooking raw chicken. It cuts your prep time significantly.
- Different vegetables – Corn, zucchini, mushrooms, or yellow onions all work. Keep the total amount around 1.5 cups of vegetables.
- Spicy ranch sauce instead of plain – Add 1-2 teaspoons of hot sauce or sriracha to the Greek yogurt sauce for a kick.
High Protein Chicken Burrito Recipe
Ingredients
Method
- Start with your sauce because it's the simplest part and can sit while you cook everything else. In a small bowl, combine 1 cup of plain Greek yogurt with 2 tablespoons of ranch dressing and 1 tablespoon of dry ranch seasoning. Add 1 tablespoon of honey or sugar — this is key because it balances the salty, savory elements. Stir in ½ teaspoon of smoked paprika and ½ to 1 teaspoon of cumin. Taste it and adjust the seasonings to your preference. If you want heat, add ½ to 1 teaspoon of cayenne pepper. The sauce should taste creamy, slightly tangy, and flavorful. Set this aside in the refrigerator.

- Heat 1 teaspoon of olive oil in a large skillet over medium-high heat. Once it's shimmering, add your diced chicken (about 18 ounces total). You want the chicken in a single layer so it browns nicely rather than steaming. Let it cook undisturbed for about 3-4 minutes until the bottom is golden. Stir and cook for another 4-5 minutes until the chicken is cooked through and no longer pink in the center. This should take about 7-9 minutes total.

- Now add your diced onion and both the red and green bell peppers to the chicken. Stir well and let everything cook together for about 3-4 minutes, just until the vegetables soften slightly but still have some texture. You're looking for them to be warm and fragrant but not mushy. This is where your dish really comes alive. Sprinkle in the chili powder, cumin, garlic powder, smoked paprika, and cayenne pepper if you're using it. Add salt and pepper to taste. Stir everything together so the spices coat everything evenly. Cook for about 1 minute until you can really smell those spices blooming.
- Add your drained black beans and drained diced tomatoes with chilies to the skillet. Stir everything together gently and let it warm through for about 2-3 minutes. Don't over-stir at this point because you want to keep the beans and tomato pieces somewhat intact. The mixture should look colorful, aromatic, and delicious. Taste it one more time and adjust your seasonings if needed — sometimes I add a touch more cumin or a squeeze of lime juice here. Let this cool for a few minutes before assembling.

- While your filling cools slightly, prepare your tortillas. You can do this a few ways — I usually wrap them in a slightly damp paper towel and microwave them for about 30 seconds, which keeps them soft and pliable. Alternatively, you can warm them directly over a gas flame for just a few seconds per side, or wrap them in foil and warm them in a 350°F oven for about 5 minutes. Warm tortillas are essential because they won't tear when you roll them.

- Lay out one warm tortilla on a flat surface. Spread about 2-3 tablespoons of your Greek yogurt sauce in the center of the tortilla, leaving about 2 inches on all sides. Add about ¾ cup of your chicken and vegetable filling on top of the sauce. Sprinkle with about 2-3 tablespoons of shredded cheddar cheese. Now here's the rolling technique I use: fold the bottom of the tortilla up and over the filling, then fold in the left and right sides, and finally roll the top down tightly. Roll firmly but not so tight that the tortilla tears. Place seam-side down on a serving plate. Repeat with remaining tortillas.

- These are best served warm, right after you've made them. You can serve them whole, or if you prefer, cut them in half diagonally for a nice presentation. I like to place the seam-side down on the plate so it looks finished and professional. Some people like to add extra toppings like fresh cilantro, additional cheese, or a dollop of Greek yogurt on the side. That's totally your call.

Nutrition
Notes
Tried this recipe?
Let us know how it was!FAQs
Can I make these burritos without the Greek yogurt sauce?
You absolutely can. The sauce adds creaminess and flavor, but if you don’t have Greek yogurt on hand, you can simply use 3-4 tablespoons of regular sour cream mixed with 1 tablespoon of ranch dressing mix, or even just spread some regular sour cream or mayonnaise on the tortilla. You’ll lose some of the nutritional benefit and probiotic content, but the burrito will still be delicious. Some people also use a thin spread of cream cheese or even salsa as a moisture component.
Is this recipe spicy?
Not inherently, no. The base recipe has chili powder and smoked paprika, which add flavor without heat. The optional cayenne pepper is what brings spice. If you’re cooking for a family with different heat preferences, I recommend leaving the cayenne out of the main filling and sauce, then letting people add their own hot sauce or extra cayenne pepper to taste. You could also prepare the cayenne separately and swirl it into just your portion of sauce.
How do I prevent my burrito from falling apart?
The key is three-fold: first, use warm tortillas (not cold); second, don’t overstuff (¾ cup filling per burrito is perfect); and third, roll firmly but gently, folding the sides in first, then rolling the top down tightly. Place the seam-side down on your plate. If you’re concerned, you can also wrap the finished burrito in foil for a few minutes to help set the shape. Additionally, avoid adding too much sauce, which creates moisture that weakens the tortilla.
Can I use chicken thighs instead of breasts?
Yes, absolutely. Chicken thighs are actually more forgiving because they stay moist and tender even if slightly overcooked. They have more fat, so the final burrito will be slightly richer, but the flavor might actually be better. One pound of thighs will yield about the same amount of meat as chicken breasts. The cooking time is the same, though thighs might need an extra 1-2 minutes to cook through completely. Make sure there’s no pink near the bone.
What’s the best way to meal prep these?
I recommend making the filling and sauce separately, then assembling when you’re ready to eat. Store the filling in one container and the sauce in another for up to 2 days. This prevents the tortilla from getting soggy. When you want to eat, warm the filling gently, assemble your burrito, and enjoy. If you absolutely must assemble them ahead, wrap them individually and eat within 24 hours. For longer storage, assemble, wrap well, and freeze for up to 3 months, then reheat as needed.
How many grams of protein are in each burrito?
Each burrito provides approximately 30-35 grams of protein, depending on whether you use chicken breast or thighs, and how much filling you use. The bulk comes from the chicken (about 24-28 grams per 3 ounces), with additional protein from the Greek yogurt (about 3 grams), black beans (about 3 grams), and cheese (about 2-3 grams). This makes it an excellent choice for post-workout meals or anyone tracking protein intake for fitness goals.
More Recipes You’ll Love
- BBQ Chicken Baked In Oven recipe – A classic preparation that’s equally quick and family-friendly, with endless serving options.
- Bean And Quinoa Recipe – If you want to swap the chicken for plant-based protein, this combines beans and quinoa for complete protein.
- Bean Rice Cheese Burrito Recipe – A vegetarian take on the burrito concept with similar flavors and structure.
I hope you make these burritos soon and love them as much as my family does. They’re proof that healthy eating doesn’t mean boring eating — it means being intentional about ingredients and flavors. Whether you’re meal prepping for the week, cooking for your family, or just looking for a satisfying lunch option, these burritos deliver on taste and nutrition. Feel free to adapt them based on what you have on hand or what you’re craving. Cooking is flexible, and the best recipe is one you’ll actually make. Happy cooking!