I’ve always believed that breakfast doesn’t have to be complicated to be satisfying. A slice of quiche hits differently when you’re feeding a crowd—or just feeding yourself well on a busy morning. This broccoli quiche with Bisquick is one of those recipes I come back to because it’s forgiving, flexible, and honestly tastes like you spent way more time on it than you actually did.
If you’re looking for more substantial breakfast options, you might also enjoy my these fresh muffins, which offers similar nutritional benefits in a portable format. And for lunch or dinner serving, it pairs beautifully with something light like Baked Fries Recipe.
Why I Keep Making This Quiche Every Single Month
My New Hampshire kitchen gets chilly in fall, and there’s something about a warm slice of quiche with coffee that just feels right. I remember the first time I made this recipe—my daughter was home from college for a weekend, and I wanted something that felt special but wouldn’t keep me in the kitchen all morning.
The magic happened when I realized the Bisquick does double duty here. It creates a light, almost biscuit-like base that’s nothing like traditional quiches, and it means you skip the fussy pie crust entirely. No rolling, no blind baking, no stress. Twenty minutes of actual work, and you’ve got something impressive.

What is Broccoli Quiche With Bisquick Recipe?
A quiche is a savory custard-based tart, but this version uses Bisquick as the foundation instead of traditional pastry. It’s a New England approach to an old classic—practical, straightforward, and honest. The Bisquick creates a tender crumb that sits between a bread and a crust, while fresh broccoli, ham, and two types of cheese make every bite satisfying.
This isn’t some fancy French affair. It’s comfort food that happens to be nutritious, thanks to all those vegetables and protein-rich eggs. The beauty is in the simplicity and in how the flavors come together without pretension. It’s the kind of dish you’d find at a community potluck or a weekend brunch with people you actually like.
Why You’ll Love This Broccoli Quiche With Bisquick Recipe
- It’s genuinely fast to prepare – Start to finish, including baking, takes just over an hour. Most of that is hands-off oven time. You’re actually working for maybe 15 minutes tops.
- No special equipment needed – A 9×13 baking dish and a mixing bowl. That’s it. No pie tin, no food processor, no special pans.
- Packed with protein and vegetables – One slice gives you eggs, cheese, ham, and broccoli. That’s substantial nutrition that actually tastes good.
- Makes enough to feed a family or last several meals – This cuts into 8 generous servings, making it budget-friendly and practical for meal prep.
- Naturally gluten-friendly with one substitution – Swap regular Bisquick for the gluten-free version and you’re set.
- Freezes beautifully – Make it ahead, slice it, freeze it, and reheat for quick breakfasts or lunches throughout the month.
The Ingredients
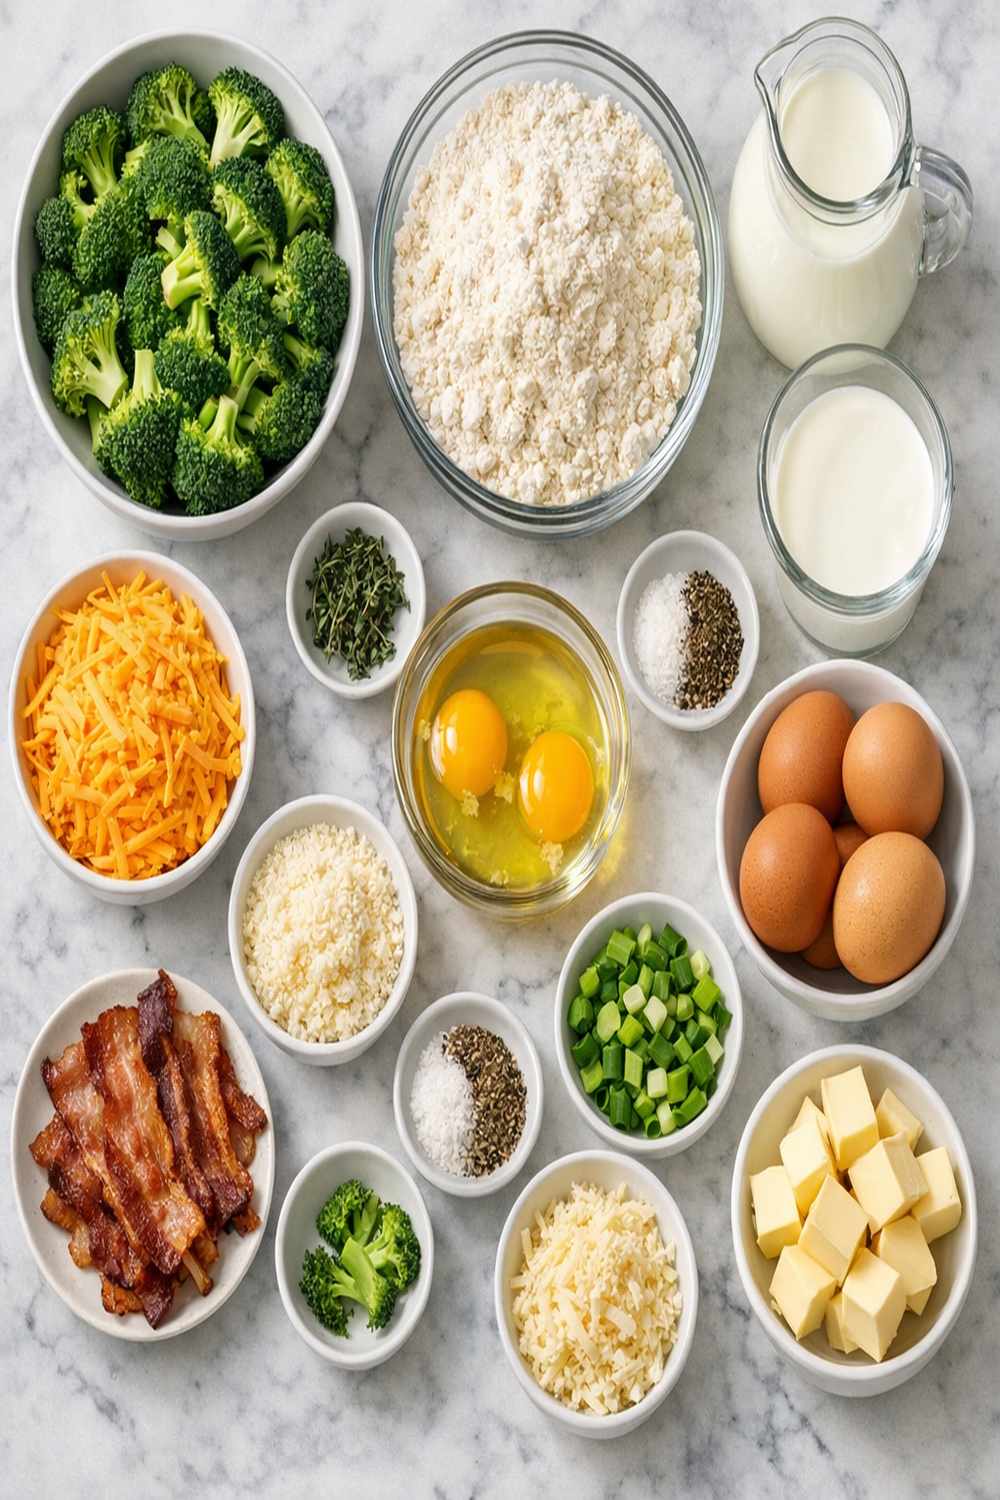
I’m sharing the exact amounts I use, but here’s a dietitian tip: these ingredients are flexible friends. The total makes 8 substantial servings, perfect for Sunday meal prep or feeding a household of hungry people. Every component serves a purpose, from the butter that enriches the custard to the broccoli that adds nutrition and texture.
- 1 cup sharp Cheddar cheese (freshly shredded, not pre-shredded if possible)
- 1 cup fresh broccoli (finely chopped into bite-sized florets)
- 3 large eggs (room temperature helps them blend smoothly into the custard)
- 1 cup ham (diced into small, even pieces for distribution)
- ½ cup American cheese (adds smoothness and helps it meld together)
- 2 tablespoons unsalted butter (melted and slightly cooled)
- ½ teaspoon sea salt (adjust to taste based on your ham saltiness)
- 1½ cups whole milk (2% works fine, but whole milk creates the creamiest texture)
- ½ cup Bisquick biscuit mix (all-purpose works best)
- ¼ teaspoon freshly ground black pepper (brightens all the flavors)
- ¼ teaspoon garlic powder (optional but really nice for depth)
How to Make Broccoli Quiche With Bisquick?
This is where the recipe lives up to its promise of simplicity. You’re essentially making a quick batter, folding in your fillings, and letting the oven do the heavy lifting. I like to have everything prepped and within arm’s reach—it makes the process feel smooth and organized.
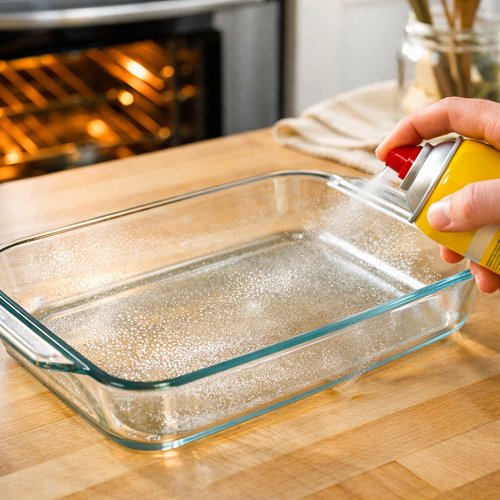
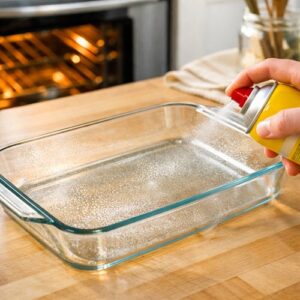
Step 1: Heat Your Oven and Prepare Your Pan
Start by preheating your oven to 350 degrees Fahrenheit. While it’s warming up, lightly grease your 9×13-inch baking dish with butter or cooking spray. I use a silicone brush with soft butter—it goes on evenly and prevents any sticking. Get every corner and the sides. This step matters more than you’d think.
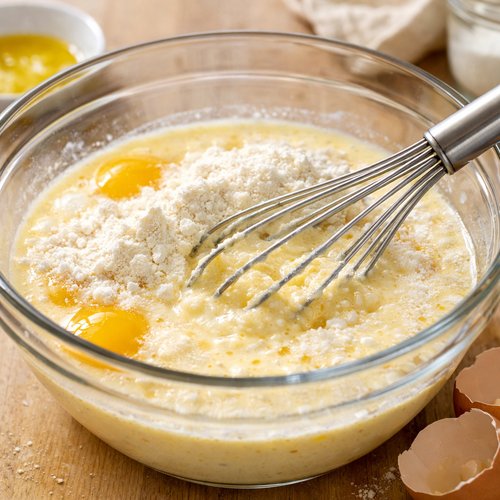
Step 2: Blend Your Wet Ingredients and Bisquick
Pour the milk, melted butter, and eggs into a medium mixing bowl. Add the Bisquick and salt. Using a whisk or fork, blend everything together until the mixture is smooth and fairly uniform. You want to break up any lumps of Bisquick, but don’t overbeat. A few tiny lumps are actually fine—they’ll disappear in the oven. The batter should look like thick pancake batter.
Step 3: Add Your Fillings
Now stir in the diced ham, chopped broccoli, Cheddar cheese, American cheese, black pepper, and garlic powder if using. Fold gently until everything is distributed throughout the batter. The mixture will look chunky and textured, which is exactly what you want. Every bite should have something interesting happening.

Step 4: Pour and Spread
Carefully pour the entire mixture into your prepared baking dish. Use a rubber spatula to spread it evenly. Don’t obsess over perfection here—it’ll level out as it bakes. Just make sure nothing is piled too high in one corner.

Step 5: Bake Until Golden
Slide the dish into your preheated oven and bake for 40 to 45 minutes. You’re looking for a golden-brown top and a center that’s set but still has a tiny bit of jiggle—not raw, but not completely firm. A toothpick inserted in the center should come out clean or with just a tiny bit of custard clinging to it. The edges will pull slightly away from the pan when it’s done.
Let it rest in the pan for 5 to 10 minutes before slicing. This makes it much easier to cut clean pieces without everything falling apart. It also lets the custard set up just a bit more.

Expert’s Nutritional Tip
Here’s something I always tell my clients: the combination of eggs and broccoli in this quiche is nutritionally stellar. Eggs provide choline, which supports brain health and memory. Broccoli offers sulforaphane, a compound with anti-inflammatory properties. Together with the cheese providing calcium, one slice of this quiche is giving you real, functional nutrition—not just calories. This is why I feel completely comfortable serving it for any meal, not just breakfast.
Tips and Tricks
- Use fresh broccoli, not frozen – Frozen broccoli releases moisture as it thaws, which can make your quiche watery. If you must use frozen, thaw it completely and squeeze out excess moisture in a clean kitchen towel.
- Don’t skip the resting time – Those 5 to 10 minutes matter. They let the custard set enough to hold together when you cut it. Slice too early and you’ll have delicious mush.
- Shred your own cheese – I know it takes an extra minute, but pre-shredded cheese has anti-caking agents that prevent it from melting as smoothly. Fresh-shredded creates a better texture.
- Taste as you go – Different hams vary in saltiness. Taste your batter before baking and adjust salt if needed. Better to catch this now than have an oversalted quiche.
- Bring eggs to room temperature – This helps them blend more smoothly and evenly into the custard base.
- Don’t overbake – A slightly underbaked center is actually better than an overbaked one. It stays moist as it cools and firms up completely within an hour.
Make-Ahead Guide
This quiche is one of my favorite recipes for advance meal prep. Here’s my professional approach: prepare the entire mixture up to the pouring step the night before. Mix all wet ingredients, fold in fillings, cover with plastic wrap, and refrigerate. The next morning, let it sit on the counter for 15 minutes to take the edge off the cold, then pour into your baking dish and bake as directed. You might need 5 to 10 extra minutes in the oven since you’re starting from cold.
Alternatively, bake it completely, cool it entirely, wrap it tightly in plastic wrap and then foil, and freeze for up to 3 months. Thaw in the refrigerator overnight, then reheat individual slices in a 325-degree oven for 10 to 12 minutes until warmed through. This approach works beautifully for grab-and-go breakfasts throughout your busy month.
Common Mistakes to Avoid
- Overmixing the batter – It’s tempting to beat everything together perfectly, but overmixing develops gluten in the Bisquick and makes the quiche tough instead of tender. Mix just until combined, then stop.
- Using too much liquid filling – If you add watery vegetables or forget to drain frozen broccoli, your quiche becomes soupy. Keep fillings relatively dry, and squeeze moisture out of any vegetables before adding.
- Skipping the oven temperature check – Every oven is different. A 350-degree setting is just a starting point. Use the visual and toothpick tests, not just the timer. Some ovens run hot.
- Not greasing the pan adequately – Even though Bisquick quiches aren’t as delicate as traditional ones, an ungreased pan will stick. Use butter, not just a quick spray.
Seasonal Variations
I love adapting this recipe through the seasons. In spring, replace some broccoli with fresh asparagus and add a handful of fresh herbs like dill or tarragon. Summer calls for corn kernels and roasted red peppers instead of ham—add crispy bacon bits for smokiness. Fall is when I keep it traditional but add fresh sage and use sharp Vermont Cheddar. Winter is perfect for the classic ham and broccoli, but I sometimes add sliced mushrooms for earthiness.
Each variation keeps the base the same—3 eggs, milk, Bisquick, and cheese—and simply switches the additions. The quiche adapts beautifully to whatever’s at your farmers market.
Can I Store Broccoli Quiche With Bisquick Recipe?
Absolutely, and this is one of its best features for busy people. Keep your baked quiche covered in the refrigerator for up to 4 days. Reheat individual slices in a 325-degree oven for 10 minutes, or microwave for 60 to 90 seconds if you’re in a rush (the texture stays better in the oven, but microwave works in a pinch).
For freezing, wrap completely baked and cooled quiche tightly in plastic wrap, then add a layer of foil. It keeps for up to 3 months frozen. Thaw overnight in the refrigerator, then reheat as above. You can also freeze individual slices wrapped separately, which is my favorite approach for quick breakfasts.
Leftovers are honestly just as good cold. I eat them straight from the fridge, or slice them and add to a quick salad with some vinaigrette.
Nutrition Information
Per serving (based on 8 servings from one 9×13 pan), this quiche provides approximately 280 calories, 18g protein, 16g fat, and 12g carbohydrates. The USDA database confirms that eggs are one of the most protein-dense foods available, and when you combine them with cheese and ham, you’re creating a meal that keeps you satisfied for hours.
The broccoli contributes fiber (about 2g per serving), which supports digestive health and helps with satiety. The combination of protein and fat makes this quiche genuinely satiating—one slice with coffee keeps me full well past noon. This is real food doing real work in your body, not empty calories.
What Can I Serve With Broccoli Quiche With Bisquick Recipe?
This quiche is satisfying on its own, but pairing it with complementary sides makes a complete meal. For breakfast or brunch, I serve it with fresh fruit and a simple green salad. For lunch or light dinner, consider adding something with good texture and nutrition alongside.
- A simple arugula salad with lemon vinaigrette – The peppery greens and bright acid cut through the richness of the quiche perfectly.
- Roasted vegetables – Brussels sprouts or cherry tomatoes roasted with olive oil and garlic make a beautiful side.
- Fresh fruit – Sliced melon, berries, or stone fruit feel light and complete the meal nutritionally.
- Whole grain toast or bread – If you want something more substantial, toasted whole grain bread with a little butter is lovely.
- A piece of fish for added nutrition – If you’re looking for extra omega-3s, try pairing it with Ahi Tuna Marinade Recipe or Baked Haddock With Ritz Crackers Recipe for a more substantial meal.
Substitutes
- Different vegetables for broccoli – Cauliflower, spinach, mushrooms, or zucchini work beautifully. Keep quantities roughly the same, and if using watery vegetables like mushrooms, cook them first to release moisture.
- Different meats for ham – Cooked bacon, sausage, or prosciutto all work. You could even skip meat entirely and add more vegetables and cheese for a vegetarian version.
- Different cheeses – Swiss, Gruyère, or Monterey Jack all work. I sometimes use all sharp Cheddar, or swap in a little smoked Gouda for complexity. Just keep one mild and one sharper for balance.
- Gluten-free Bisquick for regular – Works perfectly with no other adjustments needed.
- Cream or half-and-half for milk – Makes it richer and more indulgent, though less nutritionally balanced. I sometimes use half milk and half cream for a middle ground.
- Greek yogurt mixed with milk – Creates a tangier, higher-protein version. Use ¾ cup milk and ¾ cup Greek yogurt (plain, unsweetened).
Broccoli Quiche With Bisquick Recipe
Ingredients
Method
- Start by preheating your oven to 350 degrees Fahrenheit. While it's warming up, lightly grease your 9x13-inch baking dish with butter or cooking spray. I use a silicone brush with soft butter—it goes on evenly and prevents any sticking. Get every corner and the sides. This step matters more than you'd think.
- Pour the milk, melted butter, and eggs into a medium mixing bowl. Add the Bisquick and salt. Using a whisk or fork, blend everything together until the mixture is smooth and fairly uniform. You want to break up any lumps of Bisquick, but don't overbeat. A few tiny lumps are actually fine—they'll disappear in the oven. The batter should look like thick pancake batter.

- Now stir in the diced ham, chopped broccoli, Cheddar cheese, American cheese, black pepper, and garlic powder if using. Fold gently until everything is distributed throughout the batter. The mixture will look chunky and textured, which is exactly what you want. Every bite should have something interesting happening.

- Carefully pour the entire mixture into your prepared baking dish. Use a rubber spatula to spread it evenly. Don't obsess over perfection here—it'll level out as it bakes. Just make sure nothing is piled too high in one corner.

- Slide the dish into your preheated oven and bake for 40 to 45 minutes. You're looking for a golden-brown top and a center that's set but still has a tiny bit of jiggle—not raw, but not completely firm. A toothpick inserted in the center should come out clean or with just a tiny bit of custard clinging to it. The edges will pull slightly away from the pan when it's done. Let it rest in the pan for 5 to 10 minutes before slicing. This makes it much easier to cut clean pieces without everything falling apart. It also lets the custard set up just a bit more.

Nutrition
Notes
Tried this recipe?
Let us know how it was!FAQs
Can I make this quiche without ham?
Absolutely. Simply omit it and add more vegetables, nuts, or extra cheese. I’ve made vegetarian versions with spinach, mushrooms, and sun-dried tomatoes that are equally delicious. You might want to add ½ teaspoon of garlic powder and fresh herbs to boost flavor since you’re losing the salt and richness of the ham. The nutritional profile changes slightly—less protein, but still substantial from the eggs and cheese.
Why is my quiche watery or runny in the middle?
Usually this means either underbaking or too much liquid in your fillings. Always use the toothpick test—insert it in the very center, and it should come out clean or with just a tiny bit of custard. If you used frozen broccoli without draining it well, that’s likely your culprit. For future batches, make sure to squeeze moisture out of any thawed vegetables. Some ovens also run cool, so you might need 5 to 10 extra minutes than the recipe suggests.
Can I use powdered milk or non-dairy milk alternatives?
Regular dairy milk works best for texture and flavor, but you can use unsweetened non-dairy options like oat or almond milk. Avoid very thin options like rice milk. Powdered milk would work if reconstituted properly, but regular fresh milk is easier and creates better results. The fat in dairy milk is what creates that creamy, custard-like texture.
What if I don’t have American cheese?
American cheese adds smoothness and helps everything blend together, but you can replace it with an equal amount of Cheddar, Gruyère, or even a soft cheese like cream cheese whisked into the milk. If using cream cheese, soften it first and whisk it smooth into the milk before adding eggs. The texture might be slightly different, but still delicious.
How do I know when it’s perfectly done?
Watch for three signs: the top should be golden brown (not pale), the edges should pull slightly away from the pan, and a toothpick inserted in the very center should come out clean or with just a tiny bit of wet custard (not runny liquid). It’ll continue cooking slightly after you remove it, so it’s okay if the absolute center still jiggles just a touch. Let it rest for 5 to 10 minutes to firm up completely.
More Recipes You’ll Love
- Healthy Breakfast Egg Muffins Recipe – portable, make-ahead breakfast bites with similar nutrition
- High Protein Chicken Burrito Recipe – another hearty, protein-rich option for meal prep
- Overnight Steel Cut Oats – for mornings when you want something warmer and more wholesome
This quiche has become my go-to answer when someone asks me what I’m making for brunch or how to meal prep for the week. It’s approachable, forgiving, genuinely nutritious, and honestly delicious. The fact that it tastes special but doesn’t require special skills—that’s the real magic here.
Make this soon, slice it generously, and know that you’re giving your family real, wholesome food. And have fun with the variations once you master the base. Your kitchen, your preferences, your flexibility. That’s how good cooking happens. Happy cooking!