I absolutely love serving baked BBQ chicken thighs on busy weeknights when I need something that tastes like I’ve been cooking all day, but honestly took me less than an hour. The beauty of this recipe is that it works beautifully alongside so many sides. I’ll often pair it with a bean rice cheese burrito for the kids or a hearty bean and quinoa dish for a more protein-packed meal. Chicken thighs are honestly my secret weapon—they’re forgiving, flavorful, and way harder to dry out than breasts.
Why I’m Obsessed With This Simple Oven Recipe
It was a Saturday afternoon in late May when my neighbor stopped by with her three kids just as I was prepping dinner. I had nothing fancy planned, just some chicken thighs and a bottle of BBQ sauce in my pantry. I threw them in the oven with a simple technique my mom taught me years ago, and within 45 minutes, those kids were asking for seconds.
That’s when I realized something important: the best recipes aren’t always the most complicated ones. They’re the ones that deliver real results with ingredients you actually have on hand. This baked BBQ chicken thighs recipe is exactly that. It’s straightforward, it works every single time, and it makes your kitchen smell absolutely incredible.
What is Baked BBQ Chicken Thighs Recipe?
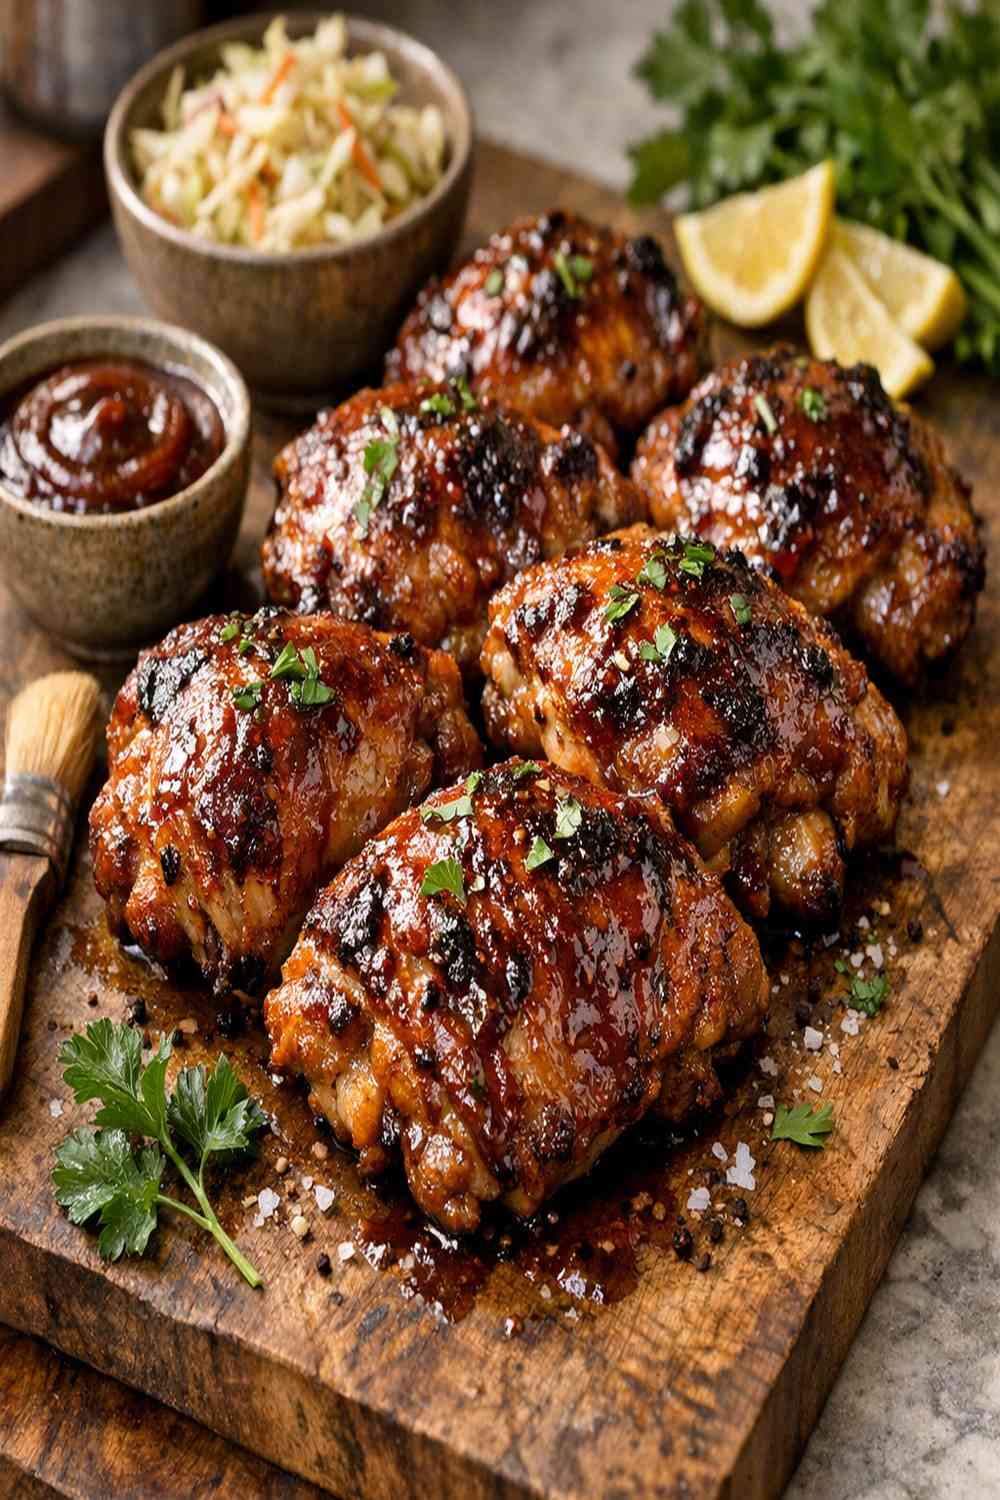
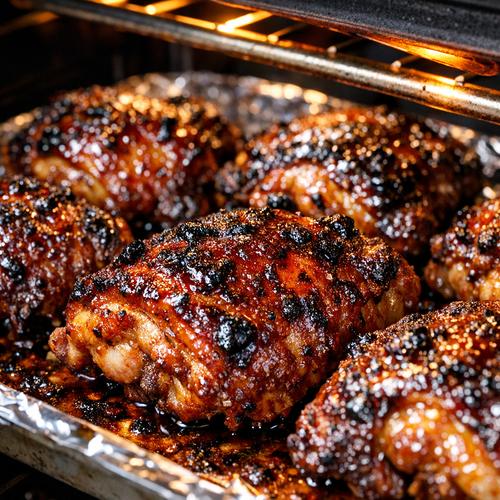
Baked BBQ chicken thighs are boneless or bone-in chicken thighs coated in your favorite barbecue sauce and finished in the oven until the skin is crispy and caramelized. The real magic happens when you baste the chicken multiple times during cooking—each layer of sauce creates a beautiful glaze that gets stickier and more flavorful with each pass.
This dish has roots in American comfort food, but honestly, every region and family seems to have their own twist on it. What I love about this particular method is that it respects the chicken. You’re not drowning it or cooking it too fast. You’re building flavors gradually and letting the skin do what it does best: get golden and crispy.
The technique involves starting at a lower temperature to cook the chicken through, then raising the heat and basting with sauce to build those caramelized edges. If you want extra crispness, you can finish it under the broiler for a few minutes. It’s restaurant-quality without the fuss.
Why You’ll Love This Baked BBQ Chicken Thighs Recipe
- It’s foolproof and forgiving – Dark meat is naturally more forgiving than white meat, so you don’t have to stress about drying it out. Even if you add a few extra minutes, it stays juicy.
- Minimal hands-on time – You’re mostly letting the oven do the work. The actual prep and basting takes just a few minutes total.
- Builds incredible flavor through layering – Each basting session adds another layer of sweet, smoky, caramelized goodness to the skin.
- Works with any BBQ sauce you love – Whether you’re a spicy mustard-based fan, a thick molasses lover, or a vinegar devotee, this recipe adapts beautifully.
- Budget-friendly and nutrient-dense – Chicken thighs are typically less expensive than breasts and pack more nutrients, including iron and B vitamins.
- Perfect for meal prep and leftovers – These reheat beautifully and are just as good cold the next day in salads or grain bowls.
The Ingredients
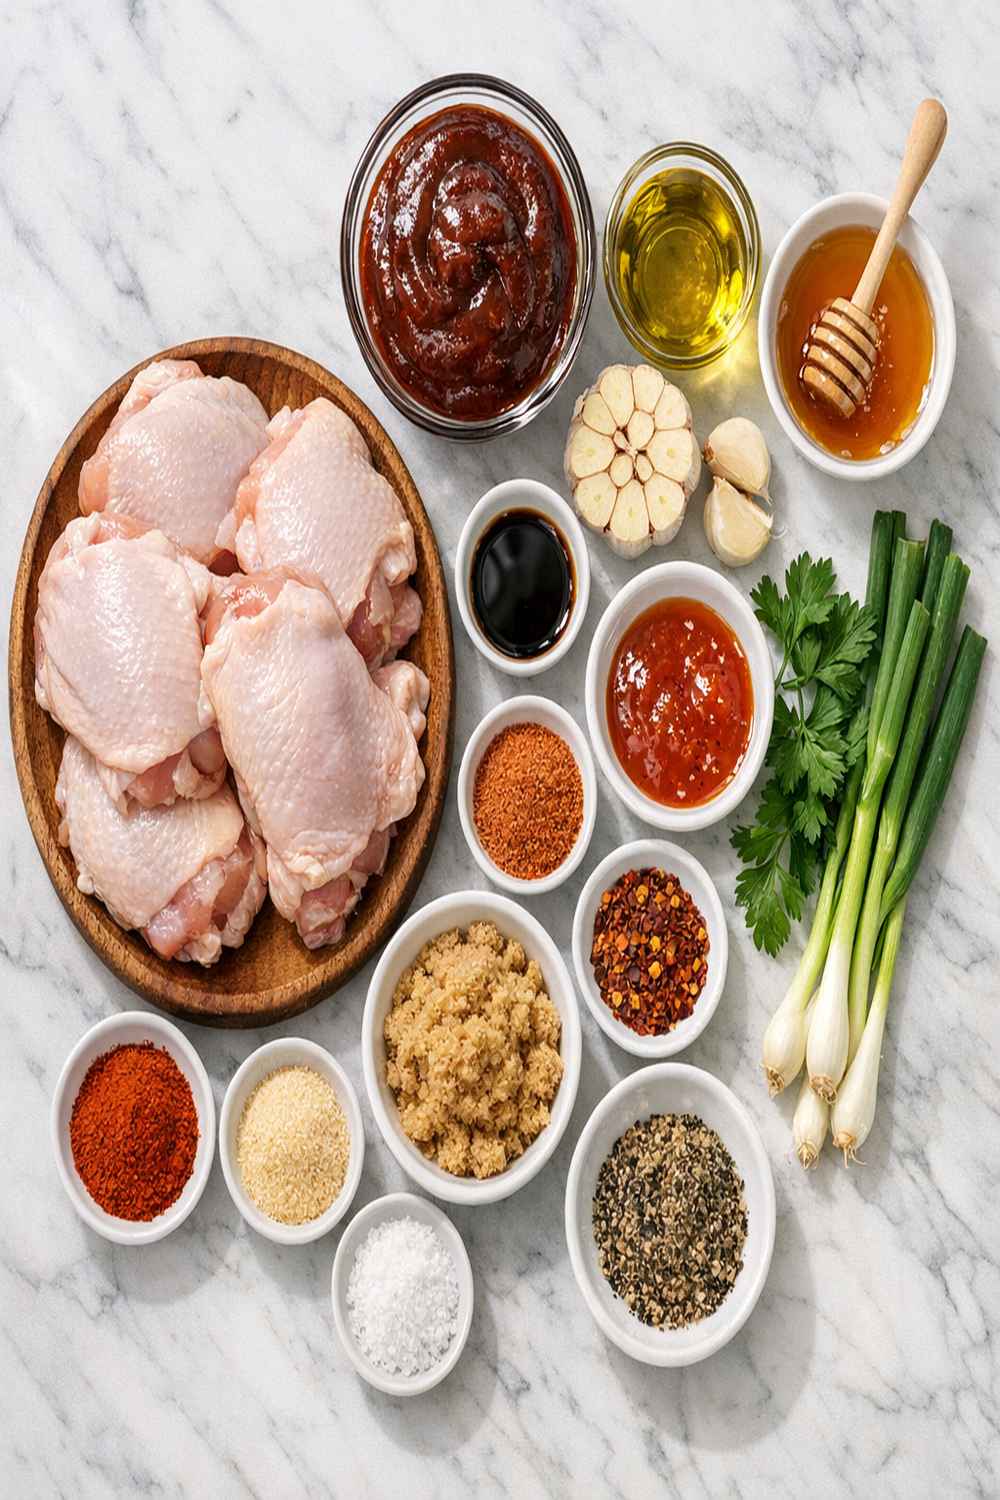
This recipe keeps things simple, which is exactly why it works so well. You’re not juggling a dozen ingredients or specialized pantry items. Just quality chicken, good oil, and sauce you already have at home. I’ve included a small amount of garlic powder and smoked paprika to deepen those BBQ flavors if you want to go that extra step, but they’re totally optional.
- ½ teaspoon smoked paprika (optional but highly recommended)
- 1 teaspoon kosher salt (or sea salt, divided for seasoning)
- 2 cups barbecue sauce (your favorite brand or homemade version)
- 8 to 10 chicken thighs or drumsticks (bone-in and skin-on works best for that crispy exterior)
- 2 tablespoons extra-virgin olive oil (or canola oil if that’s what you have)
- ½ teaspoon freshly ground black pepper (freshly cracked makes a real difference)
- ¼ teaspoon garlic powder (optional, enhances the savory depth)
This recipe serves 4 to 5 people as a main course, depending on appetites and what sides you’re serving alongside.
How to Make Baked BBQ Chicken Thighs?
I’m going to walk you through this step-by-step so you feel confident the entire way. The timing is important here, but it’s not complicated. Just read through everything first, and you’ll know exactly what to expect.
Step 1: Prep Your Oven and Chicken
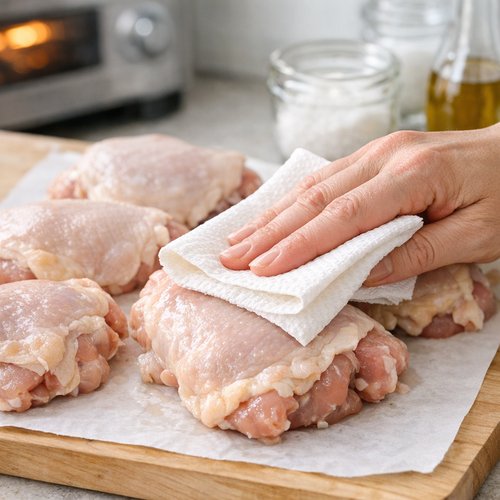
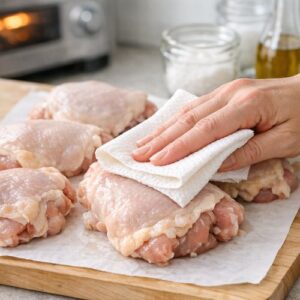
Start by preheating your oven to 400 degrees Fahrenheit. While that’s heating up, pat your chicken thighs completely dry with paper towels. This is not a step to skip—wet skin won’t crisp properly. Moisture is the enemy of crispiness.
In a small bowl, combine your salt, pepper, smoked paprika, and garlic powder (if using). Drizzle the olive oil all over both sides of the chicken, then generously sprinkle your seasoning mixture over everything. Make sure you’re coating the skin really well because that’s where all the flavor lives.
Step 2: Initial Bake at Lower Temperature
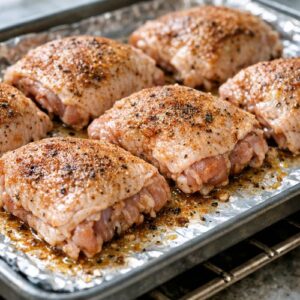
Place your seasoned chicken skin-side down on a rimmed baking sheet. This is important—you’re starting skin-side down to protect it during the initial cooking phase. Bake at 400 degrees for exactly 25 minutes. Don’t open the oven during this time. You want that heat to stay consistent.
After 25 minutes, your chicken should be mostly cooked through but not yet brown and crispy. The skin will look pale and slightly cooked. This is perfect. Don’t panic if it doesn’t look gorgeous yet—we’re building to that.

Step 3: Increase Heat and Begin Basting
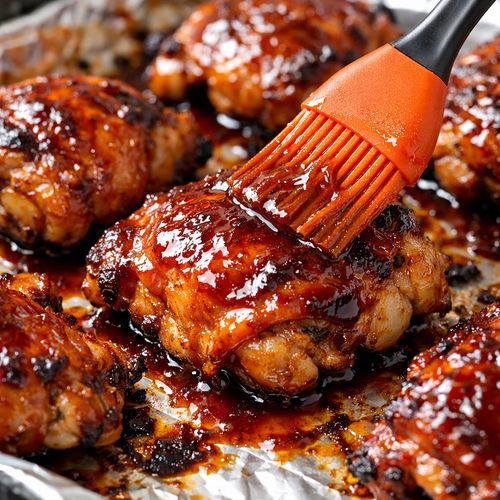
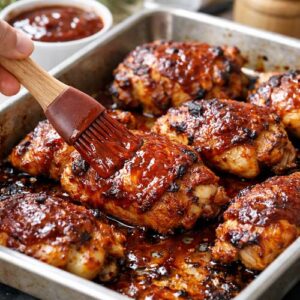
Remove the chicken from the oven and immediately increase your oven temperature to 425 degrees Fahrenheit. Close that oven door quickly so you don’t lose heat. Using a pastry brush or basting brush, generously coat the top of the chicken with your barbecue sauce.
Using a spatula (I prefer a thin metal one), carefully flip the chicken over so it’s now skin-side up. Be gentle here so you don’t tear that skin. Once it’s flipped, brush the other side generously with sauce as well. Place it back in the oven.

Step 4: The Triple Baste Method
This is where the magic happens. You’re going to bake for 7 minutes, then remove and baste again. Repeat this two more times. So you’ll have three total basting sessions with 7-minute intervals between each one. That’s 21 minutes of baking total in this phase.
Each time you remove the chicken, brush another generous layer of sauce on top. The sauce will start to caramelize and get sticky and dark. That’s exactly what you want. The sugars in the BBQ sauce are building layers of flavor and creating that beautiful mahogany color.
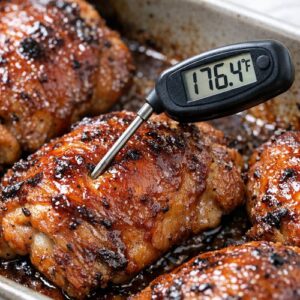
Step 5: Check Internal Temperature
After your third basting and bake (for a total of 46 minutes of cooking time), use a meat thermometer to check the thickest part of the thigh, away from the bone. The chicken is technically safe at 165 degrees Fahrenheit, but dark meat really shines at 180 to 190 degrees Fahrenheit. At that temperature, the connective tissue breaks down beautifully and the meat becomes incredibly juicy and tender.
If you’re not quite at temperature, put it back for another 5 to 7 minutes and check again. Better to take your time than to serve undercooked chicken.

Step 6: Optional Broil for Extra Crispiness
If the chicken looks a bit pale or you want extra crispy skin, move your oven rack to the highest position and broil for 3 to 5 minutes, watching closely so it doesn’t burn. You want deep golden brown, not charred. This step elevates it from good to restaurant-quality.
Step 7: Rest and Serve
Remove the chicken from the oven and let it rest on the baking sheet for about 5 minutes before serving. This allows the juices to redistribute throughout the meat. If you cut into it immediately, all those beautiful juices run right out onto the plate instead of staying in the chicken.
Transfer to a serving platter, spoon any pan drippings over the top, and serve immediately. Your family is going to be so impressed.

Expert’s Nutritional Tip
As a registered dietitian, I want to highlight something important about chicken thighs that gets overlooked: they’re nutritionally superior to chicken breasts in several ways. Yes, they have more fat, but that fat is where the flavor lives and it also helps your body absorb fat-soluble vitamins like vitamins A, D, E, and K. The dark meat contains significantly more iron and zinc than white meat—about three times as much iron, in fact.
The key is balance. Chicken thighs are fantastic, especially when you’re serving them with plenty of vegetables and whole grains. The BBQ sauce does add sugar, but if you’re using a quality sauce with reasonable portions (and you’re not drowning the chicken), it fits beautifully into a healthy eating pattern. I typically aim for sauces with less than 6 grams of sugar per tablespoon when I have options.
Tips and Tricks
- Pat the chicken completely dry – Moisture is your enemy when it comes to crispy skin. Take the extra 30 seconds and use paper towels thoroughly.
- Don’t skip the resting period – I know you’re hungry, but five minutes makes a noticeable difference in juiciness. Trust the process.
- Use a high-quality meat thermometer – Guessing is how you end up with undercooked or overcooked chicken. A good instant-read thermometer costs about fifteen dollars and lasts for years.
- Keep the oven door closed – Every time you open it, you’re dropping the temperature significantly and adding time to your cook. Resist the urge to peek.
- Choose bone-in, skin-on chicken – The bone conducts heat and helps cook the chicken evenly, while the skin gives you that textural contrast we’re all chasing.
- Room temperature chicken cooks more evenly – Take your chicken out of the fridge about 15 minutes before cooking. This helps prevent cold spots in the center.
- Rotate the pan if your oven has hot spots – If you notice uneven browning, rotate your baking sheet halfway through cooking.
Can I Store Baked BBQ Chicken Thighs?
Absolutely, and I actually think these taste even better the next day because the flavors have time to meld. Store your leftover chicken in an airtight container in the refrigerator for up to 4 days. Make sure the chicken has cooled completely before covering—steam trapped in the container can make the skin lose its crispness.
To reheat, I prefer using the oven at 350 degrees for about 10 to 12 minutes to warm through without drying it out. You could also reheat it gently in a skillet over medium-low heat, skin-side down, for a few minutes.
For freezing, store your cooled chicken in a freezer-safe container or bag for up to 3 months. Thaw overnight in the refrigerator before reheating. The texture stays great, and it’s wonderful for quick meals when you’re short on time.
I love using leftover baked BBQ chicken in salads, grain bowls, sandwiches, or even shredded over sweet potatoes. It’s meal prep gold.
Make-Ahead Guide
This recipe is incredibly make-ahead friendly, which is one of the reasons I make it so often during busy weeks. Here’s my professional approach:
The morning of: Pat your chicken dry, season it completely with the salt, pepper, paprika, and garlic powder, then store it in an airtight container in the refrigerator. The seasoning will actually penetrate the meat a bit, making it more flavorful. Bring the chicken out about 15 minutes before cooking so it’s closer to room temperature.
The night before: You can even go a step further and season your chicken the night before. Just make sure to store it properly so it stays fresh and doesn’t dry out in the fridge.
Sauce prep: If you’re making homemade sauce, prepare it the day before and store it in the refrigerator. It actually benefits from sitting overnight.
This strategy means dinner prep on the actual day is literally five minutes of oiling and popping it in the oven. That’s the kind of meal planning I can get behind.
Common Mistakes to Avoid
- Skipping the dry patting step – Wet chicken will steam instead of crisp. This is non-negotiable if you want that gorgeous skin.
- Opening the oven too frequently – Every peek drops your internal temperature and adds cooking time. Set a timer and trust it.
- Using cold chicken straight from the fridge – It cooks unevenly and takes longer. Let it sit out 15 minutes first.
- Not using a meat thermometer – This is how you either serve undercooked chicken or dry it out trying to be safe. An instant-read thermometer removes all guessing.
Seasonal Variations
Spring: Add a splash of fresh lemon juice to your BBQ sauce and throw some fresh herbs like basil or oregano into the pan during the last few minutes of cooking. It brightens everything up.
Summer: Use a vinegar-based BBQ sauce instead of a thick molasses one. It’s lighter and more refreshing when it’s hot outside. Finish with a sprinkle of fresh cilantro.
Fall: Add a teaspoon of smoked paprika and a pinch of cinnamon to the sauce for depth. Serve alongside roasted butternut squash and Brussels sprouts.
Winter: Go bold with a spicy mustard-based sauce. Use extra garlic powder and add cayenne pepper to the seasoning. Pair it with comfort sides like mashed potatoes and roasted root vegetables.
Nutrition Information
According to USDA data, one serving of this baked BBQ chicken thighs recipe (approximately one large thigh) contains roughly 320 calories, 18 grams of fat, 32 grams of protein, and 8 grams of carbohydrates (mostly from the BBQ sauce). The values vary slightly depending on your specific sauce brand and whether you’re using bone-in thighs with skin.
The protein content is substantial, making this an excellent main course for muscle maintenance and satiety. The dark meat provides iron, zinc, selenium, and B vitamins, which are essential for energy production and immune function. If you’re watching sodium intake, check your specific BBQ sauce brand, as that’s usually where most of the sodium comes from in this dish.
Served with plenty of vegetables on the side, this makes a well-balanced meal that delivers both satisfaction and nutrition.
What Can I Serve With Baked BBQ Chicken Thighs?
The beauty of this recipe is its versatility. It pairs beautifully with so many sides. Here are my go-to combinations that make dinner feel complete and balanced:
- Roasted vegetables – Corn on the cob, grilled zucchini, roasted bell peppers, or charred green beans. The smoky, charred flavors complement the BBQ beautifully.
- Creamy sides – Mashed potatoes, sweet potato puree, or a tangy coleslaw. The cool creaminess balances the sticky-sweet sauce.
- Grain bowls – Serve over brown rice, quinoa, or farro with fresh greens. This is my favorite way to serve leftovers.
- Fresh salads – Shred the cooled chicken and toss it into a green salad with fresh vegetables and a light vinaigrette for a completely different meal.
- Hearty sides – Baked beans (a classic for a reason), cornbread, or buttered corn muffins round out a proper BBQ dinner.
Substitutes
- Chicken breasts instead of thighs – You can absolutely use boneless, skinless breasts if that’s what you have. Just reduce the cooking time by about 10 minutes and check temperature more frequently since white meat dries out faster.
- Different BBQ sauce bases – Mustard-based, vinegar-based, or spicy Carolina-style sauces all work wonderfully. Use what you love and what fits your flavor preferences.
- Avocado oil instead of olive oil – If you prefer avocado oil or need something else on hand, it works perfectly and has a higher smoke point.
- Homemade BBQ sauce – If you want to make your own sauce, combine ketchup, apple cider vinegar, honey, Worcestershire sauce, and your favorite spices. It gives you complete control over sugar and sodium.
- Turkey thighs – If you want to switch proteins entirely, turkey thighs work beautifully with this same technique and cooking time.
Baked Bbq Chicken Thighs Recipe
Ingredients
Method
- Start by preheating your oven to 400 degrees Fahrenheit. While that's heating up, pat your chicken thighs completely dry with paper towels. This is not a step to skip—wet skin won't crisp properly. Moisture is the enemy of crispiness. In a small bowl, combine your salt, pepper, smoked paprika, and garlic powder (if using). Drizzle the olive oil all over both sides of the chicken, then generously sprinkle your seasoning mixture over everything. Make sure you're coating the skin really well because that's where all the flavor lives.
- Place your seasoned chicken skin-side down on a rimmed baking sheet. This is important—you're starting skin-side down to protect it during the initial cooking phase. Bake at 400 degrees for exactly 25 minutes. Don't open the oven during this time. You want that heat to stay consistent. After 25 minutes, your chicken should be mostly cooked through but not yet brown and crispy. The skin will look pale and slightly cooked. This is perfect. Don't panic if it doesn't look gorgeous yet—we're building to that.
- Remove the chicken from the oven and immediately increase your oven temperature to 425 degrees Fahrenheit. Close that oven door quickly so you don't lose heat. Using a pastry brush or basting brush, generously coat the top of the chicken with your barbecue sauce. Using a spatula (I prefer a thin metal one), carefully flip the chicken over so it's now skin-side up. Be gentle here so you don't tear that skin. Once it's flipped, brush the other side generously with sauce as well. Place it back in the oven.
- This is where the magic happens. You're going to bake for 7 minutes, then remove and baste again. Repeat this two more times. So you'll have three total basting sessions with 7-minute intervals between each one. That's 21 minutes of baking total in this phase. Each time you remove the chicken, brush another generous layer of sauce on top. The sauce will start to caramelize and get sticky and dark. That's exactly what you want. The sugars in the BBQ sauce are building layers of flavor and creating that beautiful mahogany color.

- After your third basting and bake (for a total of 46 minutes of cooking time), use a meat thermometer to check the thickest part of the thigh, away from the bone. The chicken is technically safe at 165 degrees Fahrenheit, but dark meat really shines at 180 to 190 degrees Fahrenheit. At that temperature, the connective tissue breaks down beautifully and the meat becomes incredibly juicy and tender. If you're not quite at temperature, put it back for another 5 to 7 minutes and check again. Better to take your time than to serve undercooked chicken.
- If the chicken looks a bit pale or you want extra crispy skin, move your oven rack to the highest position and broil for 3 to 5 minutes, watching closely so it doesn't burn. You want deep golden brown, not charred. This step elevates it from good to restaurant-quality.

- Remove the chicken from the oven and let it rest on the baking sheet for about 5 minutes before serving. This allows the juices to redistribute throughout the meat. If you cut into it immediately, all those beautiful juices run right out onto the plate instead of staying in the chicken. Transfer to a serving platter, spoon any pan drippings over the top, and serve immediately. Your family is going to be so impressed.
Nutrition
Notes
Tried this recipe?
Let us know how it was!FAQs
Can I use boneless, skinless chicken thighs?
You can, but I don’t recommend it unless that’s all you have available. Bone-in, skin-on chicken is what makes this recipe special. The bone conducts heat more evenly, and the skin becomes that crispy, caramelized exterior that makes people go back for seconds. Boneless, skinless thighs will cook faster (maybe 35-40 minutes total) but you lose that textural element that makes the dish special. If you do use boneless thighs, keep a close eye on the temperature and don’t baste as aggressively.
What if my chicken isn’t crispy at the end?
This usually means the oven temperature wasn’t quite hot enough or you didn’t baste aggressively enough. The broil step at the end is your friend here. Move your rack up and broil for 3-5 minutes until you get the crispiness you want. Just watch it carefully so it doesn’t burn. A good broil can transform the chicken from good to extraordinary in just a few minutes.
How do I know when the chicken is done without a thermometer?
I really don’t recommend cooking without a thermometer—it’s the only reliable way to ensure food safety and proper doneness. That said, if you absolutely must, the juices should run completely clear (not pink) when you pierce the thickest part of the thigh away from the bone. But seriously, get a thermometer. They’re inexpensive and take the guesswork out of cooking.
Can I make this on the grill instead?
Absolutely! Preheat your grill to medium-high heat (around 375-400 degrees). Place the chicken skin-side up and cook for about 20 minutes, then begin basting with sauce every 5 minutes for the final 15-20 minutes. The basting is crucial so the sauce caramelizes rather than burns. You’ll get that smoky flavor the oven can’t quite achieve, which is fantastic.
Why is my BBQ sauce burning on the bottom of the pan?
This happens when the oven temperature is too high or the sauce is basting the bottom of the chicken excessively. Make sure you’re following the temperature progression (400 then 425 degrees) and that you’re primarily basting the top side of the chicken. If you notice drips on the bottom of the pan burning, you can line your baking sheet with foil for easier cleanup, though it doesn’t affect the chicken itself. If the burning is severe, lower your oven temperature slightly—every oven runs a bit differently.
More Recipes You’ll Love
- my oven-baked chicken – Another fantastic oven method that uses a slightly different technique for variety
- Barbecue Chicken Recipe With Barbecue Sauce – Explores different sauce applications and flavor combinations
- Bean Rice Cheese Burrito Recipe – A perfect hearty side to serve alongside your chicken
- Bean And Quinoa Recipe – A protein-packed grain option that pairs beautifully with this main
I genuinely hope you give this recipe a try soon. There’s something about the combination of crispy skin, juicy meat, and that sticky-sweet-smoky BBQ glaze that just makes people happy. I’ve made this for weeknight dinners, casual entertaining, and even brought it to potlucks where it disappeared before anything else on the table.
The technique itself is simple enough that even if you’ve never made it before, you’ll feel confident following along. And the second time you make it, you’ll start making it your own—adjusting the sauce, experimenting with seasonings, maybe trying it on the grill. That’s when cooking becomes fun instead of stressful.
Happy cooking!