Ingredients
Method
Step 1: Prep Your Oven and Chicken
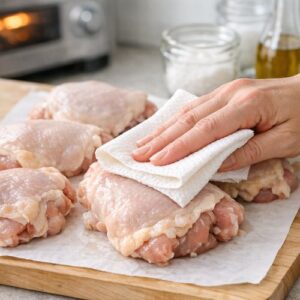
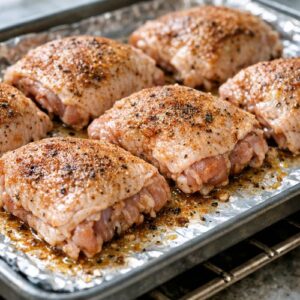
- Start by preheating your oven to 400 degrees Fahrenheit. While that's heating up, pat your chicken thighs completely dry with paper towels. This is not a step to skip—wet skin won't crisp properly. Moisture is the enemy of crispiness. In a small bowl, combine your salt, pepper, smoked paprika, and garlic powder (if using). Drizzle the olive oil all over both sides of the chicken, then generously sprinkle your seasoning mixture over everything. Make sure you're coating the skin really well because that's where all the flavor lives.
Step 2: Initial Bake at Lower Temperature
- Place your seasoned chicken skin-side down on a rimmed baking sheet. This is important—you're starting skin-side down to protect it during the initial cooking phase. Bake at 400 degrees for exactly 25 minutes. Don't open the oven during this time. You want that heat to stay consistent. After 25 minutes, your chicken should be mostly cooked through but not yet brown and crispy. The skin will look pale and slightly cooked. This is perfect. Don't panic if it doesn't look gorgeous yet—we're building to that.
Step 3: Increase Heat and Begin Basting
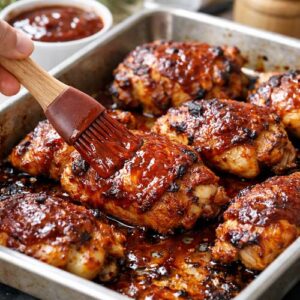
- Remove the chicken from the oven and immediately increase your oven temperature to 425 degrees Fahrenheit. Close that oven door quickly so you don't lose heat. Using a pastry brush or basting brush, generously coat the top of the chicken with your barbecue sauce. Using a spatula (I prefer a thin metal one), carefully flip the chicken over so it's now skin-side up. Be gentle here so you don't tear that skin. Once it's flipped, brush the other side generously with sauce as well. Place it back in the oven.
Step 4: The Triple Baste Method
- This is where the magic happens. You're going to bake for 7 minutes, then remove and baste again. Repeat this two more times. So you'll have three total basting sessions with 7-minute intervals between each one. That's 21 minutes of baking total in this phase. Each time you remove the chicken, brush another generous layer of sauce on top. The sauce will start to caramelize and get sticky and dark. That's exactly what you want. The sugars in the BBQ sauce are building layers of flavor and creating that beautiful mahogany color.

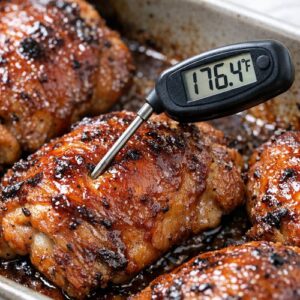
Step 5: Check Internal Temperature
- After your third basting and bake (for a total of 46 minutes of cooking time), use a meat thermometer to check the thickest part of the thigh, away from the bone. The chicken is technically safe at 165 degrees Fahrenheit, but dark meat really shines at 180 to 190 degrees Fahrenheit. At that temperature, the connective tissue breaks down beautifully and the meat becomes incredibly juicy and tender. If you're not quite at temperature, put it back for another 5 to 7 minutes and check again. Better to take your time than to serve undercooked chicken.
Step 6: Optional Broil for Extra Crispiness
- If the chicken looks a bit pale or you want extra crispy skin, move your oven rack to the highest position and broil for 3 to 5 minutes, watching closely so it doesn't burn. You want deep golden brown, not charred. This step elevates it from good to restaurant-quality.

Step 7: Rest and Serve
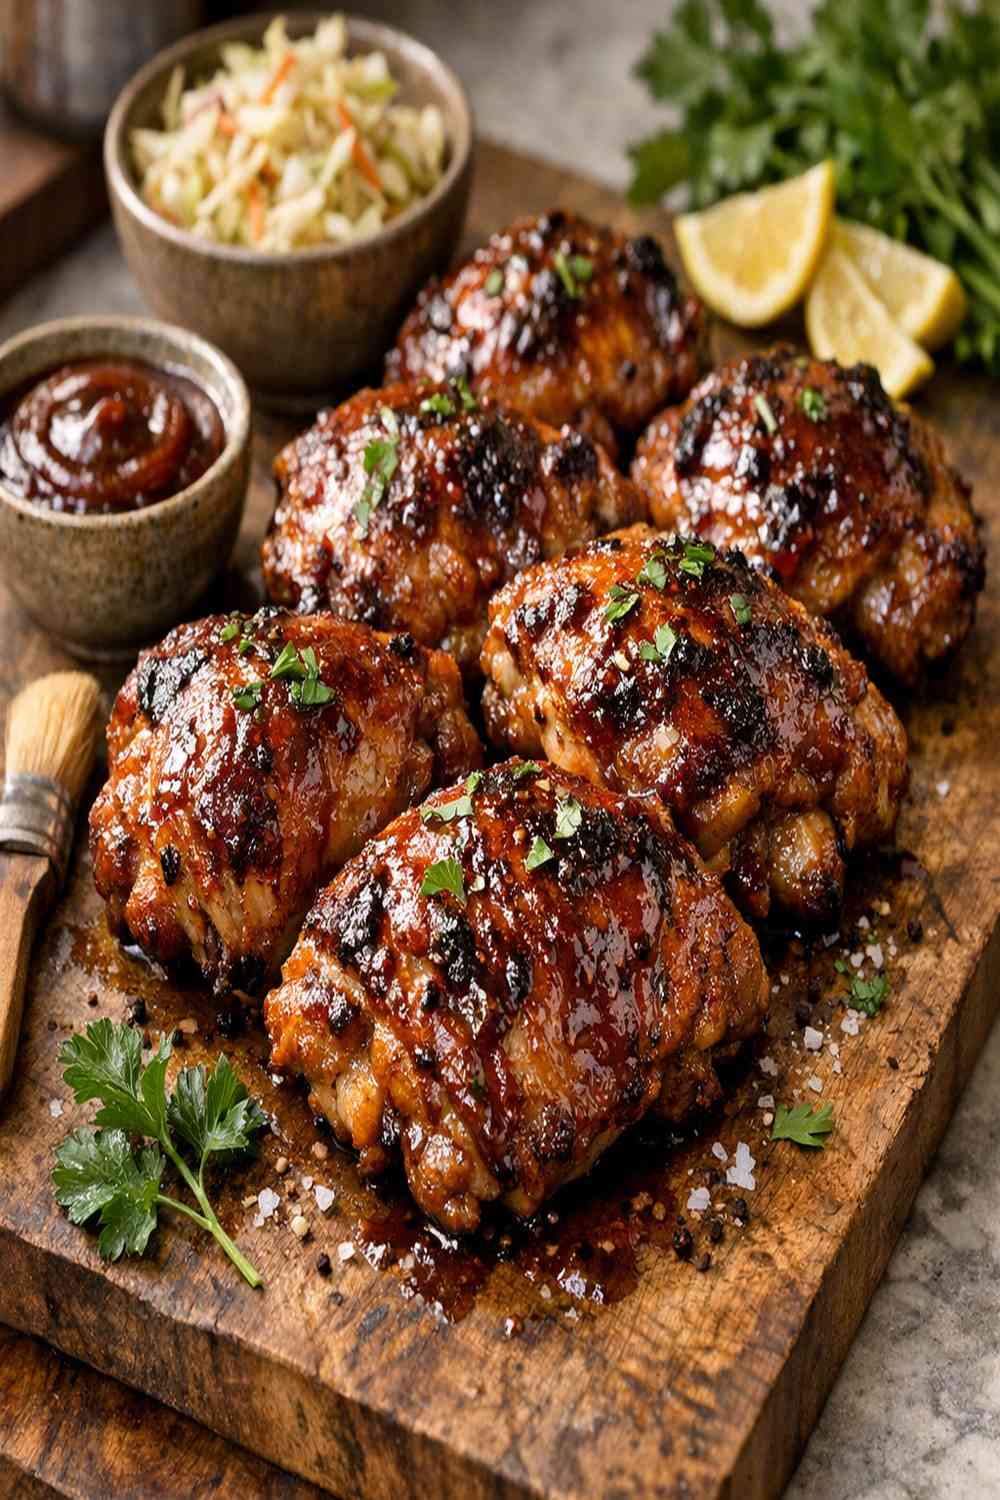
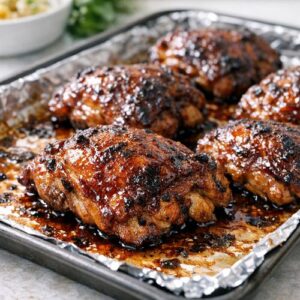
- Remove the chicken from the oven and let it rest on the baking sheet for about 5 minutes before serving. This allows the juices to redistribute throughout the meat. If you cut into it immediately, all those beautiful juices run right out onto the plate instead of staying in the chicken. Transfer to a serving platter, spoon any pan drippings over the top, and serve immediately. Your family is going to be so impressed.
Nutrition
Notes
- Pat the chicken completely dry - Moisture is your enemy when it comes to crispy skin. Take the extra 30 seconds and use paper towels thoroughly.
- Don't skip the resting period - I know you're hungry, but five minutes makes a noticeable difference in juiciness. Trust the process.
- Use a high-quality meat thermometer - Guessing is how you end up with undercooked or overcooked chicken. A good instant-read thermometer costs about fifteen dollars and lasts for years.
- Keep the oven door closed - Every time you open it, you're dropping the temperature significantly and adding time to your cook. Resist the urge to peek.
- Choose bone-in, skin-on chicken - The bone conducts heat and helps cook the chicken evenly, while the skin gives you that textural contrast we're all chasing.
- Room temperature chicken cooks more evenly - Take your chicken out of the fridge about 15 minutes before cooking. This helps prevent cold spots in the center.