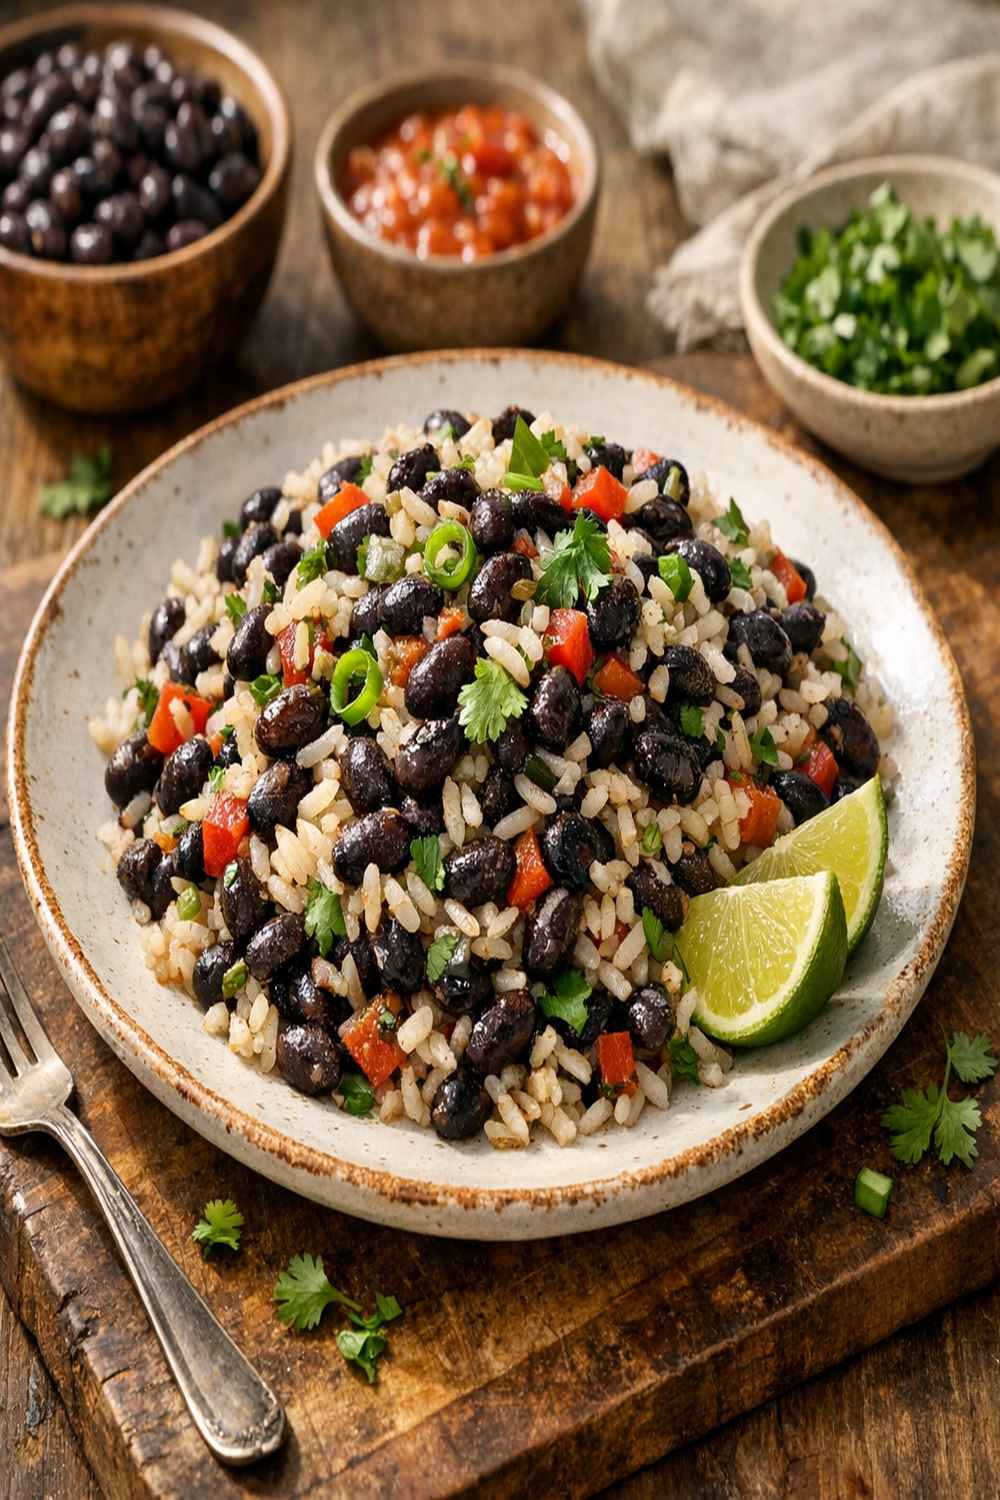
I’m a big believer that the best meals are the ones that come together quickly without sacrificing nutrition. Black beans and rice is exactly that kind of dish. It’s budget-friendly, packed with plant-based protein and fiber, and honestly? It tastes even better than takeout. This recipe pairs beautifully with simple sides like a fresh salad or some roasted vegetables, and it’s the perfect base for building more elaborate dishes like bean rice cheese burritos when you’re feeling adventurous.
Why This Became My Go-To Weeknight Solution
I remember the exact moment this recipe changed my dinner routine. It was a Tuesday evening in November, one of those days when I’d completely forgotten to plan dinner. I opened my pantry and found olive oil, garlic, onions, rice, canned beans, and broth—basically the foundation of my emergency meal kit. I threw it all together in a single saucepan while helping my kids with homework, and what came out was this perfectly seasoned, deeply satisfying dish that everyone actually wanted seconds of.
That’s when it hit me: this simple combination of humble ingredients could become my secret weapon against takeout orders and complicated recipes. The best part? It taught me that real food doesn’t need to be complicated to be delicious.
What is Black Beans and Rice?
Black beans and rice is a classic combination that appears in cuisines across Latin America, the Caribbean, and beyond. It’s been a staple for centuries because it works—nutritionally and deliciously. When you combine beans with rice, you create a complete protein, meaning you’re getting all nine essential amino acids your body needs.
What makes this recipe special is how the flavors develop. The onion and garlic are sautéed first, which deepens their sweetness and removes that raw bite. The rice gets toasted briefly in that flavorful oil, which helps each grain stay separate and adds a subtle nuttiness. Then everything steams together, allowing the cumin to perfume the entire pot while the beans warm through and absorb all those good flavors.
This isn’t fancy cooking—it’s smart cooking. One pan, minimal cleanup, maximum nutrition.
Why You’ll Love This Black Beans and Rice Recipe
- Complete protein in one bowl – When beans and rice combine, they form a complete protein with all amino acids your muscles and cells need to repair and rebuild themselves.
- Fiber powerhouse – Black beans deliver about 8 grams of fiber per cup, which supports digestive health and keeps you satisfied longer than processed carbs.
- Budget-conscious cooking – This meal costs roughly $1-2 per serving, making it one of the most economical ways to feed your family well.
- Genuinely quick – From pantry to table in about 30 minutes, with minimal hands-on time once everything is simmering.
- Naturally vegetarian – While the recipe calls for vegetable broth, you can easily use chicken broth too. Either way, it’s meatless, making it perfect for Meatless Mondays or plant-forward eating.
- Endlessly customizable – Start with this base and add whatever vegetables, proteins, or toppings you have on hand.
The Ingredients
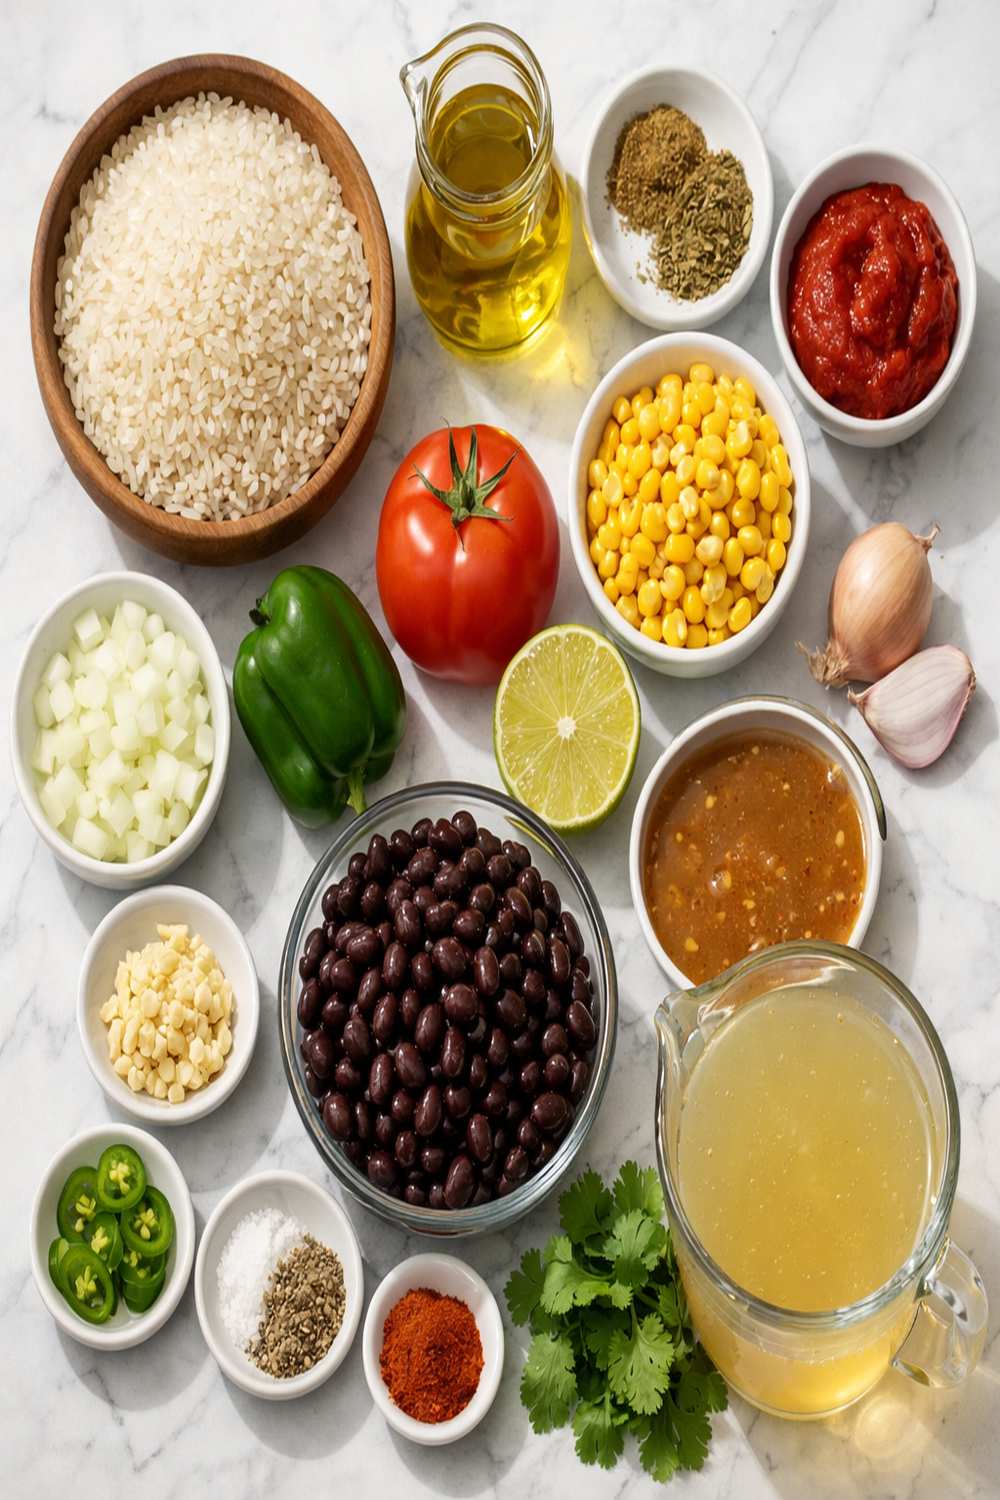
I’ve kept this ingredient list intentionally short and straightforward. Everything here serves a purpose—there’s no filler. Most of these items probably already live in your pantry or fridge. This recipe makes about 4 generous servings as a main dish, or 6 servings as part of a larger meal.
- 2 tablespoons fresh cilantro (optional, but it adds brightness at the finish)
- ¼ cup yellow onion (finely diced, not minced—you want small pieces that soften but don’t disappear)
- 2 cups vegetable broth or chicken broth (reduced-sodium helps you control saltiness)
- 2 cloves garlic (minced fine so it distributes evenly)
- 1 cup medium grain white rice (jasmine or basmati work beautifully too)
- ½ lime (for squeezing over the top, optional but recommended)
- 15 ounces canned black beans (drained and rinsed to remove excess sodium)
- ½ teaspoon ground cumin (this is the flavor backbone—don’t skip it)
- Salt and fresh cracked black pepper (to taste—adjust at the end)
- 1 tablespoon olive oil (extra virgin for drizzling at the end if you like)
How to Make Black Beans and Rice?
I’m going to walk you through this step-by-step. The beauty of this recipe is that each step builds on the previous one, creating layers of flavor that taste far more complicated than they actually are. Pay attention to the doneness cues I mention—that’s what separates mediocre rice from perfect rice.
Step 1: Start With Heat and Aromatics
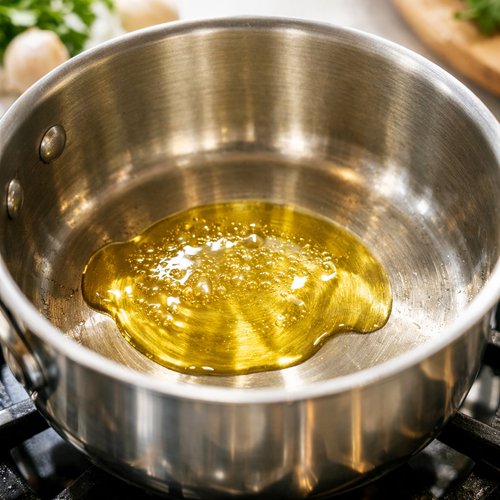
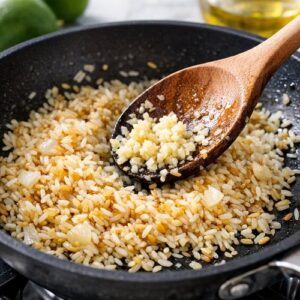
Pour your tablespoon of olive oil into a medium saucepan and set the heat to medium-high. Let it get nice and shimmering—this takes about one minute. Once it’s hot, add your finely diced onion and let it cook undisturbed for about 30 seconds, then stir it around. You’re looking for the edges to turn from translucent to just starting to pick up some color, which takes about 3 minutes total. The onion should smell sweet and slightly caramelized, not raw.
Step 2: Add Garlic and Toast the Rice
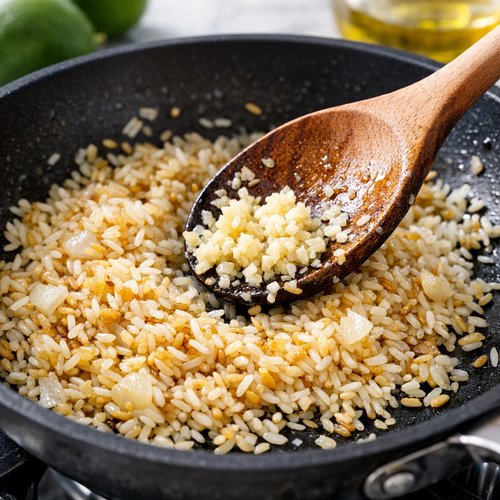
Now add your minced garlic and stir constantly for exactly 1 minute. Garlic burns easily, so you don’t want to leave it unattended, but 1 minute is long enough to cook off that harsh raw bite while keeping it fresh and fragrant. You’ll know it’s ready when your whole kitchen smells amazing—that’s your signal to move on immediately.
Add your uncooked rice right into the pot and keep stirring for about 2 minutes. You’re not trying to brown it deeply—just coat each grain in that oil and let it warm through slightly. This step is what prevents your rice from turning into mush later.
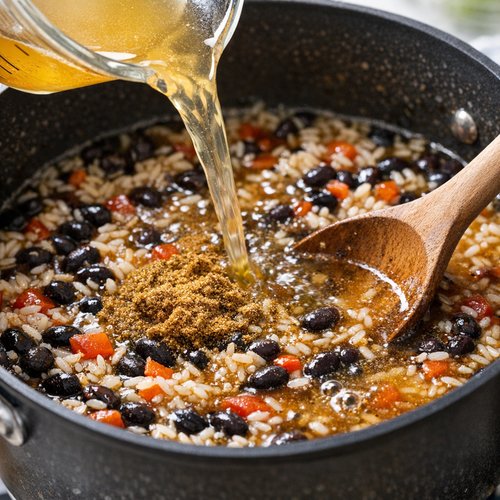
Step 3: Add Liquid and Seasonings
Pour in your broth and add the ½ teaspoon of cumin. Give everything a good stir to distribute the cumin evenly—you don’t want it clumping in one spot. Add a pinch of salt at this point (not the full amount yet, since you’ll adjust at the end). Increase the heat slightly and let the mixture come to a rolling boil, which takes about 2-3 minutes. You’ll see steam rising and hear the liquid bubbling.
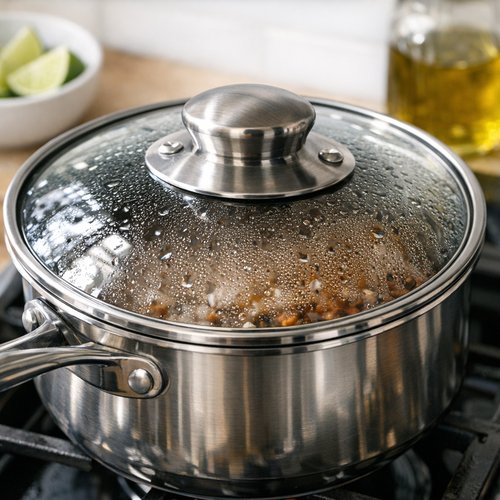
Step 4: Cover and Simmer
Once you reach a full boil, immediately cover the saucepan with a tight-fitting lid and reduce the heat to low. Set a timer for 20 minutes. Don’t lift that lid during this time—every peek lets steam escape and extends your cooking time. The rice is doing important work in there, absorbing liquid and becoming tender. Resist the temptation to check on it.
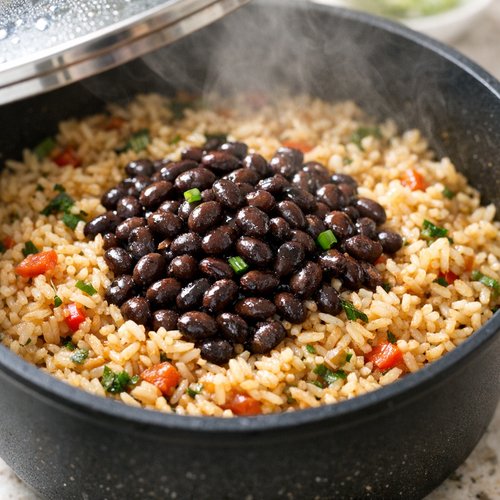
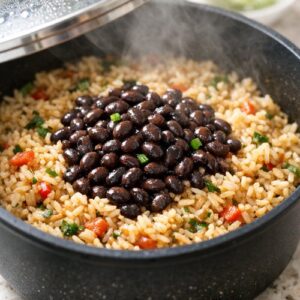
Step 5: Finish With Beans
When your timer goes off, carefully remove the lid (watch out for steam rising up). The rice should look mostly cooked and the liquid should be almost completely absorbed. Open your can of black beans, drain them in a colander, and give them a quick rinse under cold water. This removes excess sodium from the canning liquid.
Stir the rinsed beans directly into the hot rice. Replace the lid and turn off the heat. Let it sit undisturbed for 3 minutes. This resting period allows the residual heat to warm the beans through and lets everything meld together. It sounds simple, but this step makes a real difference.
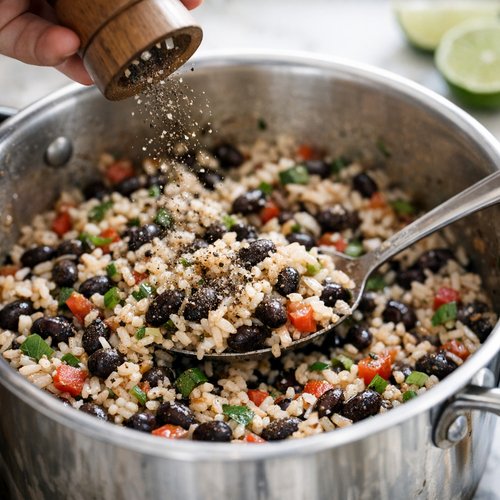
Step 6: Season and Serve
Remove the lid, give everything a good stir, and taste. This is your moment to adjust the seasoning. Add salt and pepper gradually—remember, the broth already has salt, so you might need less than you think. Squeeze that lime wedge over the top if you have it (the acid brightens everything), sprinkle with fresh cilantro if you’re using it, and serve immediately.
Expert’s Nutritional Tip
Here’s something I tell clients all the time: the combination of beans and rice creates what’s called a “complete protein.” Black beans are high in lysine but lower in methionine, while rice is the opposite. Together, they provide all nine essential amino acids your body can’t manufacture on its own. This is why this humble dish has sustained cultures for centuries. One serving provides roughly 7 grams of protein and 6 grams of fiber, making it surprisingly filling for something that costs pennies per serving.
Tips and Tricks
- Use medium-grain white rice – Long-grain tends to be too delicate and breaks apart, while short-grain gets mushy. Medium grain gives you that perfect tender-but-separate texture.
- Don’t skip the rice-toasting step – This 2-minute phase creates what cooks call the “flavor foundation.” It prevents mushy rice and adds subtle depth.
- Taste the broth before using it – Some broths are very salty, others are mild. Knowing what you’re working with helps you season appropriately at the end.
- Keep that lid on during simmering – I know it’s tempting to check, but lifting the lid releases steam and throws off your cooking time. Trust the process.
- Make it spicy if you like – Add ¼ teaspoon of cayenne pepper with the cumin, or a pinch of smoked paprika for depth.
- Add fresh vegetables – Diced bell peppers, corn, or diced tomatoes can go in with the beans at the end, or even with the initial onion.
Make-Ahead Guide
This is where black beans and rice really shines for busy people. You have several options depending on your schedule.
Same-day prep: Dice your onion and garlic in the morning, and you’re cutting your active cooking time in half. Keep them in separate containers in the fridge.
Refrigerator storage: Make a full batch and store it in an airtight container for up to 4 days. Reheat gently in a saucepan with a splash of water or broth to restore the original texture—microwaving works too but can make rice a bit rubbery.
Freezer storage: This dish freezes beautifully for up to 3 months. Cool it completely first, then transfer to freezer-safe containers. Thaw overnight in the fridge and reheat gently on the stovetop. Add a little extra liquid since rice absorbs more as it sits.
Build your own bowls: Make a big batch and portion it into containers with toppings already prepped—shredded cheese, avocado (add this fresh), salsa, cilantro. Assembly takes 2 minutes on busy nights.
Common Mistakes to Avoid
- Lifting the lid too often – This is the number one mistake. Those 20 minutes of undisturbed heat are doing crucial work. Every peek disrupts the process and can add 5-10 minutes to your cooking time.
- Using canned beans without rinsing – The liquid in canned beans contains added sodium and starch. Rinsing them removes both, improving flavor and reducing bloating for some people.
- Forgetting to adjust seasoning at the end – The broth does the heavy lifting here, but you still need to taste and adjust. This is the difference between “meh” and “wow, this is good.”
- Skipping the rice-toasting step – I get it—you’re hungry and want to speed things up. But those 2 minutes with the rice in the oil prevent gummy, overcooked rice. Worth it every time.
Seasonal Variations
Spring: Add fresh spring peas and chopped fresh mint at the end. Squeeze fresh lemon juice instead of lime.
Summer: Stir in corn kernels and diced bell peppers with the beans. Top with fresh tomato salsa and crumbled feta cheese.
Fall: Add roasted sweet potato cubes and a pinch of cinnamon with the cumin. The sweetness pairs beautifully with the earthiness of beans.
Winter: Stir in diced roasted carrots and celery. Use chicken broth instead of vegetable broth and add a bay leaf while simmering for deeper flavor.
Can I Store Black Beans and Rice?
Absolutely. This is actually one of those recipes that makes great use of your meal-prep time. Store it in an airtight container in the refrigerator for up to 4 days. The flavors actually develop more as it sits, so day-three leftovers are often tastier than day-one.
For freezing, let the dish cool to room temperature completely, then transfer to freezer-safe containers. It keeps for up to 3 months. When you’re ready to eat it, thaw overnight in the fridge and reheat gently in a saucepan over medium-low heat, adding a splash of broth or water to restore the original consistency. The rice tends to absorb liquid as it sits, so that extra moisture helps bring it back to life.
One pro tip: if you’re planning to freeze this, slightly undercook the rice by a minute or two. It will soften a bit more as it freezes and thaws, and this compensates for that.
Nutrition Information
According to USDA data, one serving (approximately 1 cup) of this recipe contains roughly 210 calories, 7 grams of protein, 42 grams of carbohydrates, 6 grams of fiber, and 3 grams of fat. The fiber content is particularly notable—that’s about 24% of your daily fiber needs in a single serving, which is why this dish keeps you satisfied for hours.
The black beans provide polyphenols (antioxidants), folate, and iron. The rice provides B vitamins and manganese. Together, they create a nutritionally complete meal that’s low in fat and sodium (especially when you rinse the canned beans). If you use vegetable broth, the entire dish is plant-based.
What Can I Serve With Black Beans and Rice?
This recipe is wonderfully versatile. On its own, it’s a complete meal, but you can certainly build around it. I love serving it with simple sides that let the flavors shine. A crisp green salad with lime vinaigrette is my go-to pairing. For something more substantial, roasted vegetables like broccoli, zucchini, or sweet potatoes add nutrition and texture.
If you want to turn this into something fancier, use it as a base for bean and quinoa bowls with roasted vegetables and fresh toppings. Or build those bean rice cheese burritos I mentioned earlier—this recipe is the perfect filling.
- Avocado and cilantro lime crema – Blend avocado with sour cream, lime, garlic, and cilantro for a creamy, bright topping.
- Quick pickled onions – Thinly slice red onion, cover with vinegar, lime juice, and salt. Let sit 15 minutes. Adds acidity and crunch.
- Grilled fish or chicken – Black beans and rice pairs beautifully with grilled bass or other white fish. The beans’ earthiness balances the delicate fish perfectly.
- Fresh tomato salsa – Dice tomatoes, red onion, jalapeño, cilantro, and lime juice. Simple and bright.
- Shredded cheese and sour cream – A dollop of each, plus hot sauce, transforms this into something more indulgent.
- Roasted vegetables – Bell peppers, zucchini, broccoli—roast them at 425°F until crispy-edged and pile them on top.
Substitutes
- Brown rice instead of white – Use brown rice and increase cooking time to 35-40 minutes. It’s nuttier and higher in fiber, though slightly chewier in texture.
- Red beans instead of black beans – Works beautifully and creates a warmer color. Same nutrition profile, slightly creamier texture.
- Pinto beans as an alternative – More mild than black beans, but they soak up flavors wonderfully and have a buttery texture.
- Vegetable or chicken broth – Either works. Vegetable is lighter and more neutral, chicken adds subtle richness. Use whichever you have.
- Cilantro or parsley for garnish – Parsley is milder if cilantro isn’t your thing. Or skip the garnish entirely if you prefer.
- Coriander instead of cumin – Not the same flavor, but it’s warm and slightly floral. Use the same amount and it still works.
Black Beans And Rice Recipe
Ingredients
Method
- Pour your tablespoon of olive oil into a medium saucepan and set the heat to medium-high. Let it get nice and shimmering—this takes about one minute. Once it's hot, add your finely diced onion and let it cook undisturbed for about 30 seconds, then stir it around. You're looking for the edges to turn from translucent to just starting to pick up some color, which takes about 3 minutes total. The onion should smell sweet and slightly caramelized, not raw.

- Now add your minced garlic and stir constantly for exactly 1 minute. Garlic burns easily, so you don't want to leave it unattended, but 1 minute is long enough to cook off that harsh raw bite while keeping it fresh and fragrant. You'll know it's ready when your whole kitchen smells amazing—that's your signal to move on immediately. Add your uncooked rice right into the pot and keep stirring for about 2 minutes. You're not trying to brown it deeply—just coat each grain in that oil and let it warm through slightly. This step is what prevents your rice from turning into mush later.
- Pour in your broth and add the ½ teaspoon of cumin. Give everything a good stir to distribute the cumin evenly—you don't want it clumping in one spot. Add a pinch of salt at this point (not the full amount yet, since you'll adjust at the end). Increase the heat slightly and let the mixture come to a rolling boil, which takes about 2-3 minutes. You'll see steam rising and hear the liquid bubbling.

- Once you reach a full boil, immediately cover the saucepan with a tight-fitting lid and reduce the heat to low. Set a timer for 20 minutes. Don't lift that lid during this time—every peek lets steam escape and extends your cooking time. The rice is doing important work in there, absorbing liquid and becoming tender. Resist the temptation to check on it.

- When your timer goes off, carefully remove the lid (watch out for steam rising up). The rice should look mostly cooked and the liquid should be almost completely absorbed. Open your can of black beans, drain them in a colander, and give them a quick rinse under cold water. This removes excess sodium from the canning liquid. Stir the rinsed beans directly into the hot rice. Replace the lid and turn off the heat. Let it sit undisturbed for 3 minutes. This resting period allows the residual heat to warm the beans through and lets everything meld together. It sounds simple, but this step makes a real difference.
- Remove the lid, give everything a good stir, and taste. This is your moment to adjust the seasoning. Add salt and pepper gradually—remember, the broth already has salt, so you might need less than you think. Squeeze that lime wedge over the top if you have it (the acid brightens everything), sprinkle with fresh cilantro if you're using it, and serve immediately.

Notes
Tried this recipe?
Let us know how it was!FAQs
Can I make this with dried beans instead of canned?
Absolutely. You’ll need about ¾ cup dried black beans. Soak them overnight (or use the quick-soak method: boil for 2 minutes, then let sit covered for 1 hour). Drain and rinse, then cook them in water for 45 minutes to 1 hour until tender before adding to the recipe. It takes longer but tastes fresher if you prefer dried beans. Some people find dried beans easier to digest than canned.
Why is my rice mushy?
This usually happens because the lid was lifted frequently during cooking, letting steam escape and extending cooking time. Too much liquid can also cause this—make sure you’re measuring your broth accurately. If you’re using homemade broth, it might be thinner than store-bought. Next time, try a 2-to-1 ratio of liquid to rice (so 2 cups liquid to 1 cup rice) if you find your ratios are off.
Can I add vegetables to this recipe?
Yes, and I encourage it. Diced bell peppers, corn, carrots, and diced tomatoes all work beautifully. Add them with the initial onion sauté so they cook slightly and release their flavors. You can also add them when you stir in the beans if you prefer them less cooked. Leafy greens like spinach or kale should be added right at the end—they’ll wilt in the residual heat.
Is this recipe vegan?
Yes, completely. All ingredients are plant-based. Just make sure you’re using vegetable broth instead of chicken broth. This is a wonderful plant-based protein dish that satisfies like meat would.
Can I double this recipe?
Absolutely, and meal prep is where this shines. Just double everything and use a larger saucepan. The cooking time stays the same. This is how I manage busy weeks—I make a double batch on Sunday and eat it all week.
More Recipes You’ll Love
- Bean Rice Cheese Burrito Recipe – Take this black beans and rice as your filling and wrap it up with cheese for an easy weeknight burrito bowl or hand-held version.
- Bean and Quinoa Recipe – Similar protein-packed approach but with quinoa instead of rice for more texture variety and slightly higher protein content.
- my oven-baked chicken – Pair this black beans and rice with grilled or baked protein for a complete dinner plate.
Final Thoughts
I keep coming back to this recipe because it represents everything I believe about good food. It’s simple without being boring. It’s economical without being cheap or unsatisfying. It nourishes your body with complete protein and fiber while being delicious enough that you’ll actually want to make it again next week. It’s the kind of dish that works equally well for a solo dinner on a Tuesday or scaling up for a crowd.
Most importantly, it proved to me years ago that you don’t need fancy ingredients or complicated techniques to eat well. You need to understand a few basic principles—how heat transforms ingredients, how flavors build on each other, how timing matters—and then apply those with intention. That’s the whole philosophy behind my approach to cooking and nutrition.
Make this recipe. Taste it. Adjust it. Make it again next week with a slight variation. That’s how you develop confidence in the kitchen and discover what you actually love to eat. Your pantry-to-table dinner is waiting.
Happy cooking!