There’s something magical about a slice of homemade vanilla cake with silky frosting. I love pairing it with fresh berries or serving it alongside lighter options like this protein smoothie the morning after a celebration. This recipe delivers that bakery-quality texture you’ve been craving.
The Birthday Cake That Started It All
I’ll never forget my daughter’s eighth birthday party in our backyard here in New Hampshire. I’d planned to buy a cake from the local bakery, but they called that morning—no vanilla cakes left. I was frustrated, honestly. But then I thought: I can do this myself.
I pulled out my old recipe box and found my mother’s vanilla cake formula. Three hours later, I had a two-layer cake that tasted better than anything I could’ve purchased. The kids went wild. My daughter asked me to make it every year since. That was fifteen years ago.
Today, as a registered dietitian, I’ve refined that recipe countless times. I’ve learned which ingredients matter most for nutrition and texture, and which shortcuts actually work. This is the version I make for every celebration now—and it’s become the one people request by name.
What is Vanilla Birthday Cake Recipe?
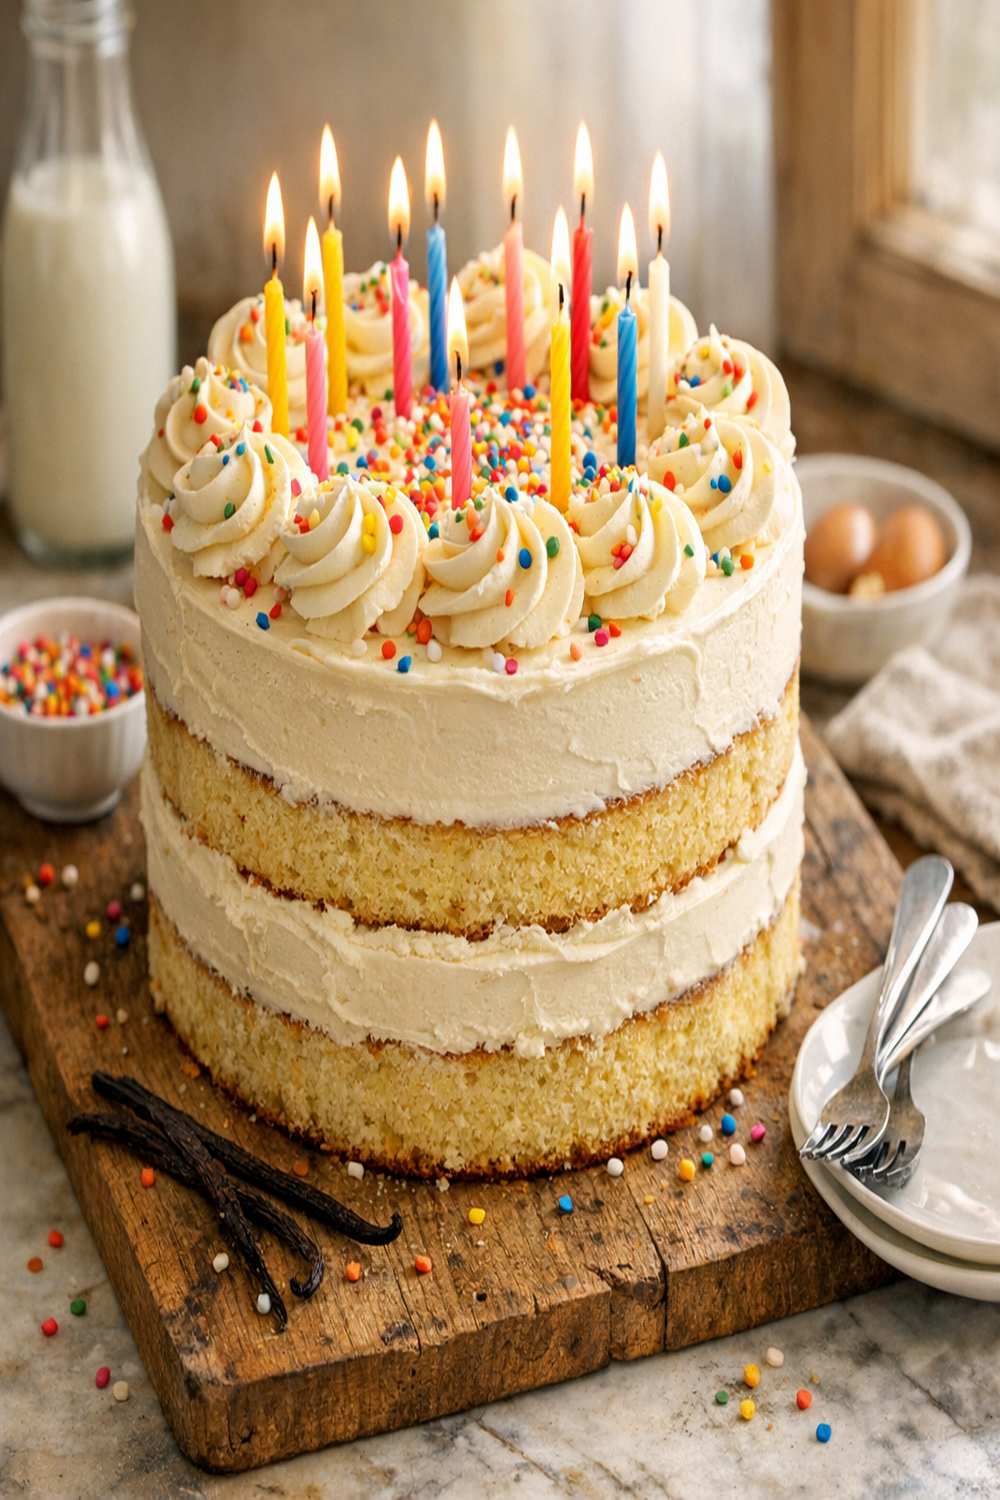
Classic vanilla birthday cake is a tender, moist layer cake with a buttery crumb and delicate vanilla flavor. Unlike dense or overly sweet grocery store cakes, this version relies on simple pantry ingredients and proper technique to create something genuinely special.
The magic lies in the balance: enough fat for moisture, the right ratio of sugar for structure, and eggs for lift. A touch of oil mixed with butter creates incredible tenderness. The frosting is silky American buttercream—nothing fancy, just smooth and spreadable.
This recipe makes a two-layer 9-inch round cake, which serves about 12-14 people comfortably. You can also bake it as a single 9×13-inch sheet cake if you prefer something less formal.
Why You’ll Love This Vanilla Birthday Cake Recipe
- Genuinely moist crumb – The combination of butter and oil creates a tender, not-dry cake that stays fresh for three days. No one will reach for water after a bite.
- Simple ingredient list – Just pantry staples and quality vanilla. No weird additives or ingredients you can’t pronounce.
- Foolproof results – Even if you don’t bake often, this recipe works reliably. Room temperature ingredients and proper mixing technique are really the only tricks.
- Easy to customize – Want lemon? Add zest. Want almond notes? Switch vanilla to almond extract. The base is flexible.
- Makes great layers – The batter rises evenly and levels beautifully, so frosting between layers is actually easy and looks professional.
The Ingredients
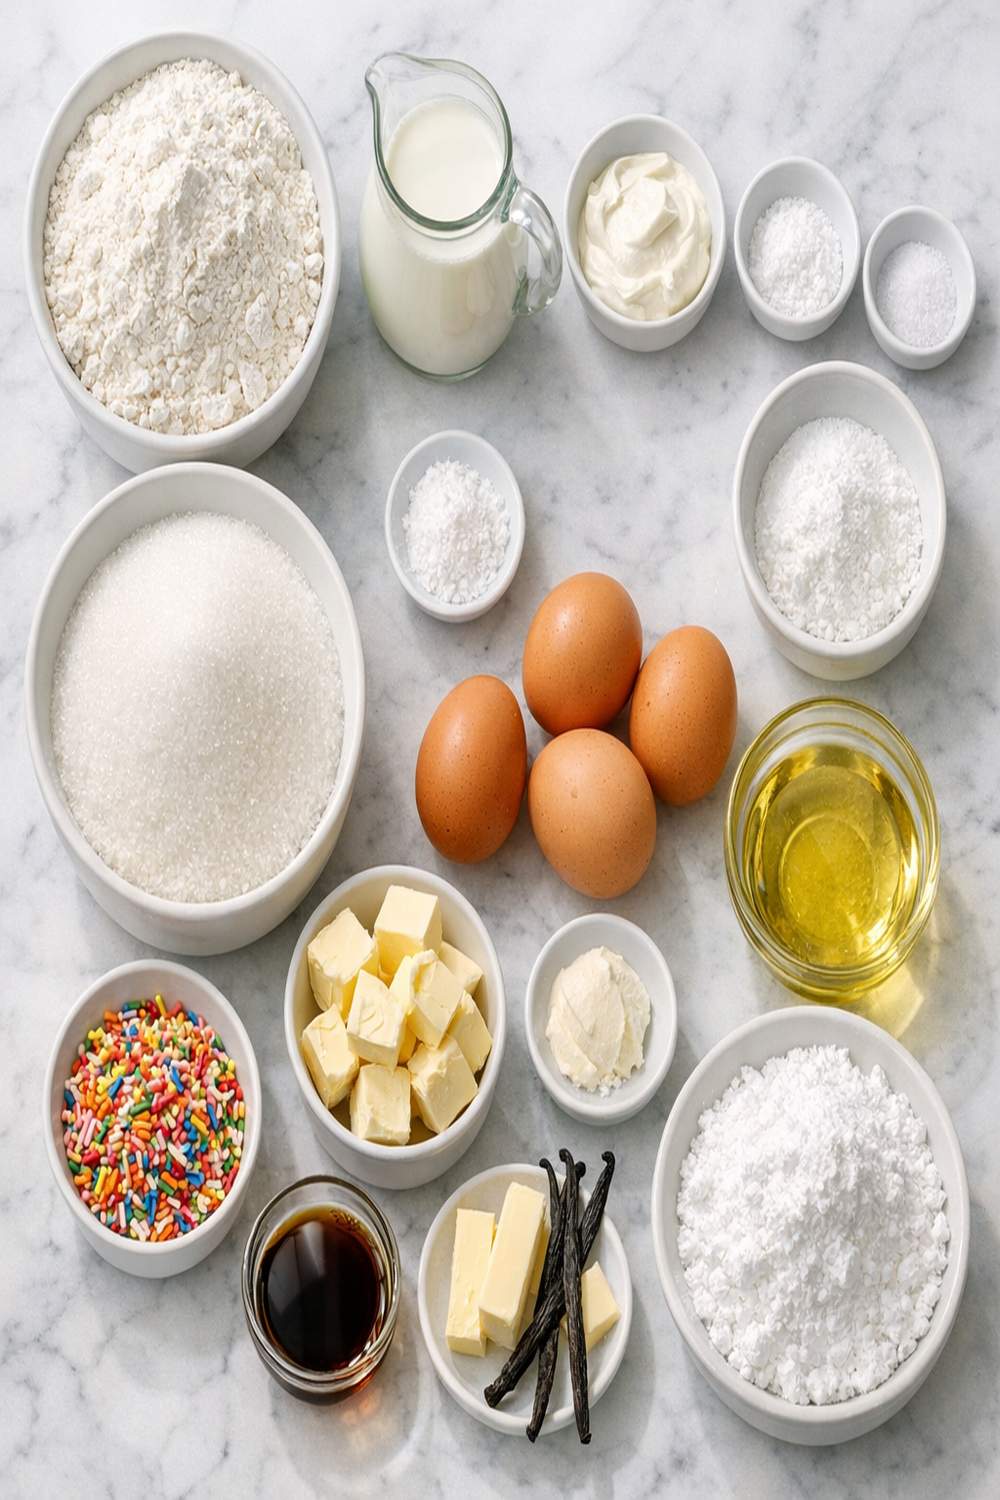
I’ve learned through years of baking that quality ingredients really do matter here. Since vanilla is the star, splurge on pure vanilla extract—not imitation. For flour, I prefer cake flour for the most tender crumb, but all-purpose works perfectly fine. Let your eggs and butter come to room temperature; this sounds fussy, but it actually changes your results dramatically.
For the Cake
- 2½ teaspoons baking powder (aluminum-free is my preference)
- ½ cup unsalted butter (cut into cubes, at room temperature)
- ¼ teaspoon kosher salt (intensifies vanilla flavor)
- 3 teaspoons vegetable or canola oil (adds moisture and tenderness)
- 3 teaspoons pure vanilla extract (the best you can afford)
- 2 cups all-purpose flour (cake flour also works beautifully for extra tenderness)
- 4 large eggs (50-55g each, at room temperature)
- 1½ cups granulated sugar (caster or superfine sugar dissolves more evenly)
- 1 cup whole milk (full-fat creates better crumb structure)
- ½ teaspoon almond extract (optional but lovely—enhances vanilla notes)
For the Frosting
- 1 pound powdered sugar (500g, sifted before measuring)
- 3 teaspoons pure vanilla extract
- 2-4 tablespoons whole milk (to reach spreadable consistency)
- ¼ teaspoon kosher salt (balances sweetness)
- 2 sticks unsalted butter (225g, softened to room temperature)
How to Make Vanilla Birthday Cake?
I’ve broken this down into manageable steps. The whole process takes about an hour from start to finish, plus cooling time. Don’t rush the cooling—it matters more than you’d think for frosting success.
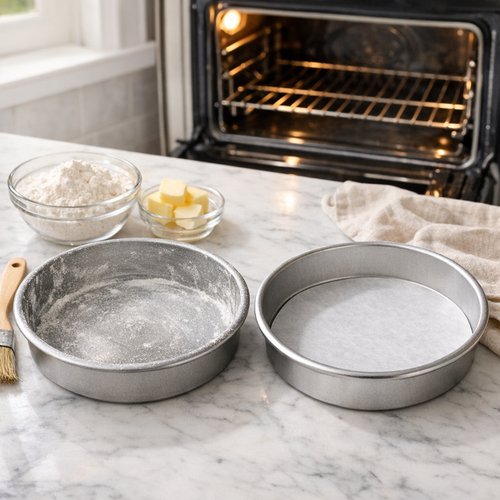
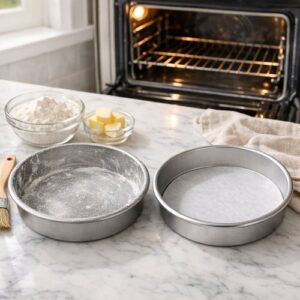
Step 1: Prepare Your Pans and Preheat
Start by positioning your oven rack to the center position and preheating to 350°F. This takes about 10-12 minutes. While it heats, prepare two 9-inch round cake pans by coating them lightly with cooking spray or butter, then dusting with a bit of flour. Tap out the excess. Line the bottoms with parchment paper rounds—this guarantees your cakes will release cleanly.
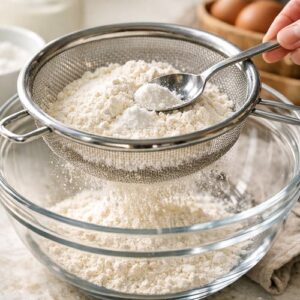
Step 2: Sift Your Dry Ingredients
In a medium bowl, whisk together your flour, baking powder, and salt. I actually sift these ingredients together using a fine-mesh sieve. This aerates the flour slightly and ensures the baking powder distributes evenly. You want no lumps in the mixture. Set aside.

Step 3: Cream Butter and Sugar
In a large mixing bowl, beat your softened butter and granulated sugar together on medium speed for 3-4 minutes. This is important. The mixture should become pale, fluffy, and noticeably lighter in color. You’re incorporating air, which helps the cake rise. Scrape down the bowl halfway through.

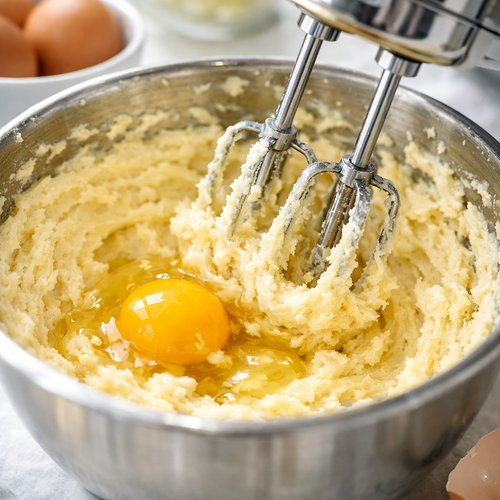
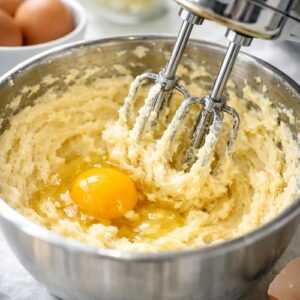
Step 4: Add Eggs One at a Time
Add your room-temperature eggs one at a time, beating well after each addition. This takes about 30 seconds per egg. After you’ve added all four, the mixture should look creamy and slightly fluffy. Don’t skip this step—it’s why your cake will be tender. If the mixture ever looks curdled, don’t panic. Just keep mixing; it’ll come together.
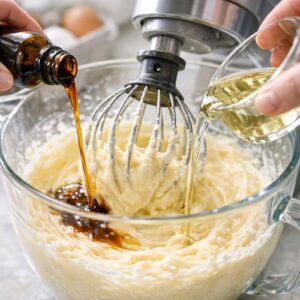
Step 5: Add Vanilla and Oil
Pour in your vanilla extract and oil, then mix on medium speed until completely combined, about 1 minute. The oil won’t be visible—that’s fine. It’s integrating into the batter and will create that incredibly moist texture.

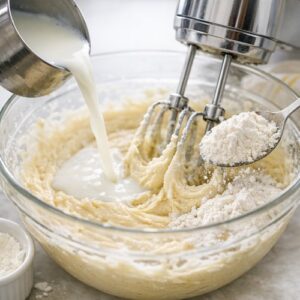
Step 6: Alternate Dry and Wet Ingredients
Here’s where care matters. Add your dry ingredients in three additions and your milk in two additions, beginning and ending with the dry ingredients. So: dry, wet, dry, wet, dry. Mix on low speed until just combined after each addition. This prevents overmixing, which toughens cake. Stop as soon as you don’t see streaks of flour. Scrape down the bowl between additions.

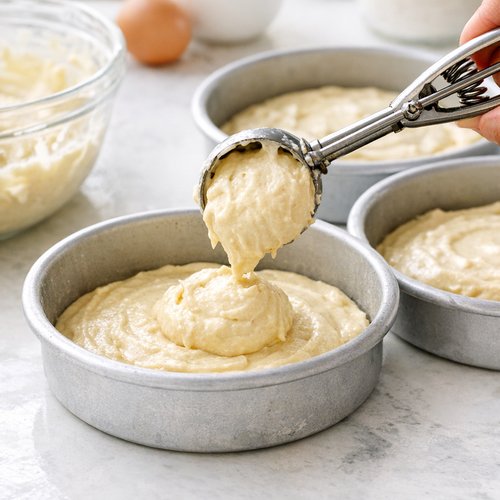
Step 7: Divide and Bake
Divide your batter evenly between your prepared pans. I use an ice cream scoop for even distribution. Tap each pan gently on the counter twice to release air bubbles. Place both pans in the oven on the middle rack, ideally with a little space between them for air circulation.
Bake for 28-32 minutes. The cakes are done when a toothpick inserted in the center comes out with just a few moist crumbs. The tops should be golden and spring back when you gently touch the center.
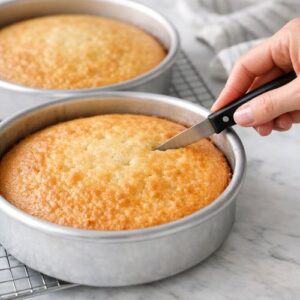
Step 8: Cool Properly
This step determines whether your cake stays tender or dries out. Let the cakes cool in their pans for 15 minutes. Then run a thin knife around the edge of each cake and turn them out onto wire cooling racks. Remove the parchment paper. Let cool completely at room temperature for at least 2 hours before frosting. You can even refrigerate them for an hour—cold cake is easier to frost.

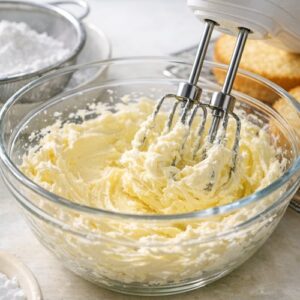
Step 9: Make Your Frosting
While cakes cool, sift your powdered sugar into a bowl. In a separate large bowl, beat your softened butter on medium speed until creamy, about 2 minutes. Add the sifted powdered sugar gradually, a cup at a time, beating well after each addition. This prevents lumps.
Once all sugar is incorporated, add your vanilla and salt. Beat on medium-high speed for 3-4 minutes until light, fluffy, and pale. Add milk one tablespoon at a time until you reach a spreadable consistency. You want it thick enough to hold peaks but soft enough to spread easily.

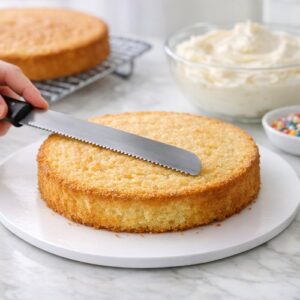
Step 10: Assemble Your Cake
Place one cake layer on your serving plate or cake board. If you want perfectly level layers, this is where a serrated knife or cake leveler helps. Spread a layer of frosting on top, about ½-inch thick. Top with your second cake layer. Frost the top and sides with remaining frosting. Use an offset spatula and rotate your plate for even coverage.

Tips and Tricks
- Room temperature ingredients are non-negotiable – Cold eggs and butter won’t incorporate properly into the batter, and you’ll get a dense cake. Take eggs and butter out of the fridge 30 minutes before baking.
- Don’t use imitation vanilla – Real vanilla extract makes a noticeable difference. It costs more upfront but you use so little that a bottle lasts months.
- Sift your powdered sugar – This removes lumps and makes frosting silky smooth. Trust me on this one.
- Use cake flour for maximum tenderness – If you don’t have it, you can make a substitute by removing 2 tablespoons of all-purpose flour per cup and replacing with cornstarch.
- Don’t overbake by even a minute – Start checking at 28 minutes. The difference between perfect and dry is sometimes just 60 seconds.
- A turntable makes frosting easier – Not essential, but it’s genuinely helpful for even coverage. I got mine for $15 and use it constantly.
- Crumb coat first – Spread a thin layer of frosting all over the cake first, then refrigerate for 20 minutes. This locks in crumbs before your final frosting coat.
Common Mistakes to Avoid
As a dietitian and baker, I see the same errors repeatedly. Let me save you from making them.
Mistake 1: Not bringing ingredients to room temperature. Cold ingredients won’t emulsify properly. Your batter will look separated and grainy. The resulting cake will be dense and tough. Set your eggs and butter out 30 minutes before starting.
Mistake 2: Overmixing after adding flour. This develops gluten, which makes cake chewy and tough instead of tender. Mix just until you don’t see flour streaks. A slightly lumpy batter is actually what you want.
Mistake 3: Opening the oven door before 28 minutes. The moisture and heat are crucial for proper rise. If you peek too early, the cake can collapse or bake unevenly. Resist the urge.
Mistake 4: Frosting a warm cake. Warm cake melts frosting, and it slides right off. Cool cakes completely. If you’re in a hurry, refrigerate the layers for an hour.
Dietitian’s Nutritional Insight
Here’s something most bakers don’t talk about: the oil in this recipe serves a real nutritional purpose beyond taste. While we often think of oil as unhealthy, the small amount here (3 teaspoons total) helps your body absorb the fat-soluble vitamins from eggs. It also stabilizes blood sugar response compared to a cake made with only butter. Each slice still contains natural sugars, so this isn’t a “health food,” but the formulation is actually more thoughtful than most recipes.
The eggs provide choline, which supports brain health, and the butter provides vitamin A. Am I saying you should eat cake all the time? Absolutely not. But when you do indulge, making it from scratch ensures you know exactly what’s in it.
Can I Store Vanilla Birthday Cake?
Yes, and it actually improves slightly as it sits. Once frosted, your cake lasts 3-4 days at room temperature in an airtight container. The crumb stays moist and tender. If your kitchen is very warm, refrigerate it instead—it’ll keep for 5 days refrigerated.
You can also freeze unfrosted cake layers for up to 3 months. Wrap each layer individually in plastic wrap, then foil. Thaw at room temperature for 2 hours before frosting. Frosted cakes don’t freeze as well since frosting can separate, but you can freeze them for up to 1 month if needed. Thaw overnight in the refrigerator.
Make-Ahead Guide
I bake for gatherings constantly, and this is my foolproof timeline.
Three days before: Bake your cake layers. Cool completely, wrap tightly, and refrigerate. They’ll actually taste better after a day.
Two days before: Make your frosting. Store in an airtight container in the refrigerator. Let it come to room temperature before using—it’ll be easier to spread.
One day before: Assemble your cake completely. Refrigerate uncovered for the first 2 hours so frosting sets, then cover loosely. This gives you zero stress on party day.
Day of: Remove from refrigerator 30 minutes before serving so it comes to room temperature. Add fresh decorations or fruit right before guests arrive.
Nutrition Information
Based on USDA data, one slice of this cake (1/12 of a two-layer cake) contains approximately 480 calories, 24g fat, 62g carbohydrates, and 5g protein. The sodium is about 310mg per slice.
The protein comes primarily from eggs, and the carbohydrates from sugar and flour. There’s 0g fiber per slice—this is a treat, not a health food. If you’re monitoring sugar intake, remember that one slice contains about 47g of sugar. For diabetics, portion control becomes especially important, and pairing with protein can help moderate blood sugar response.
Seasonal Variations
While vanilla is timeless, I love adapting this cake for different seasons.
Spring: Add the zest of 2 lemons and substitute 2 tablespoons of milk with fresh lemon juice. Use lemon extract instead of almond. Frost with white buttercream and top with fresh lemon curd.
Summer: Add ½ teaspoon raspberry extract and swirl fresh raspberry puree into the frosting. Top with fresh berries and edible flowers for a garden party vibe.
Fall: Add 1 teaspoon cinnamon, ½ teaspoon nutmeg, and ¼ teaspoon ground cloves to the dry ingredients. The spices complement vanilla beautifully without making it “spice cake.”
Winter: Add ½ teaspoon peppermint extract for a festive twist. Or embrace the holidays with 1 teaspoon eggnog extract instead of vanilla, and substitute eggnog for regular milk.
What Can I Serve With Vanilla Birthday Cake?
Vanilla cake is endlessly versatile. I often serve it alongside fresh fruit, especially berries or sliced peaches. A lighter companion option would be Overnight Steel Cut Oats Recipe the next morning if someone wants breakfast after celebrating.
For the celebration itself, consider these pairings:
- Fresh strawberries and whipped cream – The tartness balances sweetness beautifully.
- Vanilla ice cream – Warm cake with cold ice cream is perfection.
- Coffee or tea – A simple pairing that lets the cake shine.
- Fresh lemon curd – Dollop it on top for brightness.
- Chocolate sauce – Drizzle for decadence.
- Raspberry coulis – Elegant and delicious.
Substitutes
- All-purpose flour instead of cake flour – Works fine. You’ll get a slightly less tender crumb, but honestly most people won’t notice the difference. Use the same measurement.
- Coconut oil instead of vegetable oil – Adds subtle coconut notes. Use refined coconut oil so vanilla is still the star. Use the same amount.
- Buttermilk instead of regular milk – The acidity creates an even more tender crumb. Use the same measurement, but add ½ teaspoon baking soda to the dry ingredients.
- Sour cream in the frosting – Replaces up to 2 tablespoons of milk. Adds tanginess that some people love. Taste as you go since it affects sweetness.
- Almond extract instead of vanilla – Use 1½ teaspoons instead of 3 for a delicate almond note without overpowering vanilla.
- European butter in the frosting – Higher fat content creates richer, silkier frosting. Use the same amount, but your frosting might need less milk to reach proper consistency.
Vanilla Birthday Cake Recipe
Ingredients
Method
- Start by positioning your oven rack to the center position and preheating to 350°F. This takes about 10-12 minutes. While it heats, prepare two 9-inch round cake pans by coating them lightly with cooking spray or butter, then dusting with a bit of flour. Tap out the excess. Line the bottoms with parchment paper rounds—this guarantees your cakes will release cleanly.
- In a medium bowl, whisk together your flour, baking powder, and salt. I actually sift these ingredients together using a fine-mesh sieve. This aerates the flour slightly and ensures the baking powder distributes evenly. You want no lumps in the mixture. Set aside.
- In a large mixing bowl, beat your softened butter and granulated sugar together on medium speed for 3-4 minutes. This is important. The mixture should become pale, fluffy, and noticeably lighter in color. You're incorporating air, which helps the cake rise. Scrape down the bowl halfway through.

- Add your room-temperature eggs one at a time, beating well after each addition. This takes about 30 seconds per egg. After you've added all four, the mixture should look creamy and slightly fluffy. Don't skip this step—it's why your cake will be tender. If the mixture ever looks curdled, don't panic. Just keep mixing; it'll come together.
- Pour in your vanilla extract and oil, then mix on medium speed until completely combined, about 1 minute. The oil won't be visible—that's fine. It's integrating into the batter and will create that incredibly moist texture.
- Here's where care matters. Add your dry ingredients in three additions and your milk in two additions, beginning and ending with the dry ingredients. So: dry, wet, dry, wet, dry. Mix on low speed until just combined after each addition. This prevents overmixing, which toughens cake. Stop as soon as you don't see streaks of flour. Scrape down the bowl between additions.
- Divide your batter evenly between your prepared pans. I use an ice cream scoop for even distribution. Tap each pan gently on the counter twice to release air bubbles. Place both pans in the oven on the middle rack, ideally with a little space between them for air circulation. Bake for 28-32 minutes. The cakes are done when a toothpick inserted in the center comes out with just a few moist crumbs. The tops should be golden and spring back when you gently touch the center.

- This step determines whether your cake stays tender or dries out. Let the cakes cool in their pans for 15 minutes. Then run a thin knife around the edge of each cake and turn them out onto wire cooling racks. Remove the parchment paper. Let cool completely at room temperature for at least 2 hours before frosting. You can even refrigerate them for an hour—cold cake is easier to frost.
- While cakes cool, sift your powdered sugar into a bowl. In a separate large bowl, beat your softened butter on medium speed until creamy, about 2 minutes. Add the sifted powdered sugar gradually, a cup at a time, beating well after each addition. This prevents lumps. Once all sugar is incorporated, add your vanilla and salt. Beat on medium-high speed for 3-4 minutes until light, fluffy, and pale. Add milk one tablespoon at a time until you reach a spreadable consistency. You want it thick enough to hold peaks but soft enough to spread easily.
- Place one cake layer on your serving plate or cake board. If you want perfectly level layers, this is where a serrated knife or cake leveler helps. Spread a layer of frosting on top, about ½-inch thick. Top with your second cake layer. Frost the top and sides with remaining frosting. Use an offset spatula and rotate your plate for even coverage.
Nutrition
Notes
Tried this recipe?
Let us know how it was!FAQs
Can I make this cake in a 9×13-inch pan instead of round layers?
Absolutely. This is actually easier for beginners. Bake in a single 9×13-inch pan for 32-36 minutes—it’ll be thicker, so add a few minutes. Cool, then frost right in the pan. You’ll get about 12-15 servings depending on how you cut it. It’s less formal than layered cakes, but equally delicious.
Why is my cake sinking in the middle?
This usually means either underbaking or oven temperature issues. A toothpick with just a few moist crumbs is done; if you pull out a toothpick with wet batter, it needs more time. Also, verify your oven temperature with an oven thermometer—many home ovens are off by 25 degrees. Sinking can also mean you’re opening the door too early during baking.
My frosting is too soft. How do I fix it?
Refrigerate it for 15-20 minutes and try again. If it’s still too soft, you can add more powdered sugar—a quarter cup at a time—beating well after each addition. Make sure your butter was truly softened, not melted. If it was melted, your frosting won’t hold peaks. You may need to start over with softened butter.
Can I use salted butter instead of unsalted?
Yes, but reduce the added salt. Salted butter already contains about ¼ teaspoon of salt per stick, so I’d use just ⅛ teaspoon of added salt in the frosting. For the cake, omit the added salt entirely. Taste as you go.
How do I get perfectly level cake layers?
You have three options. First, divide batter evenly between pans using a scale or ice cream scoop—this is the easiest. Second, invest in a cake leveler (about $10-15) and trim after baking. Third, use cake strips—wet fabric strips that wrap around the pan to create more level layers. All work beautifully.
Can I halve this recipe for a smaller cake?
Yes, but I’d recommend baking in two 6-inch pans or one 8-inch pan instead of 9-inch. Halve all ingredients. Reduce baking time to 22-26 minutes. Watch closely since smaller pans heat differently.
More Recipes You’ll Love
- Flourless Chocolate Torte – A decadent alternative for chocolate lovers that’s naturally gluten-free.
- these Greek butter cookies – Buttery shortbread cookies that pair beautifully with coffee after cake.
- my go-to banana bread – A tender, moist cake-like bread for a different kind of celebration.
This vanilla cake has been part of my life and my kitchen for nearly two decades now. Every birthday, graduation, and celebration has included a version of this recipe. There’s something deeply satisfying about creating something beautiful and delicious from scratch—watching people’s faces light up at that first bite, hearing them ask for seconds.
I hope it becomes part of your celebrations too. Bake it with confidence. Trust the process. And remember that homemade is always better, not because store-bought is bad, but because you made it with intention and care. That matters more than any ingredient.
Happy cooking!