Let’s talk about pairings. Focaccia is versatile and can accompany many dishes. It shines next to salads, especially those with a zesty dressing. Think of a refreshing Italian Pasta Salad, bursting with veggies and flavor. You might also enjoy it with soups, particularly a steaming bowl of minestrone.
Focaccia is terrific on its own, but if you want to take it to another level, dip it in good-quality extra virgin olive oil or balsamic vinegar. Or, enjoy it with some rich cheese, like aged parmesan or creamy goat cheese. The combinations are endless!

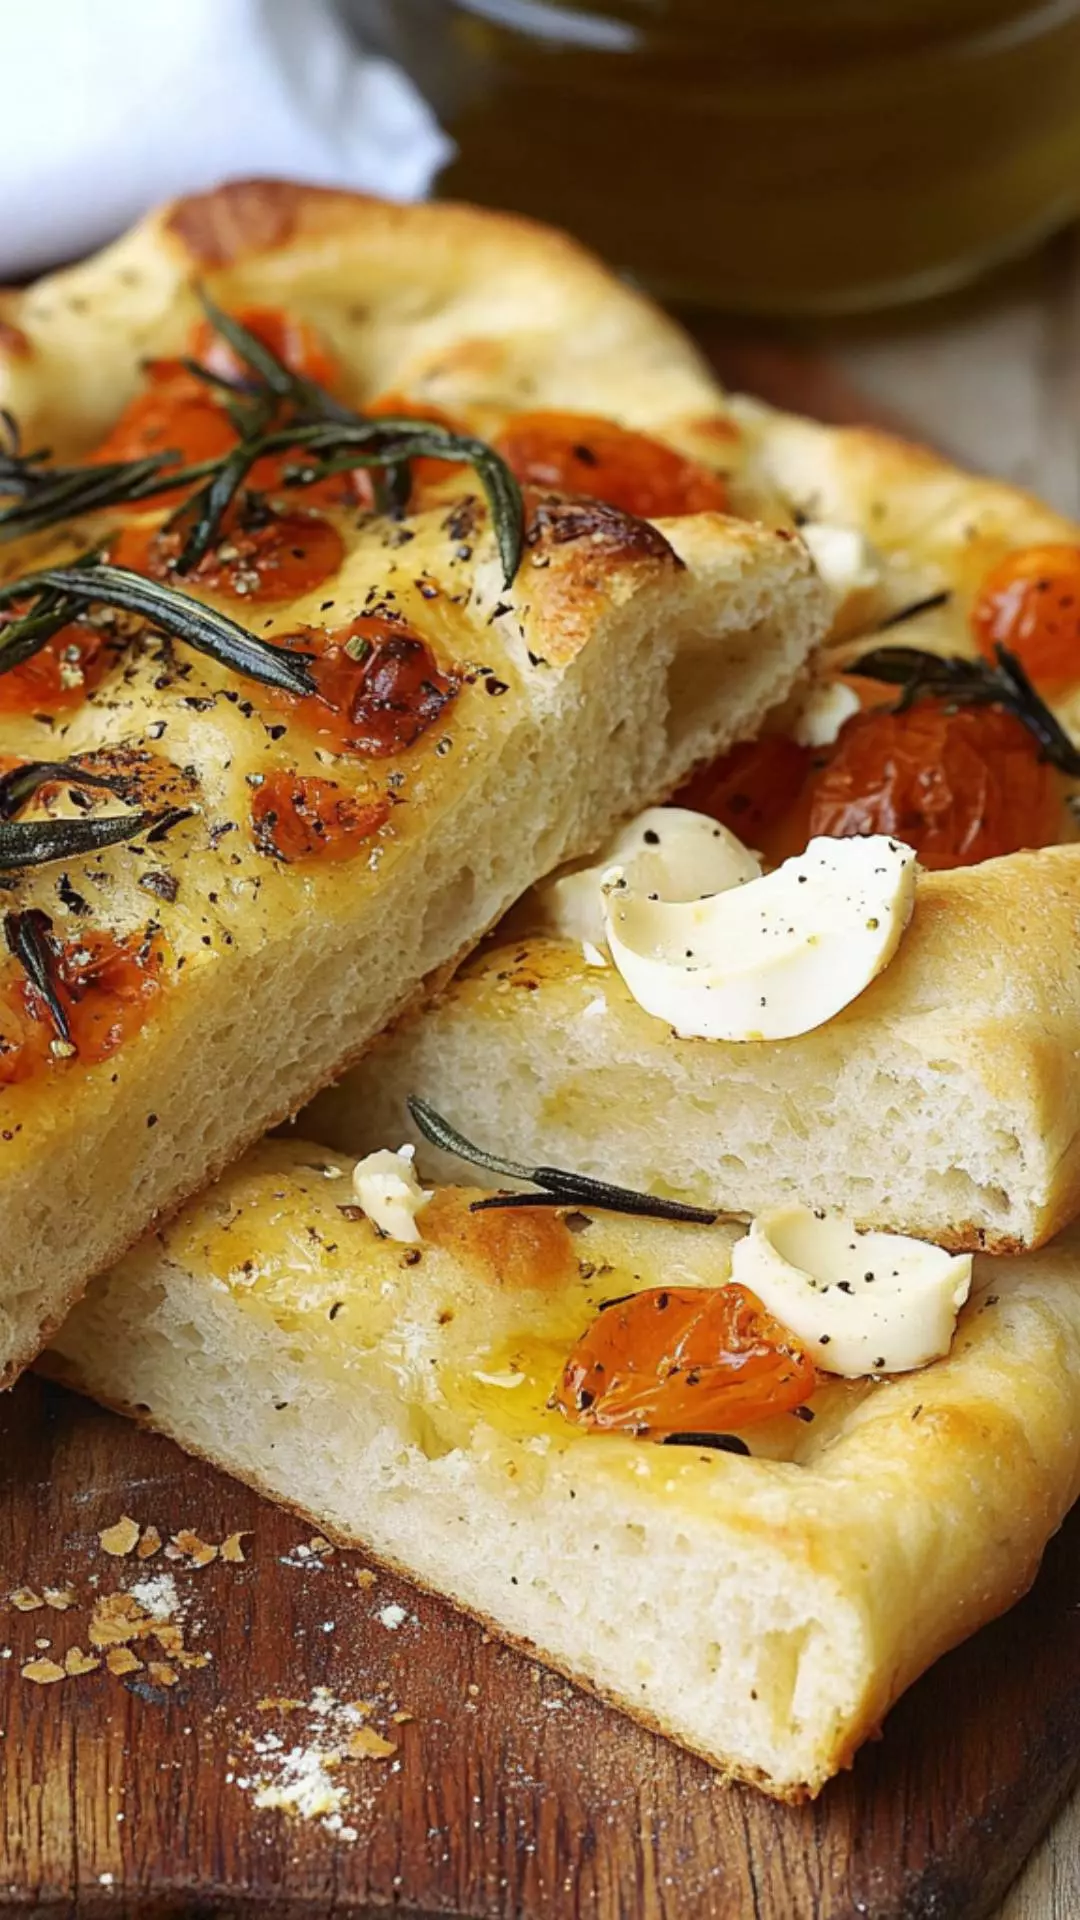
Ah, focaccia. Just the name evokes a sense of warmth and comfort. I remember the first time I bit into a slice of freshly baked focaccia. It was a game-changer. The crispy crust, the soft, airy interior, and that glorious sheen of olive oil brought a whole new level to bread.
Thanks to Jamie Oliver, I dove into bread-making with a smile. His approach makes baking accessible, fun, and downright delicious. Imagine the aroma of freshly baked focaccia wafting through your home, luring everyone into the kitchen. This post is not just about the recipe; it’s about an experience — one that transforms a simple loaf into something special.
What is Jamie Oliver’s Bread Focaccia?
Focaccia is more than just bread. It’s a traditional Italian bread known for its rich flavor and fluffy texture. Jamie Oliver’s focaccia elevates this classic with creative toppings, making each bite an adventure.
He emphasizes using fresh ingredients and simple techniques, encouraging even novice bakers to give it a shot. It’s a canvas open for experimentation. Whether you prefer a classic rosemary focaccia or something unique, like balsamic onions or cheese, focus on creating something that resonates with you.
Why You’ll Love Jamie Oliver’s Focaccia
You will appreciate this focaccia for many reasons.
- First, it’s straightforward to make. You don’t need a bakery degree to get it right. The dough is forgiving, allowing you to learn as you go.
- The texture is a winner: crispy crust, soft and chewy inside — all the right qualities for dunking or enjoying with a meal.
- Jamie emphasizes the importance of using high-quality ingredients, particularly olive oil, to enhance the flavor profile.
- Toppings galore! Fresh herbs, cheeses, and vegetables make each creation customizable.
When I tried Jamie’s focaccia for the first time, it blew my taste buds away. The toppings transformed each piece into a flavorful bite. Plus, it’s an impressive dish to serve at gatherings. Your friends and family will marvel at your baking prowess.
The Ingredients You Will Need To Make Jamie Oliver’s Focaccia
For the Dough:
- 100g fine semolina flour (or more strong white bread flour)
- 400g strong white bread flour (with extra for dusting)
- 300ml lukewarm water
- 1 sachet fast-action dried yeast
- ½ tablespoon golden caster sugar
- Olive oil (for greasing)
- Extra-virgin olive oil (for drizzling)
For the Balsamic Onion Topping:
- 2 tablespoons balsamic vinegar
- 2 medium red onions, thinly sliced
- A few sprigs of fresh thyme
- 1 teaspoon honey (optional, for added sweetness)
For the Basil and Cherry Tomato Topping:
- 1 large handful of ripe cherry tomatoes, halved
- 1 small bunch of fresh basil (30g)
- 1 teaspoon white wine vinegar
- 2 garlic cloves, finely minced
- 1 tablespoon olive oil (optional)
For the Three-Cheese and Rosemary Topping:
- 1 sprig of fresh rosemary
- 30g creamy Taleggio cheese
- Freshly grated Parmesan cheese
- 1 small log of tangy goat’s cheese
- 1 pinch of cracked black pepper (optional)

Directions
Step 1: Prepare the Dough
To start, combine the semolina flour and strong white bread flour in a large bowl. Make a well in the center. Sprinkle the yeast and sugar into the well. Pour in the lukewarm water, mixing slowly until combined. Knead the dough on a floured surface for about 10 minutes until it becomes smooth.
Step 2: Rise the Dough
Grease a bowl with olive oil, place the dough inside, and cover it with a clean cloth. Let it rise in a warm area until it’s doubled in size, approximately 1-2 hours. This is the moment of magic!
Step 3: Shape the Dough
Once risen, punch down the dough to release air. Lightly flour your surface again and stretch out the dough into a rectangle, about 1-inch thick. Transfer it to a greased baking sheet.
Step 4: Create Dimples
Using your fingers, press down into the dough to create dimples. This is not just for show; it helps hold the toppings. Cover it again and let it rise for another 30 minutes.
Step 5: Prepare the Toppings
While your dough is resting, let’s prepare the toppings. For the balsamic onion topping, heat a pan over medium heat. Add the sliced onions and cook until soft, about 10 minutes. Add the balsamic vinegar, thyme, and honey (if using), and simmer for about 5 minutes.
For the basil and cherry tomato topping, mix the basil, tomatoes, garlic, and white wine vinegar in a bowl. If you’re feeling fancy, splash in some olive oil.
Step 6: Preheat the Oven
Preheat your oven to 220°C (428°F).
Step 7: Assemble the Focaccia
Once your dough has risen again, drizzle it lightly with extra virgin olive oil. Spread the onion mixture evenly on one side, the tomato mix on the other, and sprinkle cheese on the entire surface. Finish with rosemary and cracked pepper.
Step 8: Bake
Put the focaccia in the oven and bake for 25-30 minutes. You’ll know it’s done when it’s golden brown and the house smells divine!
Step 9: Cool and Serve
Let the focaccia cool on a wire rack for a few minutes. Drizzle a bit more olive oil before slicing. Now, cut into squares and prepare for oohs and aahs!
Notes
- Use Fresh Ingredients: Always rely on fresh herbs and quality olive oil. It makes a world of difference.
- Kneading Technique: When kneading the dough, don’t be shy. Push, fold, and stretch for that perfect texture.
- Temperature Matters: Keep in mind that yeast prefers a warm environment. A slightly warm oven can help.
- Get Creative with Toppings: You don’t have to stick to prescribed toppings. Experiment with what you love!
- Experiment with Flour Types: If you want a different flavor, try a mix of whole wheat and bread flour.
Storage Tips
If you have leftovers (though it’s unlikely), store them in an airtight container. It’s best to consume focaccia within 2-3 days, as it tends to dry out. If you want to keep it longer, freeze it!
Wrap it tightly in plastic wrap and then pop it in a zip-lock bag. When you want to enjoy it, just thaw it at room temperature and reheat.

Serving Suggestions
- With Antipasto Platter: Perfectly complements an assortment of cured meats, cheeses, and olives, creating a beautiful spread.
- As a Sandwich Base: Cut a piece and fill it up with your favorite meats, cheeses, and greens for a fantastic sandwich.
- With Soup: Serve alongside a warm bowl of tomato or bean soup. The focaccia serves as a great dunking companion!
- For Breakfast: Toast slices and spread some ricotta and honey for a delightful breakfast treat.
- With Salads: Pair with a light salad for a filling lunch. The focaccia will soak up all those tasty vinaigrette flavors.
What Other Substitutes Can I Use in Jamie Oliver’s Focaccia?
- Flour: Instead of strong white bread flour, try whole wheat flour or a gluten-free flour blend.
- Yeast: If you don’t have fast-action yeast, active dry yeast works, though it might take longer to rise.
- Herbs: Swap rosemary for thyme, oregano, or even sage.
- Cheese: Substitute taleggio with mozzarella, feta, or even vegan cheese.
- Veggies: If cherry tomatoes are out of season, use roasted red peppers or sun-dried tomatoes instead.
Jamie Oliver Bread Focaccia Recipe
Ingredients
Equipment
Method
- To start, combine the semolina flour and strong white bread flour in a large bowl. Make a well in the center. Sprinkle the yeast and sugar into the well. Pour in the lukewarm water, mixing slowly until combined. Knead the dough on a floured surface for about 10 minutes until it becomes smooth.
- Grease a bowl with olive oil, place the dough inside, and cover it with a clean cloth. Let it rise in a warm area until it’s doubled in size, approximately 1-2 hours. This is the moment of magic!
- Once risen, punch down the dough to release air. Lightly flour your surface again and stretch out the dough into a rectangle, about 1-inch thick. Transfer it to a greased baking sheet.
- Using your fingers, press down into the dough to create dimples. This is not just for show; it helps hold the toppings. Cover it again and let it rise for another 30 minutes.
- While your dough is resting, let’s prepare the toppings. For the balsamic onion topping, heat a pan over medium heat. Add the sliced onions and cook until soft, about 10 minutes. Add the balsamic vinegar, thyme, and honey (if using), and simmer for about 5 minutes.
- For the basil and cherry tomato topping, mix the basil, tomatoes, garlic, and white wine vinegar in a bowl. If you’re feeling fancy, splash in some olive oil.
- Preheat your oven to 220°C (428°F).
- Once your dough has risen again, drizzle it lightly with extra virgin olive oil. Spread the onion mixture evenly on one side, the tomato mix on the other, and sprinkle cheese on the entire surface. Finish with rosemary and cracked pepper.
- Put the focaccia in the oven and bake for 25-30 minutes. You’ll know it’s done when it’s golden brown and the house smells divine!
- Let the focaccia cool on a wire rack for a few minutes. Drizzle a bit more olive oil before slicing. Now, cut into squares and prepare for oohs and aahs!
Nutrition
Notes
- Use Fresh Ingredients: Always rely on fresh herbs and quality olive oil. It makes a world of difference.
- Kneading Technique: When kneading the dough, don’t be shy. Push, fold, and stretch for that perfect texture.
- Temperature Matters: Keep in mind that yeast prefers a warm environment. A slightly warm oven can help.
- Get Creative with Toppings: You don’t have to stick to prescribed toppings. Experiment with what you love!
- Experiment with Flour Types: If you want a different flavor, try a mix of whole wheat and bread flour.
Tried this recipe?
Let us know how it was!Frequently Asked Questions
Conclusion
Baking Jamie Oliver’s focaccia is more than a culinary task; it’s a delightful experience filled with aromas, tactile joy, and the satisfaction of creating something from scratch. Whether you’re preparing it for a casual dinner or a festive gathering, this focaccia is sure to impress.
With step-by-step instructions, tips, and customization options, you’re ready to create your masterpiece. So roll up your sleeves, grab those ingredients, and let the baking begin! Your taste buds will thank you.